Video Introduction
Below you can find a quick and dense introduction to the DWAS User Interface. This video quickly walks you through the process of setting up a custom alert.
Introduction
Welcome to the Dynamic Weather Alerting Service (DWAS) User Manual.
DWAS allows end users to customize the rules and geographic location(s) for receiving weather-based notifications. DWAS is capable of addressing weather parameters directly as well as non-gridded types of data. The DWAS architecture makes liberal use of modern cloud-based technologies to create an asynchronous, flexible, and highly scalable service.
DWAS currently has email and SMS-based notifications. Recent notifications are also viewable from the web user interface's notification pane. This powerful interface provides feedback about all the relevant notification details including:
- Which alert was triggered
- Who was notified about the conditions
- What communication channel was used for the notification
- What weather conditions triggered the notification
- When did the conditions occur
- Where did the conditions occur
The DWAS team is actively developing additional avenues of machine to machine communication of notifications as well.
With that high level introduction in hand, let's dive a little deeper into:
- Setting up alerts in the Web User Interface.
- Receiving and navigating Notifications, again in the Web User Interface.
Chapter 1: Web User Interface
Setting up organizations and user accounts in DWAS should be familiar and unsurprising to modern internet users. DWAS users participate collaboratively within an organization and this organization name appears in the URL on registration and login pages.
While configuring alerts takes a little effort, we expect you will find it a relatively frictionless process and be very pleased with the value that we are able to subsequently return. Further, this documentation will show you step by detailed step, exactly how to configure an alert.
We have included bulk upload capabilities for cases where users have a lot of data to upload. For example, raw GeoJSON files can be uploaded in order to create points and point collections of interest en masse.
User Accounts
Please read the steps below in order to learn how to join (and grow) an organization within the DWAS service.
Forgot Password
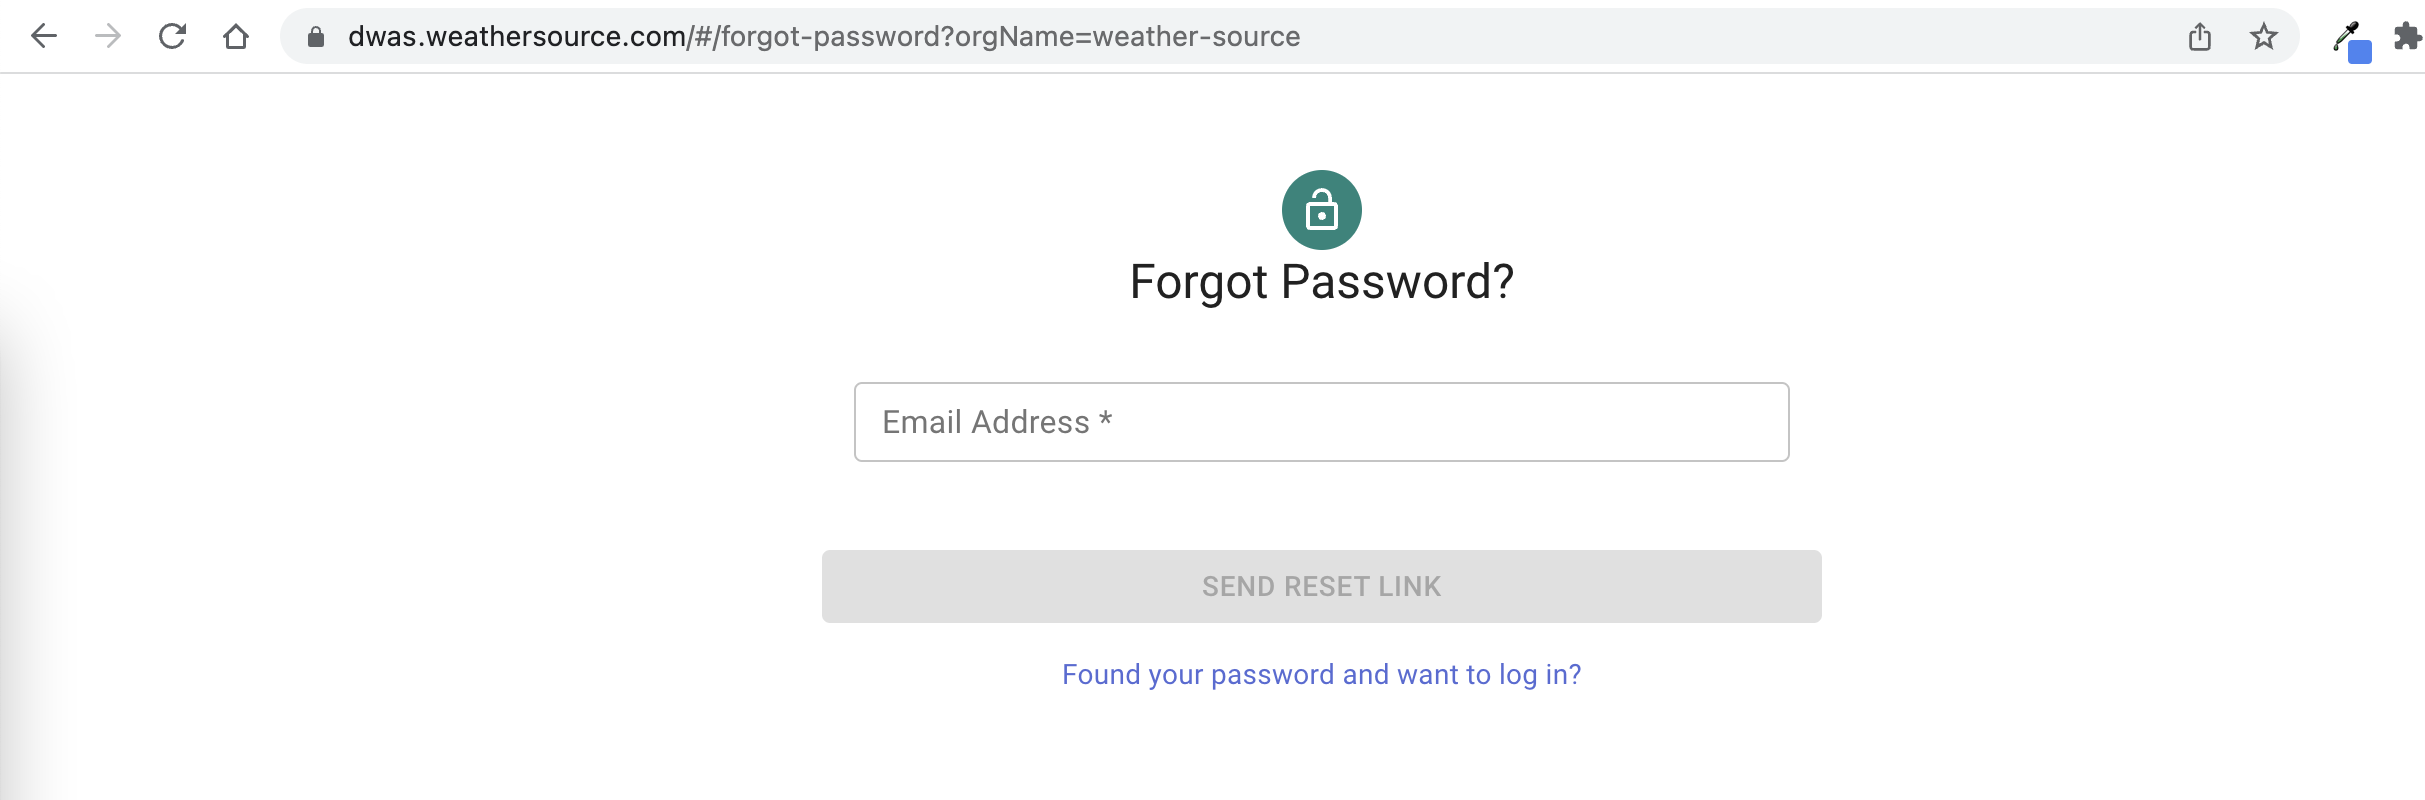
As discussed in the login documenation one can select to visit the forgot password functionality from the login page. Upon clicking the link about forgot password from that interface they are brought to a page where they can enter the email that they originally registered with DWAS. One can enter that email in the interface as shown below. After entering the text, simply click the "send reset link" button. Alternatively, one could return to the login page in the case that they found (or remembered) their password.
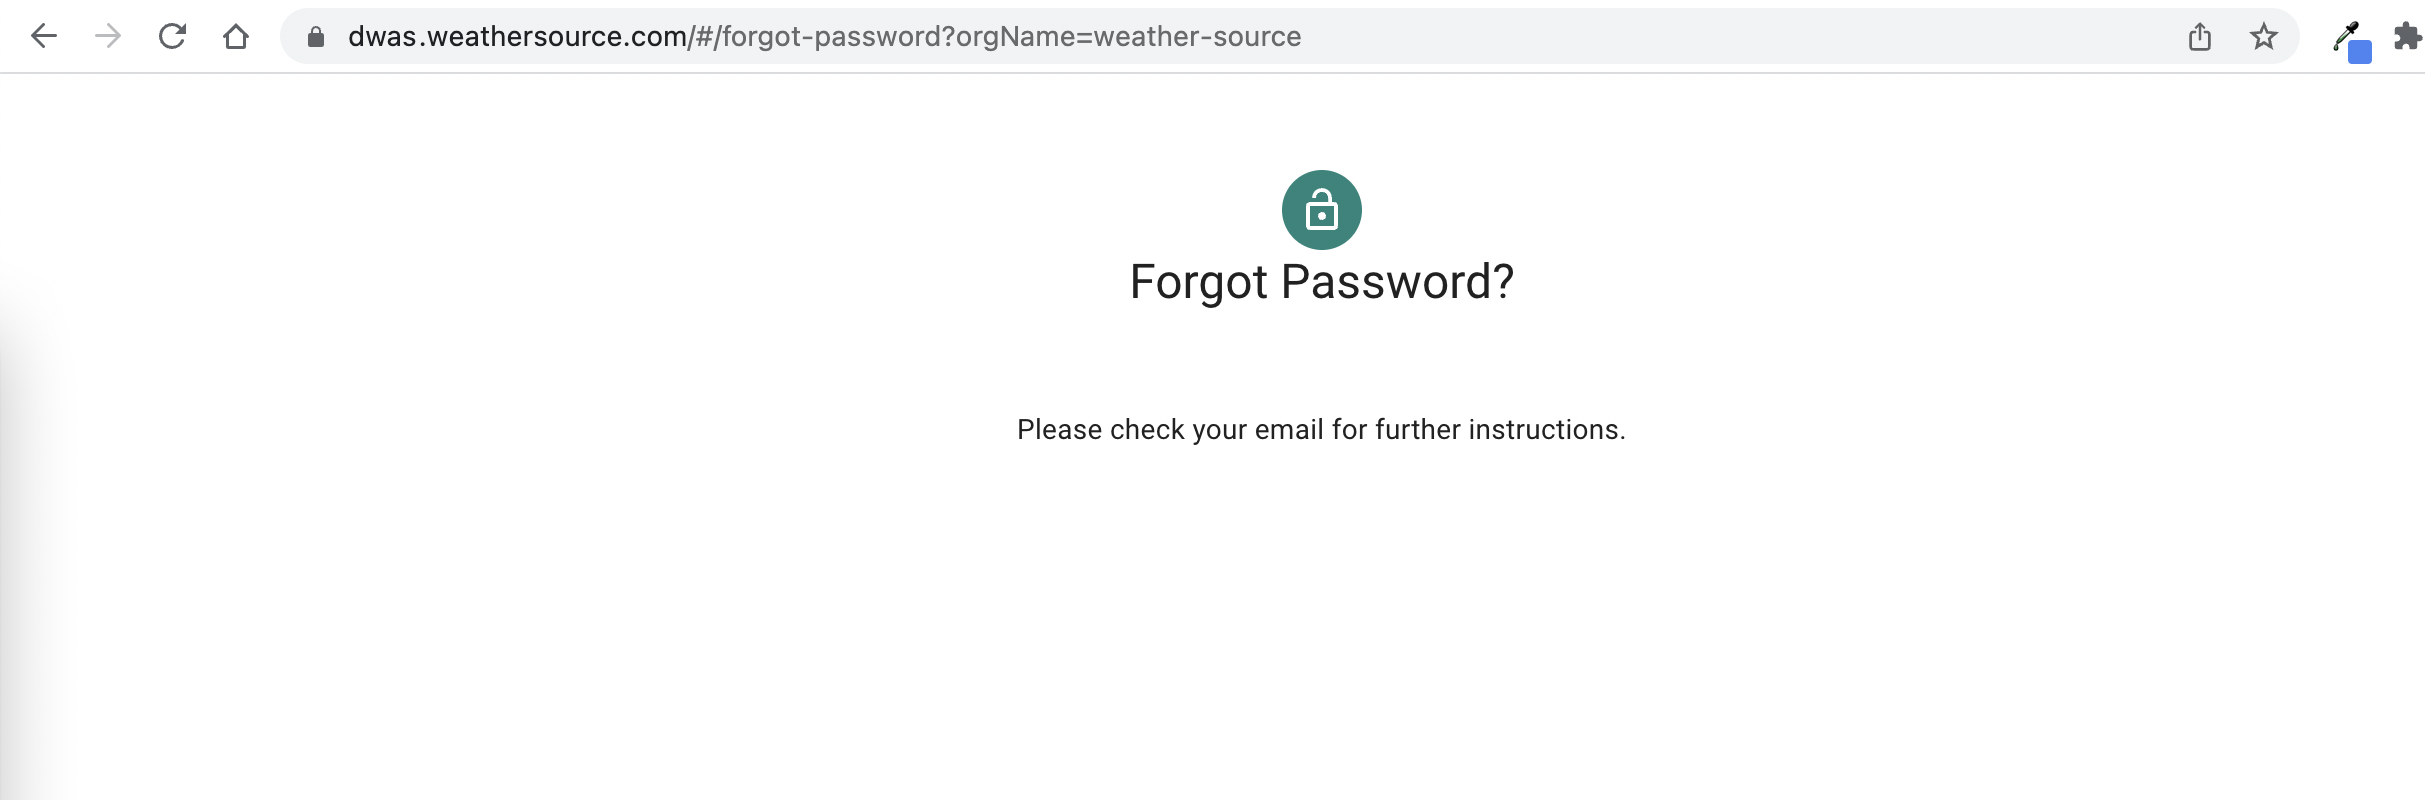
DWAS cannot confirm nor deny the existence of the provided email address for security reasons to make sure that we don't let bad guys to know whether your email exists or not. However, you will see a message confirming that DWAS at least attempted to contact you via the provided email as shown below:
If you provided the correct email, as originally provided, you will receive an email with a big blue "Reset Password" button in it. It will appear something like:
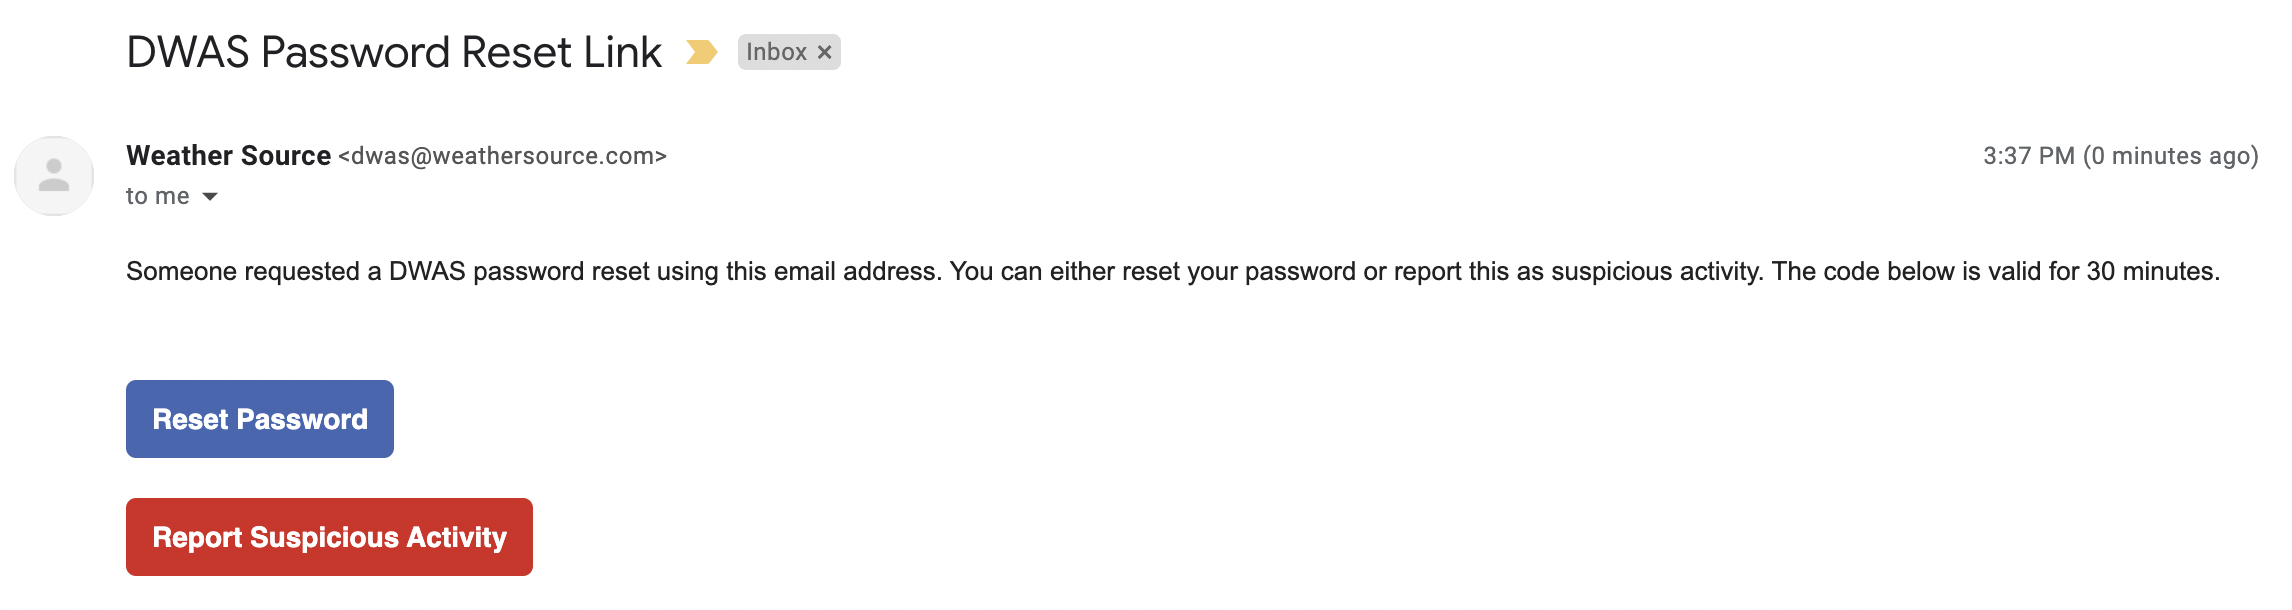
We also guard against the possibility that someone is up to no good by offering you the chance to report this activity as suspicious, with a big red button entitled "Report Suspicious Activity". This provides you the ability to email the DWAS team directly.
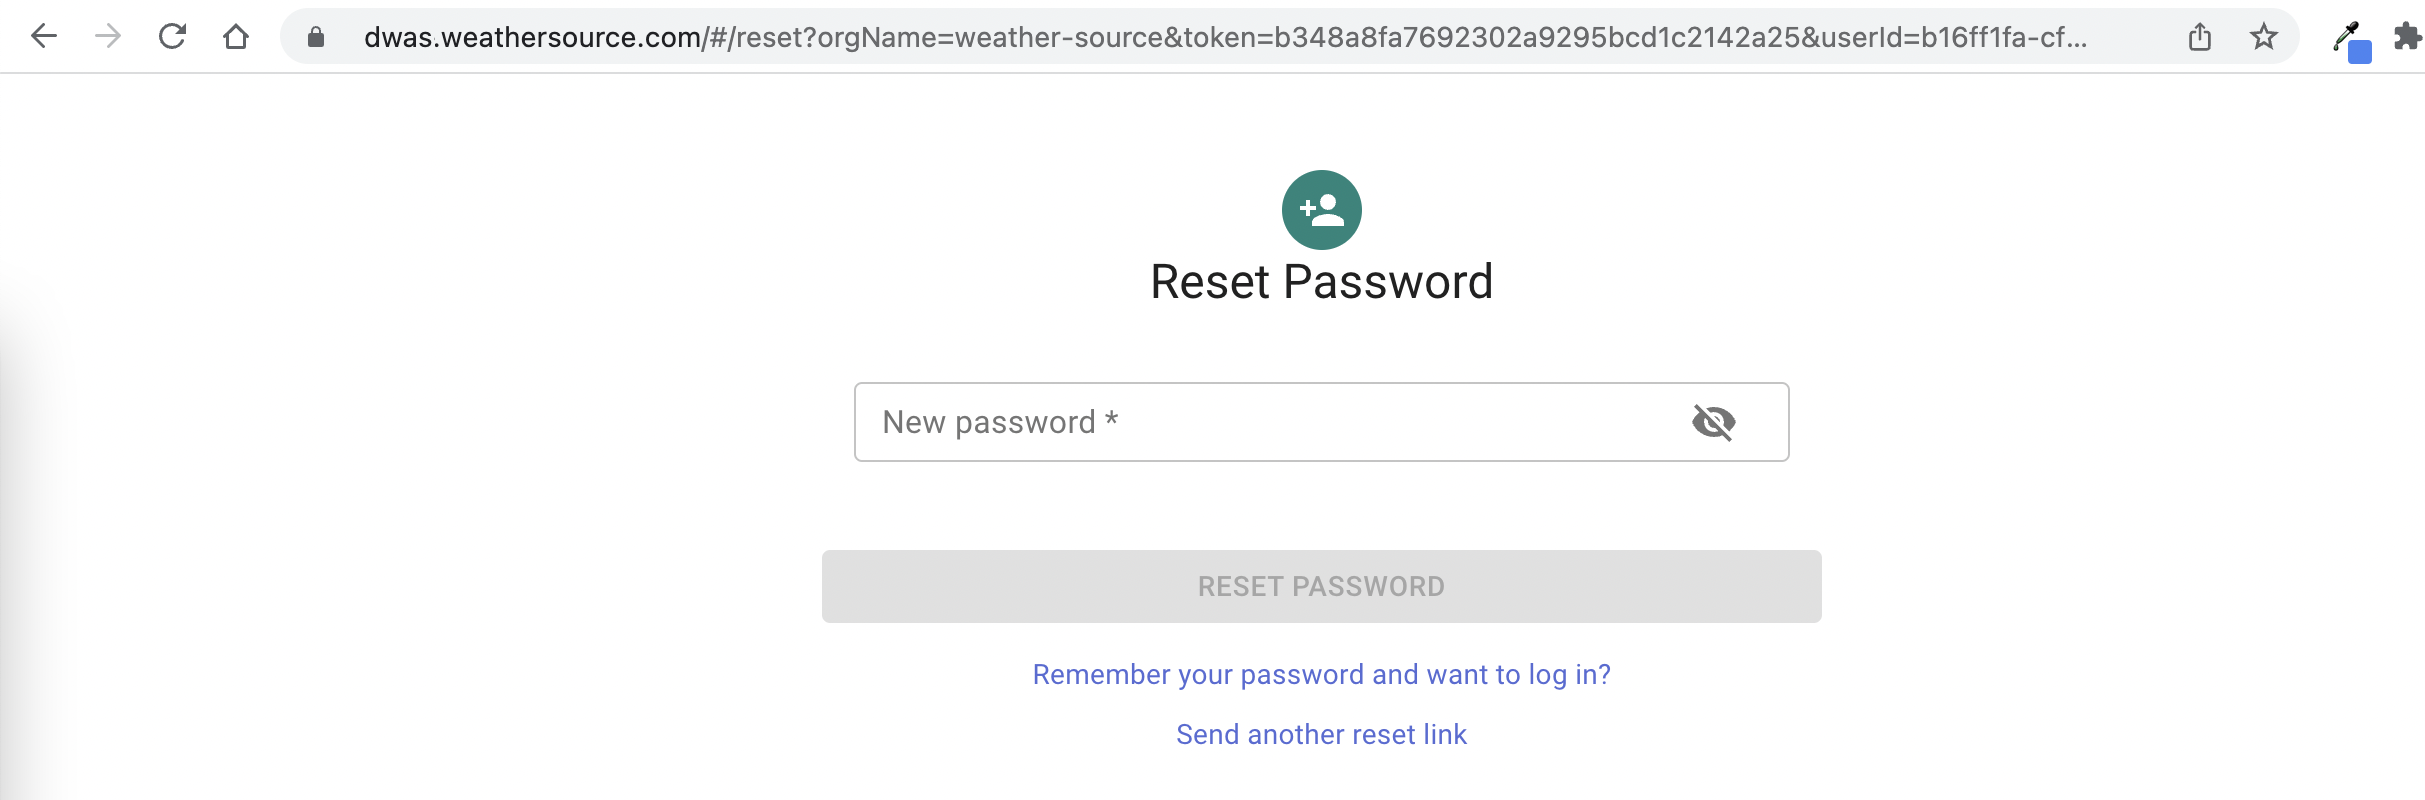
If you hit the blue button with the "Reset Password" text within 30 minutes of having requested the password reset, you will be taken to an interface where you are given the opportunity to reset your password. For your security, we can only provide a 30-minute window of time to complete the set of actions described above. In the case that you do not complete the set of actions in that time window, you will need to request a new password link be sent to your email again and repeat the steps discussed above again.
Accounting
One can find the accounting interface by using the dropdown menu in the upper right hand corner. However, one must be an organization level administrator to see this option or make this selection.
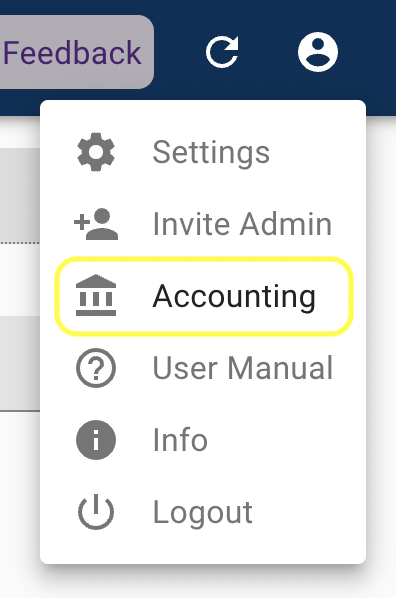
After making this selection, one can see the account edit form as shown below.
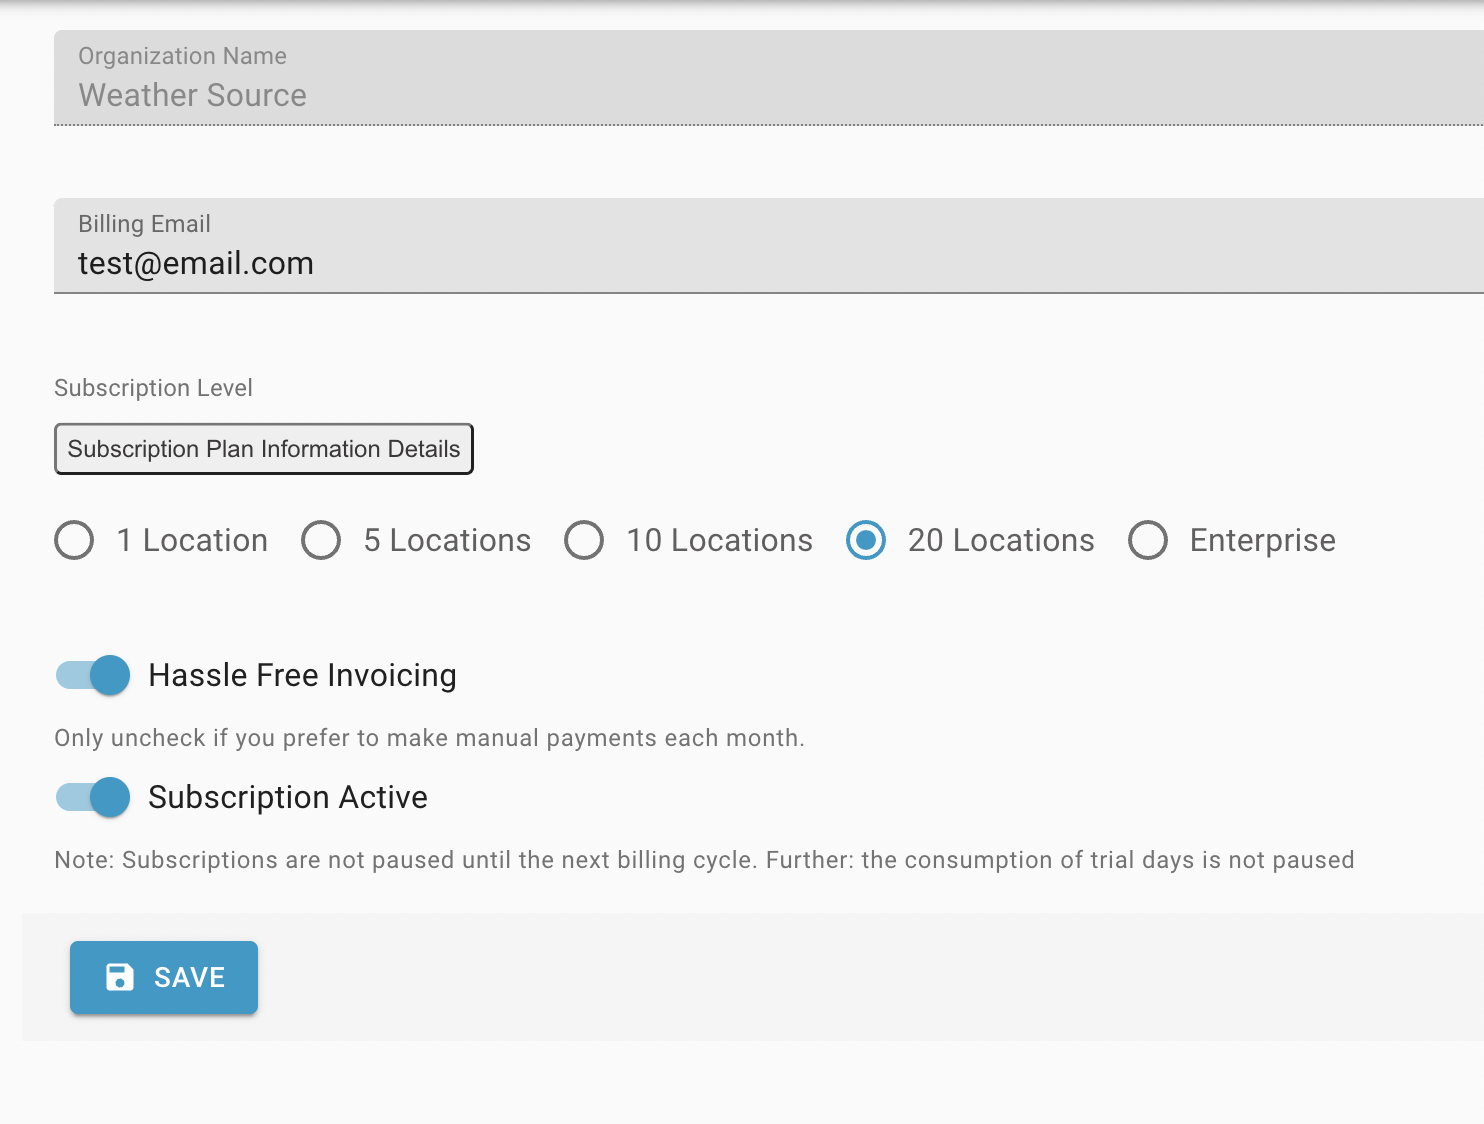
Here, you can change the accounting settings for the organizatin:
- Billing email
- Subscription plan level
- Billing method
- Activity
You may change the following settings:
- Change the billing email. This will change whom we send invoices to.
- Change the subscription plan. This will change the billing rates and resource limits from the previous pricing model.
- Toggling the billing method. This will either make automatic deductions from the credit card on file (e.g. "hassle-free invoicing") or will require manual payments each month. Invoices are communicated via email in either case. If "hassle-free invoicing" is not selected, it will be necessary to provide electronic payment every month. We encourage you to opt for "hassle-free invoicing" so that you never have to worry about experiencing any interruptions in service.
Lastly, it is possible to suspend or reactivate your service at any time.
The billing cycle responds in an appropriately dynamic manner to any changes in subscripiton level or activity, effectively canceling old subscriptions and starting a new one and billing appropriately.
Configuring Alerts
The DWAS user interface is a web-based application. Now that we have discussed setting up an organization and inviting users, we are ready to set up the alerts.
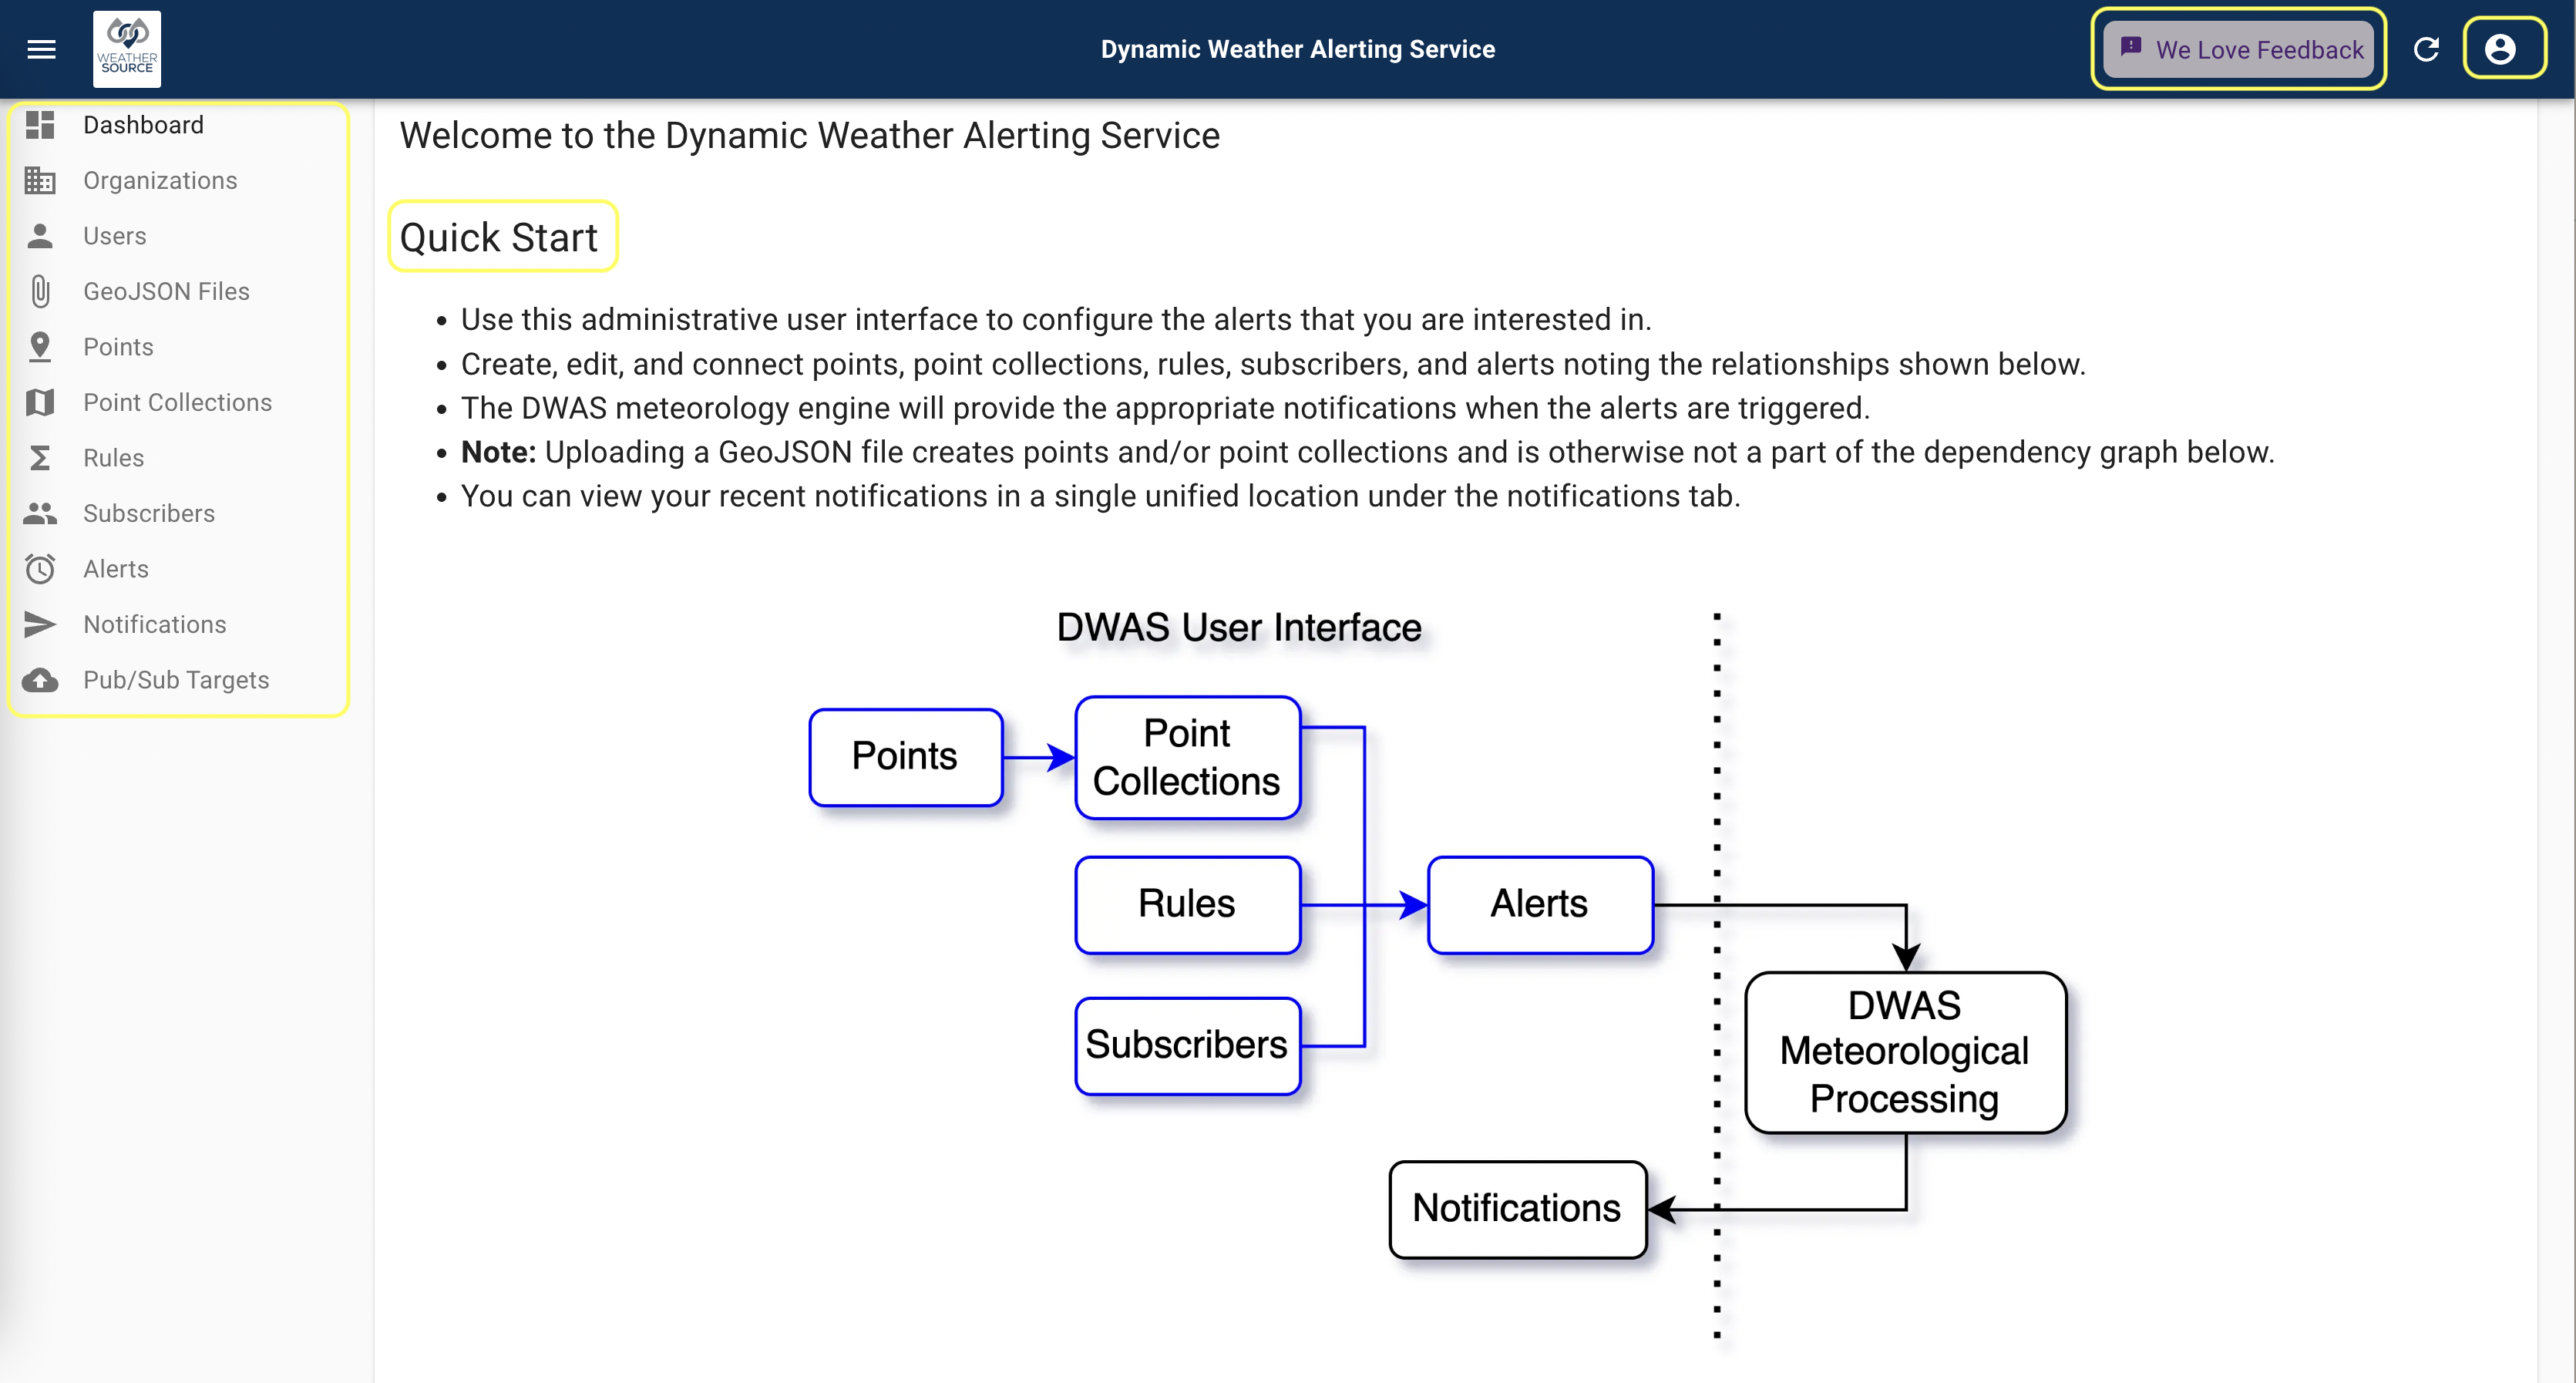
An "alert" is best-defined by the parts that come together to create it (e.g. the associated point collection, rule, and subscriber entities). Alerts are different than notifications. Alerts describe the conditions of interest and notifications are what is emitted when the trigger conditions are actually met. All users in the organization have the power to specify "subscribers", such that the people setting up the alerts need not necessarily be the recipients.
The diagram below illustrates the dependency diagram between the different entities.
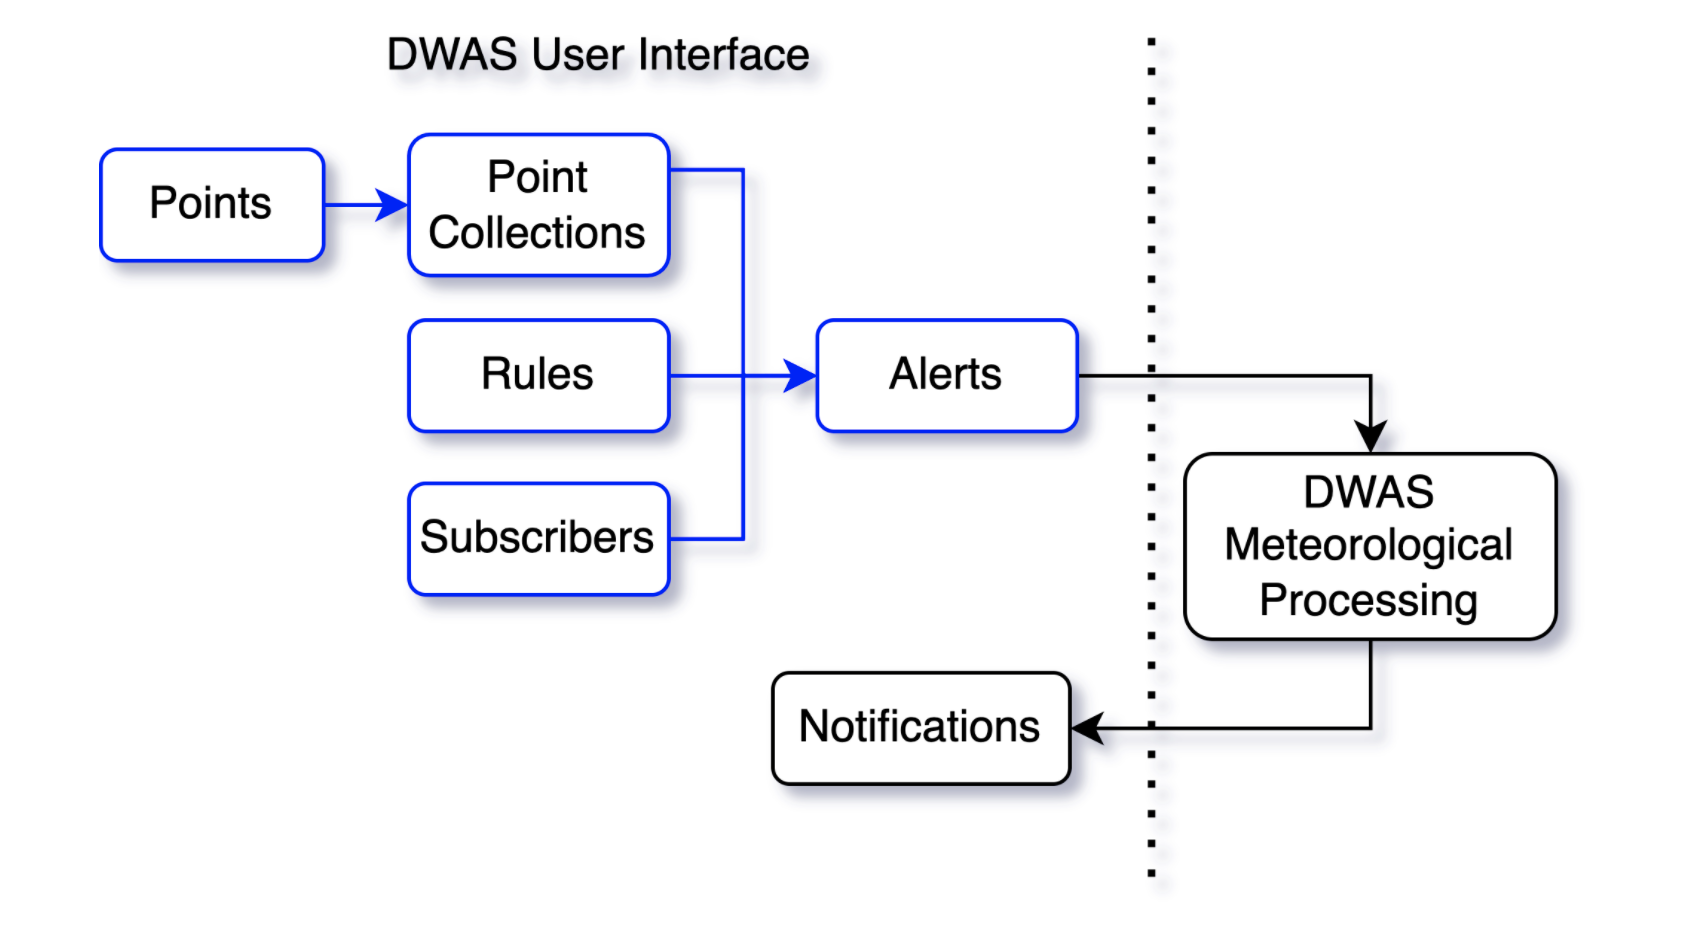
One can create the entities in any order, but an alert is not meaningful until all of its subparts are defined. Similarly, point collections are not useful until points are defined. Each of these entities are connected via many-to-many relationships.
These many-to-many relationships mean that:
- An alert can have many point collections and a point collection can appear in many alerts.
- An alert can have many rules and a rule can appear in many alerts.
- An alert can have many subscribers and a subscriber can appear in many alerts.
- A point collection can have many points and a point can appear in many point collections.
These many-to-many relationships provide the maximum flexibility to you, the user, such that you can evolve your configuration in the manner that you best see fit.
With a keen eye on reducing data-entry effort, we have provided a bulk upload feature for GeoJSON files. This enables one to upload many points at once and to (optionally) associate them with a particular point collection in the process.
List, Create, Edit, Show, and Delete
The DWAS UI provides the ability to list, create, edit, show, and delete all of the entities mentioned above, e.g. points, point collections, rules, subscribers, and alerts.
These actions are supported by URL endpoints using a syntax similar to those in Rest APIs. For example, the point resources take the following URLs:
- list:
#/points - create:
#/points/create - edit:
#/points/{id} - show:
#/points/show/{id}
For example, for a specific point, the URL takes the form as shown below:
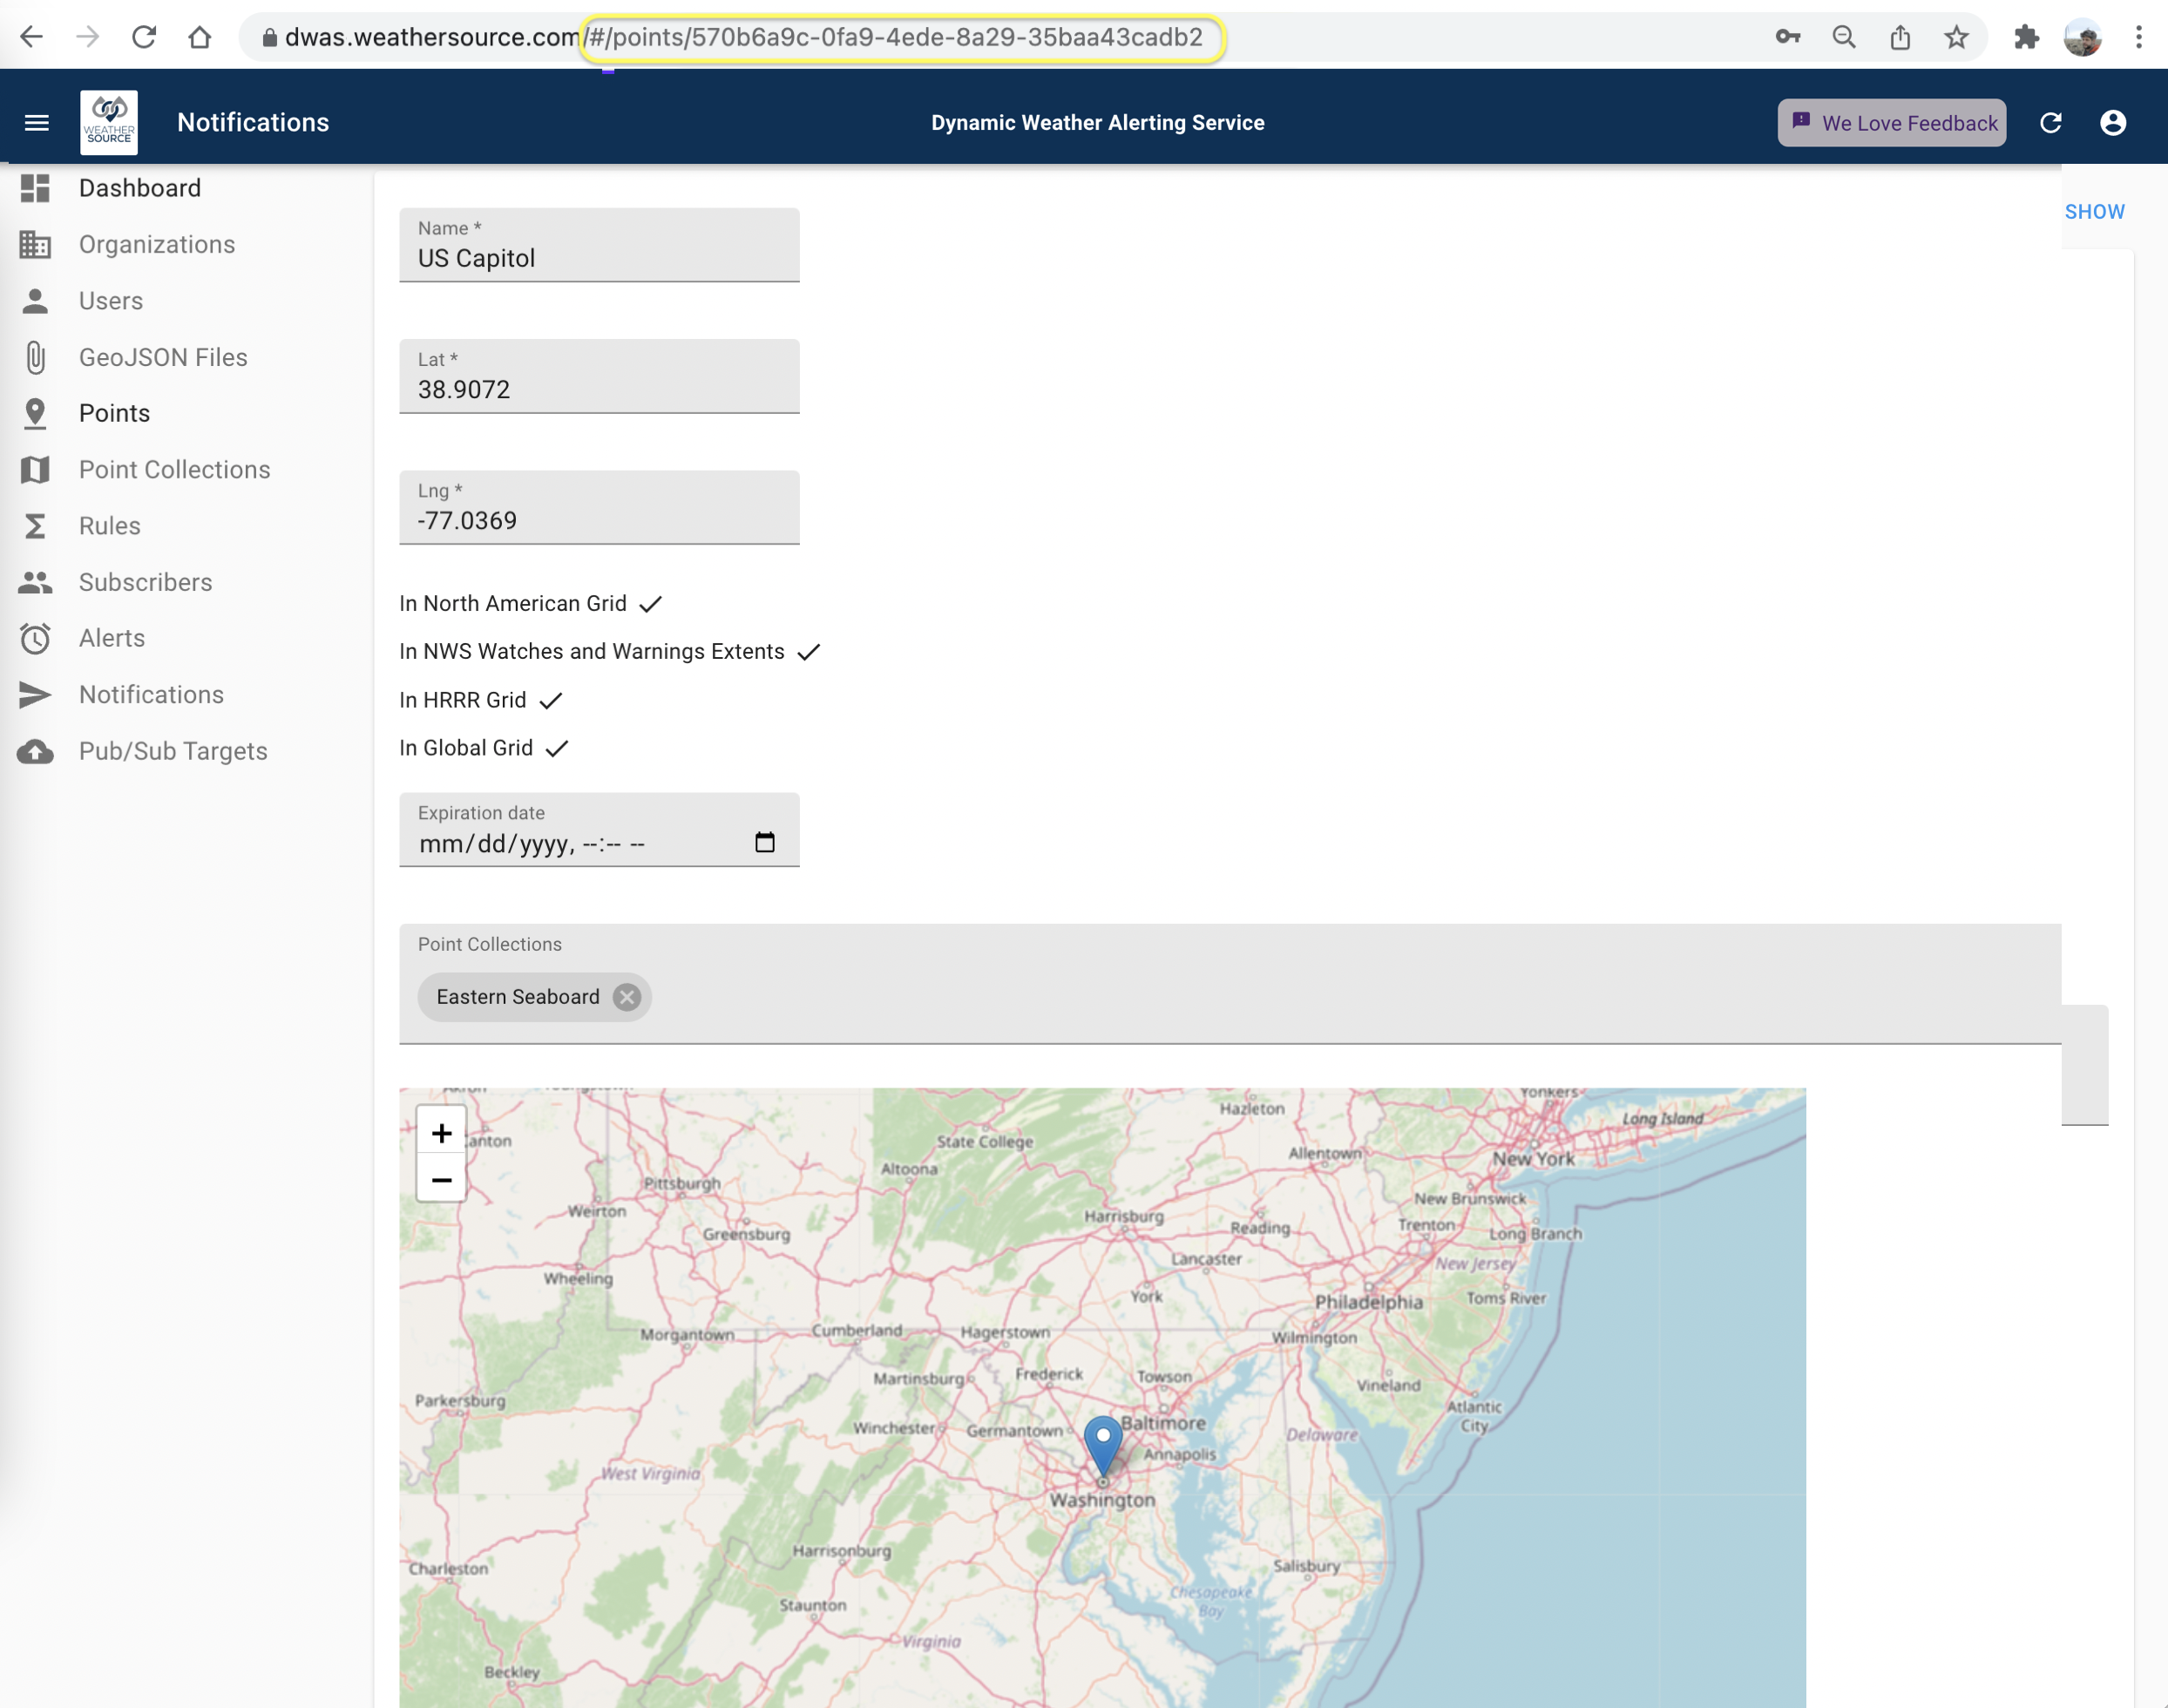
These are internal links inside the single-page application. One can interactively use the web user interface without noting these links, but they can be very useful when sharing links to specific data within an organization.
The generic form of these links are:
- list:
#/{resource} - create:
#/{resource}/create - edit:
#/{resource}/{id} - show:
#/{resource}/show/{id}
One can delete an entity from the list interface.
One can also delete an entity from the edit interface.

List Features
Export
All of the list interfaces offer the ability to export your data locally. This button is available in the upper right corner of all list interfaces and appears as an Export button.
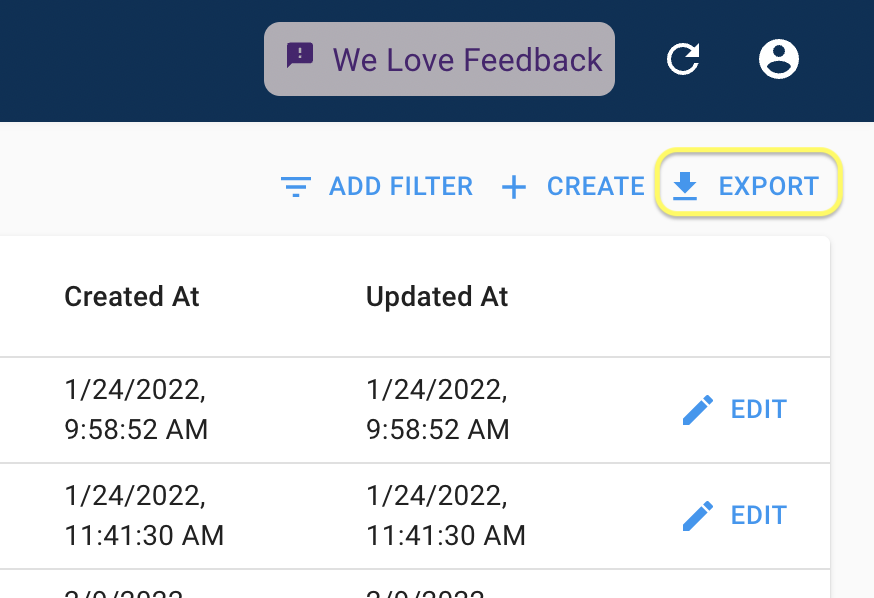
This allows the user to download all the entities as a CSV to their local machine and use them in any manner.
Filter
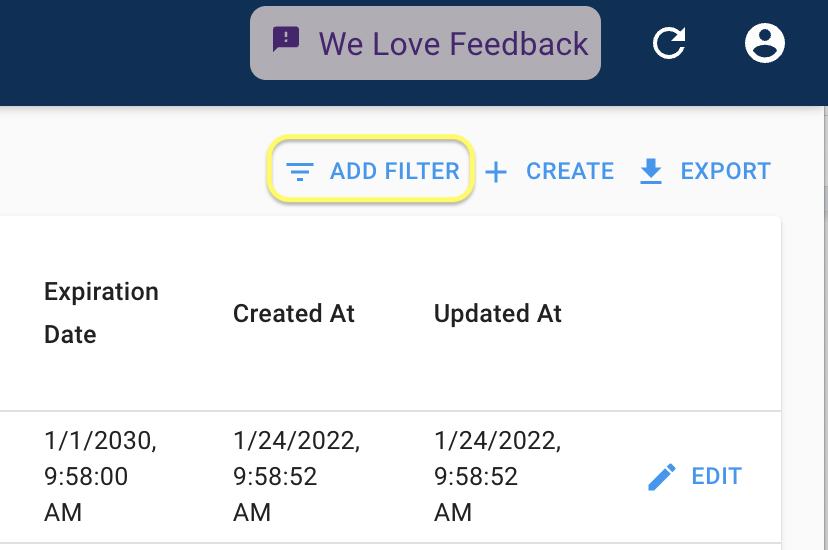
All of the list interfaces offer the ability to filter your data. This button is always available in the upper right corner and appears as an Add Filter button.
Each entity type has different properties/fields/attributes and therefore each dropdown filter will take a different form. The fields one can filter points with appears like so:
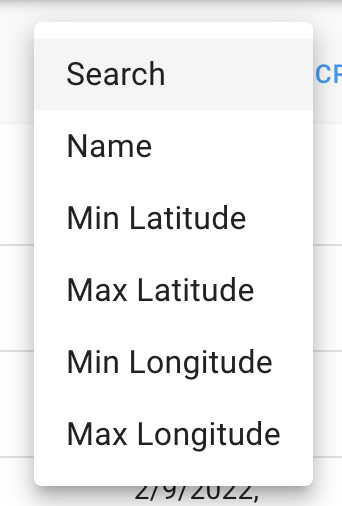
It is logical for floating point numbers, like latitude and longitude to be searchable by a bounding range as shown below.

One can search all the fields for any text using the generic "Search" option under the dropdown.

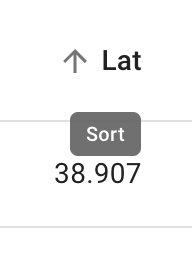
Sort
Most fields in the list interface support sorting in an ascending or descending manner. This is simply accomplished by clicking on the field heading name that you desire to sort by and it will toggle between ascending and descending sort order.
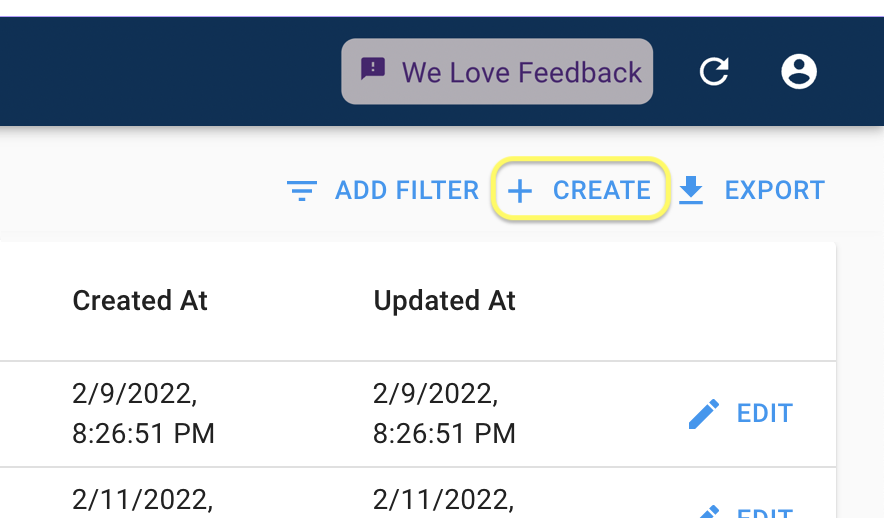
Create
One can create an entity by clicking on the Create button from the list interface related to the entity.
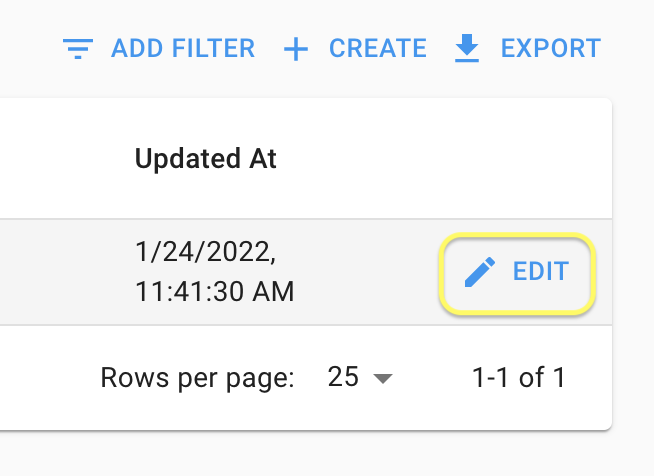
Edit
One can edit an entity by clicking on it from the list interface. There is also an Edit button in the final column that achieves the same thing.
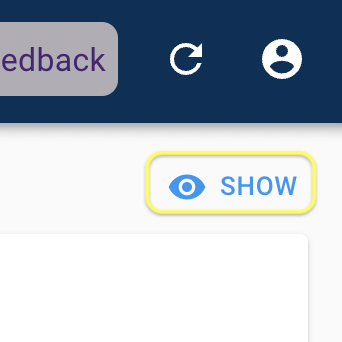
Show
One can investigate a read-only view of an existing entity by clicking on the Show button from within an edit interface.
Delete
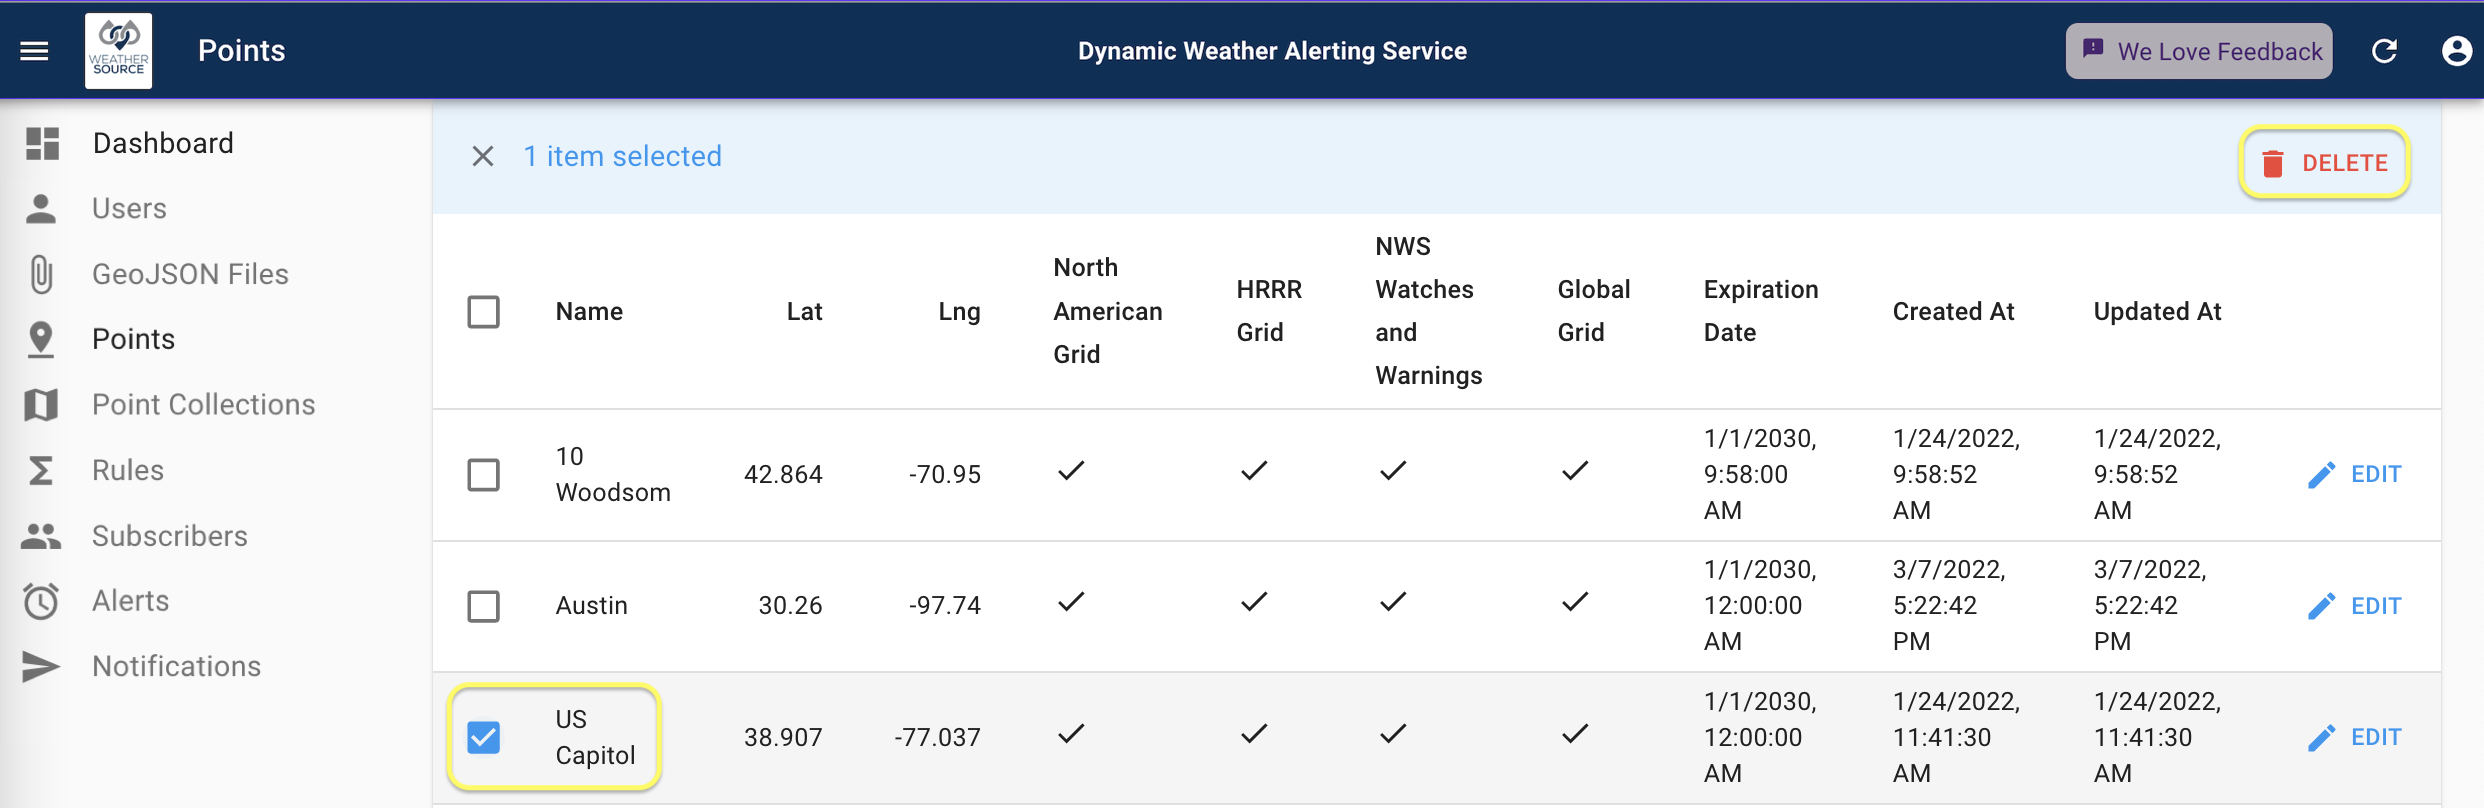
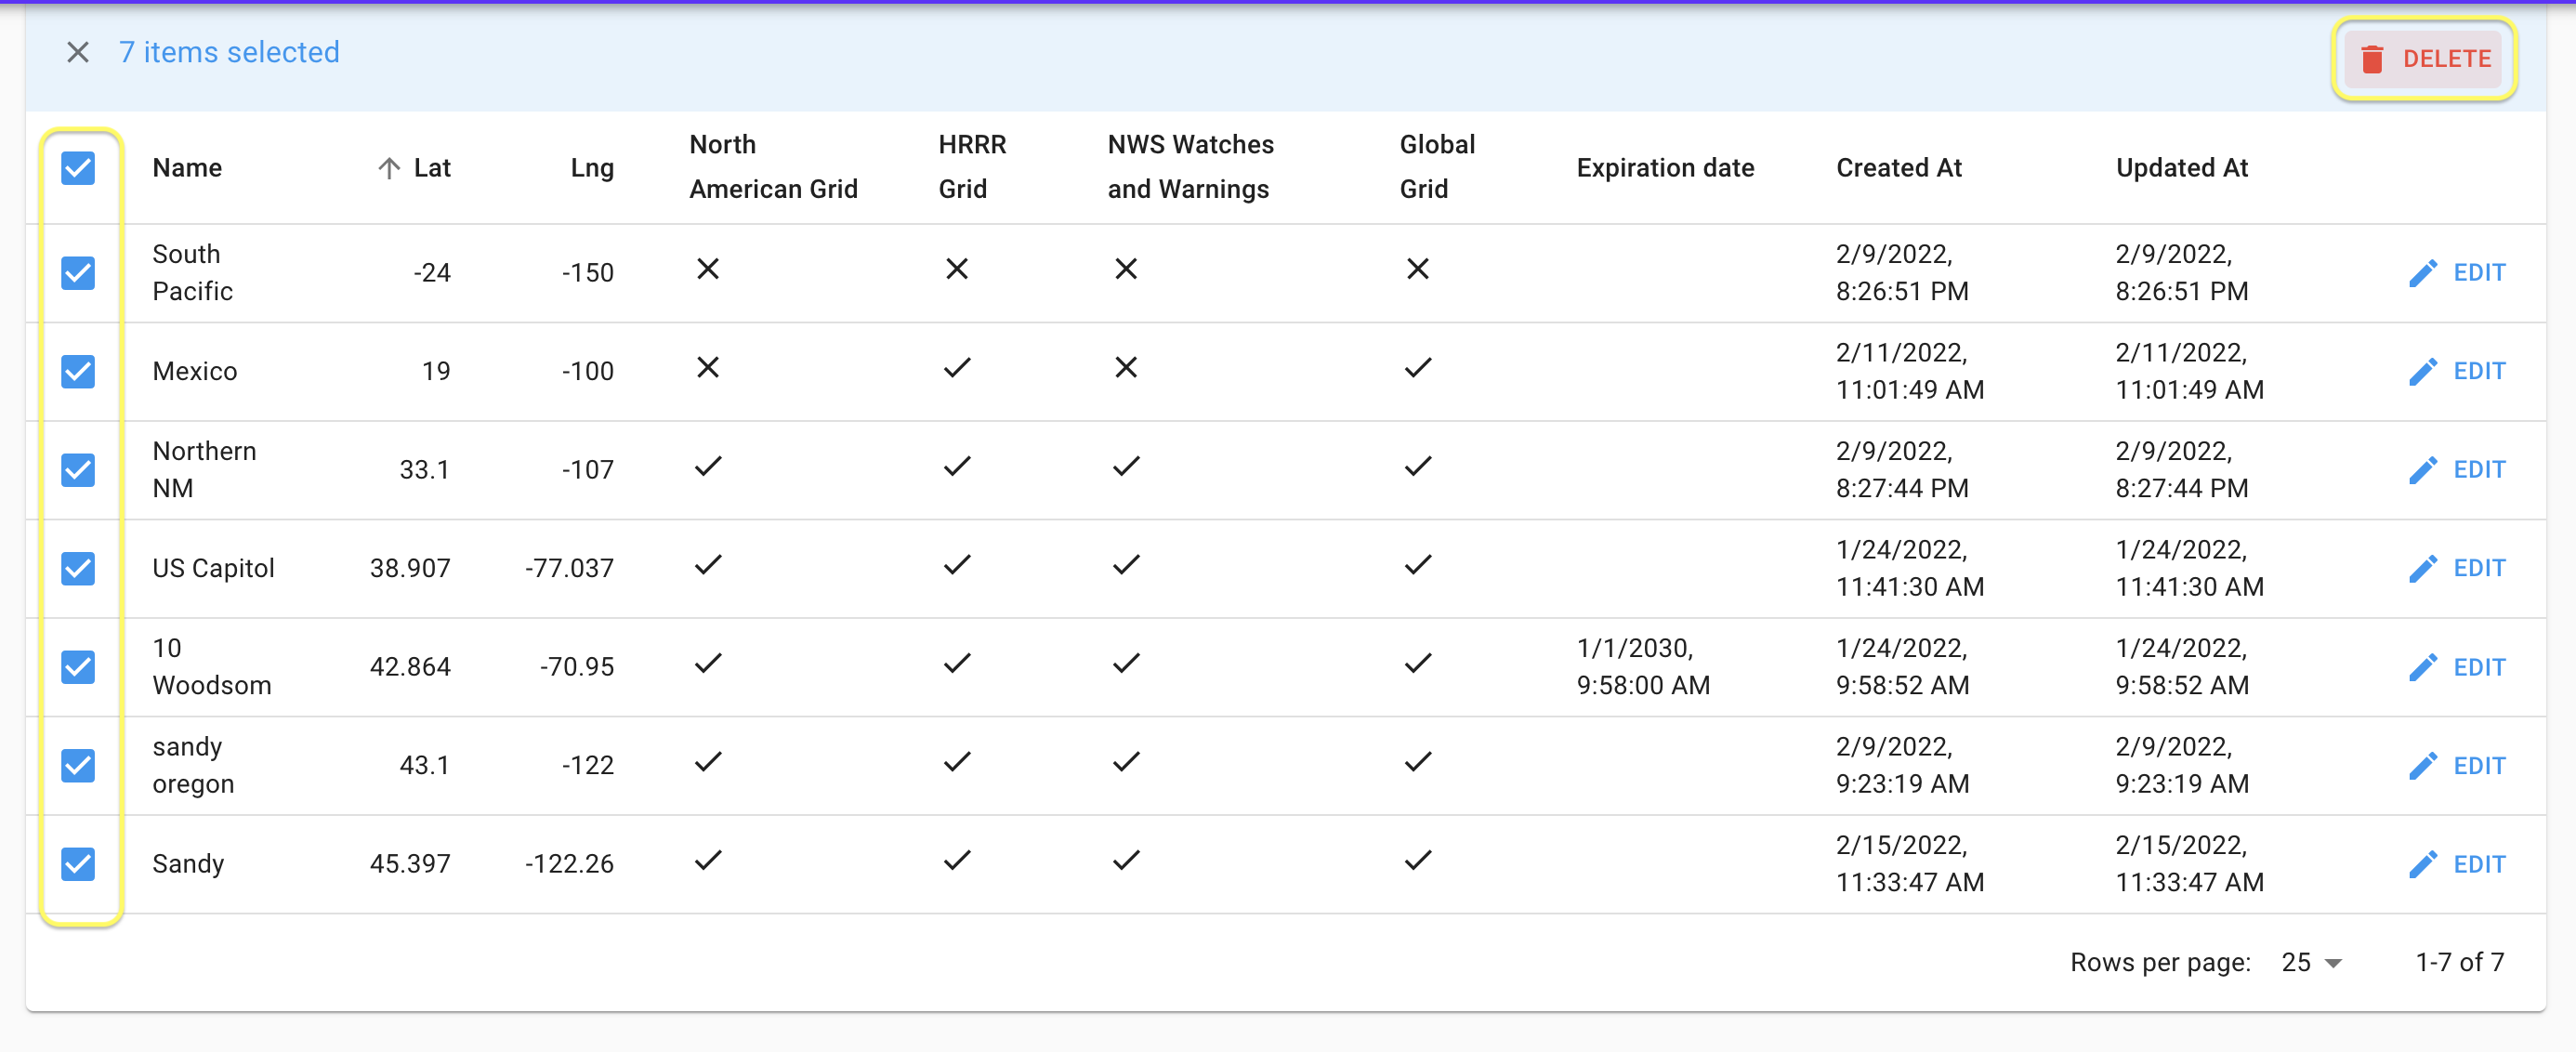
One can perform bulk deletes by selecting all the desired entities with their checkboxes and deleting them all at once using the Delete button in the upper right. Note that one can select entities in bulk by holding the shift key down while selecting a range of entities. This functionality is customary in many modern interfaces.
One can also individually delete an entity from within an edit interface using the Delete button in the lower right corner.
Now that we have introduced the general tools available for configuring the entities, let's start to visit them one by one and investigate how we use them to define an alert.
Configuring Points
Points are quite simple, they must have a name, a latitude, and a longitude, and can optionally have an expiration date. One can also associate (or disassociate) a point from a point collection.
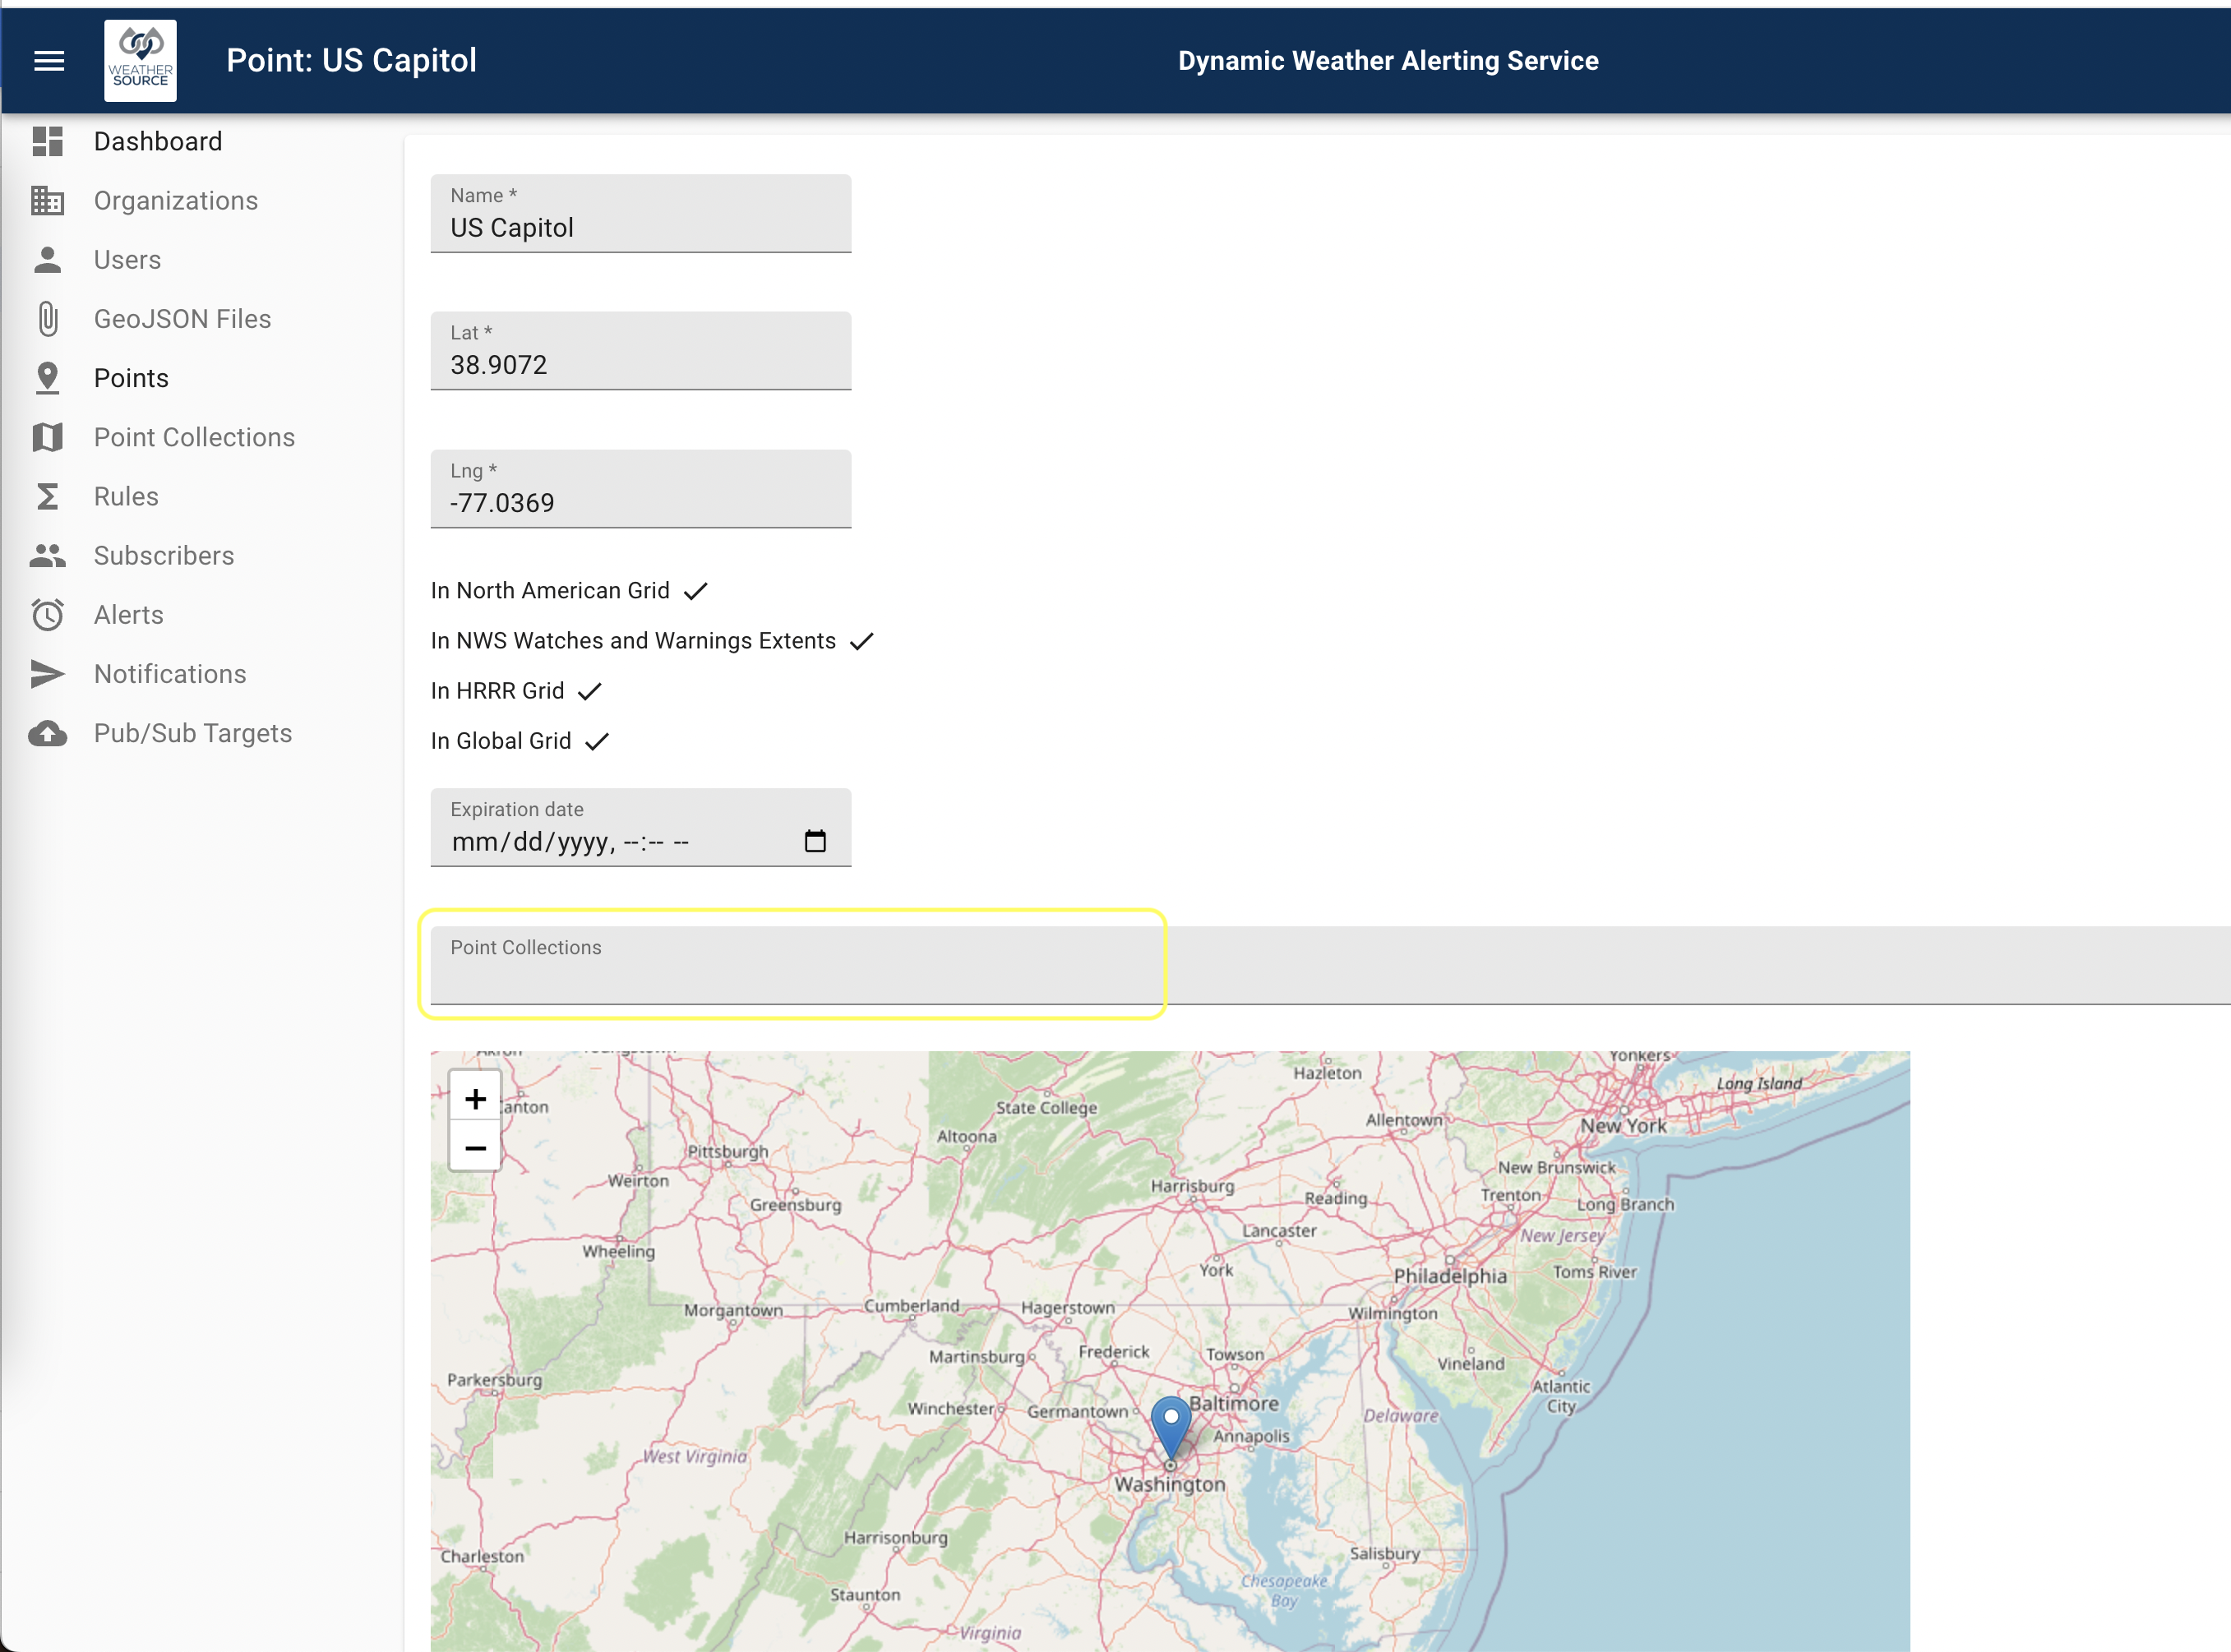
DWAS provides feedback regarding which meteorological grids a point is contained within as well as a map. These are read-only user feedback, not inputs, for quality control purposes. The interface for the U.S, Capitol is as shown below. Note that the required fields are provided and the optional ones are not.
Further, as mentioned above, note that one can associate this point with a point collection using the last dropdown available, labeled Point Collections.
As mentioned before in the section on resource limits. The DWAS system will enforce limits on the number of points in accordance with your pricing tier. You are free to adjust your pricing tier at any time. You can find more details about that in the accounting section.
Once we have some points, we can now create a point collection.
Configuring Point Collections
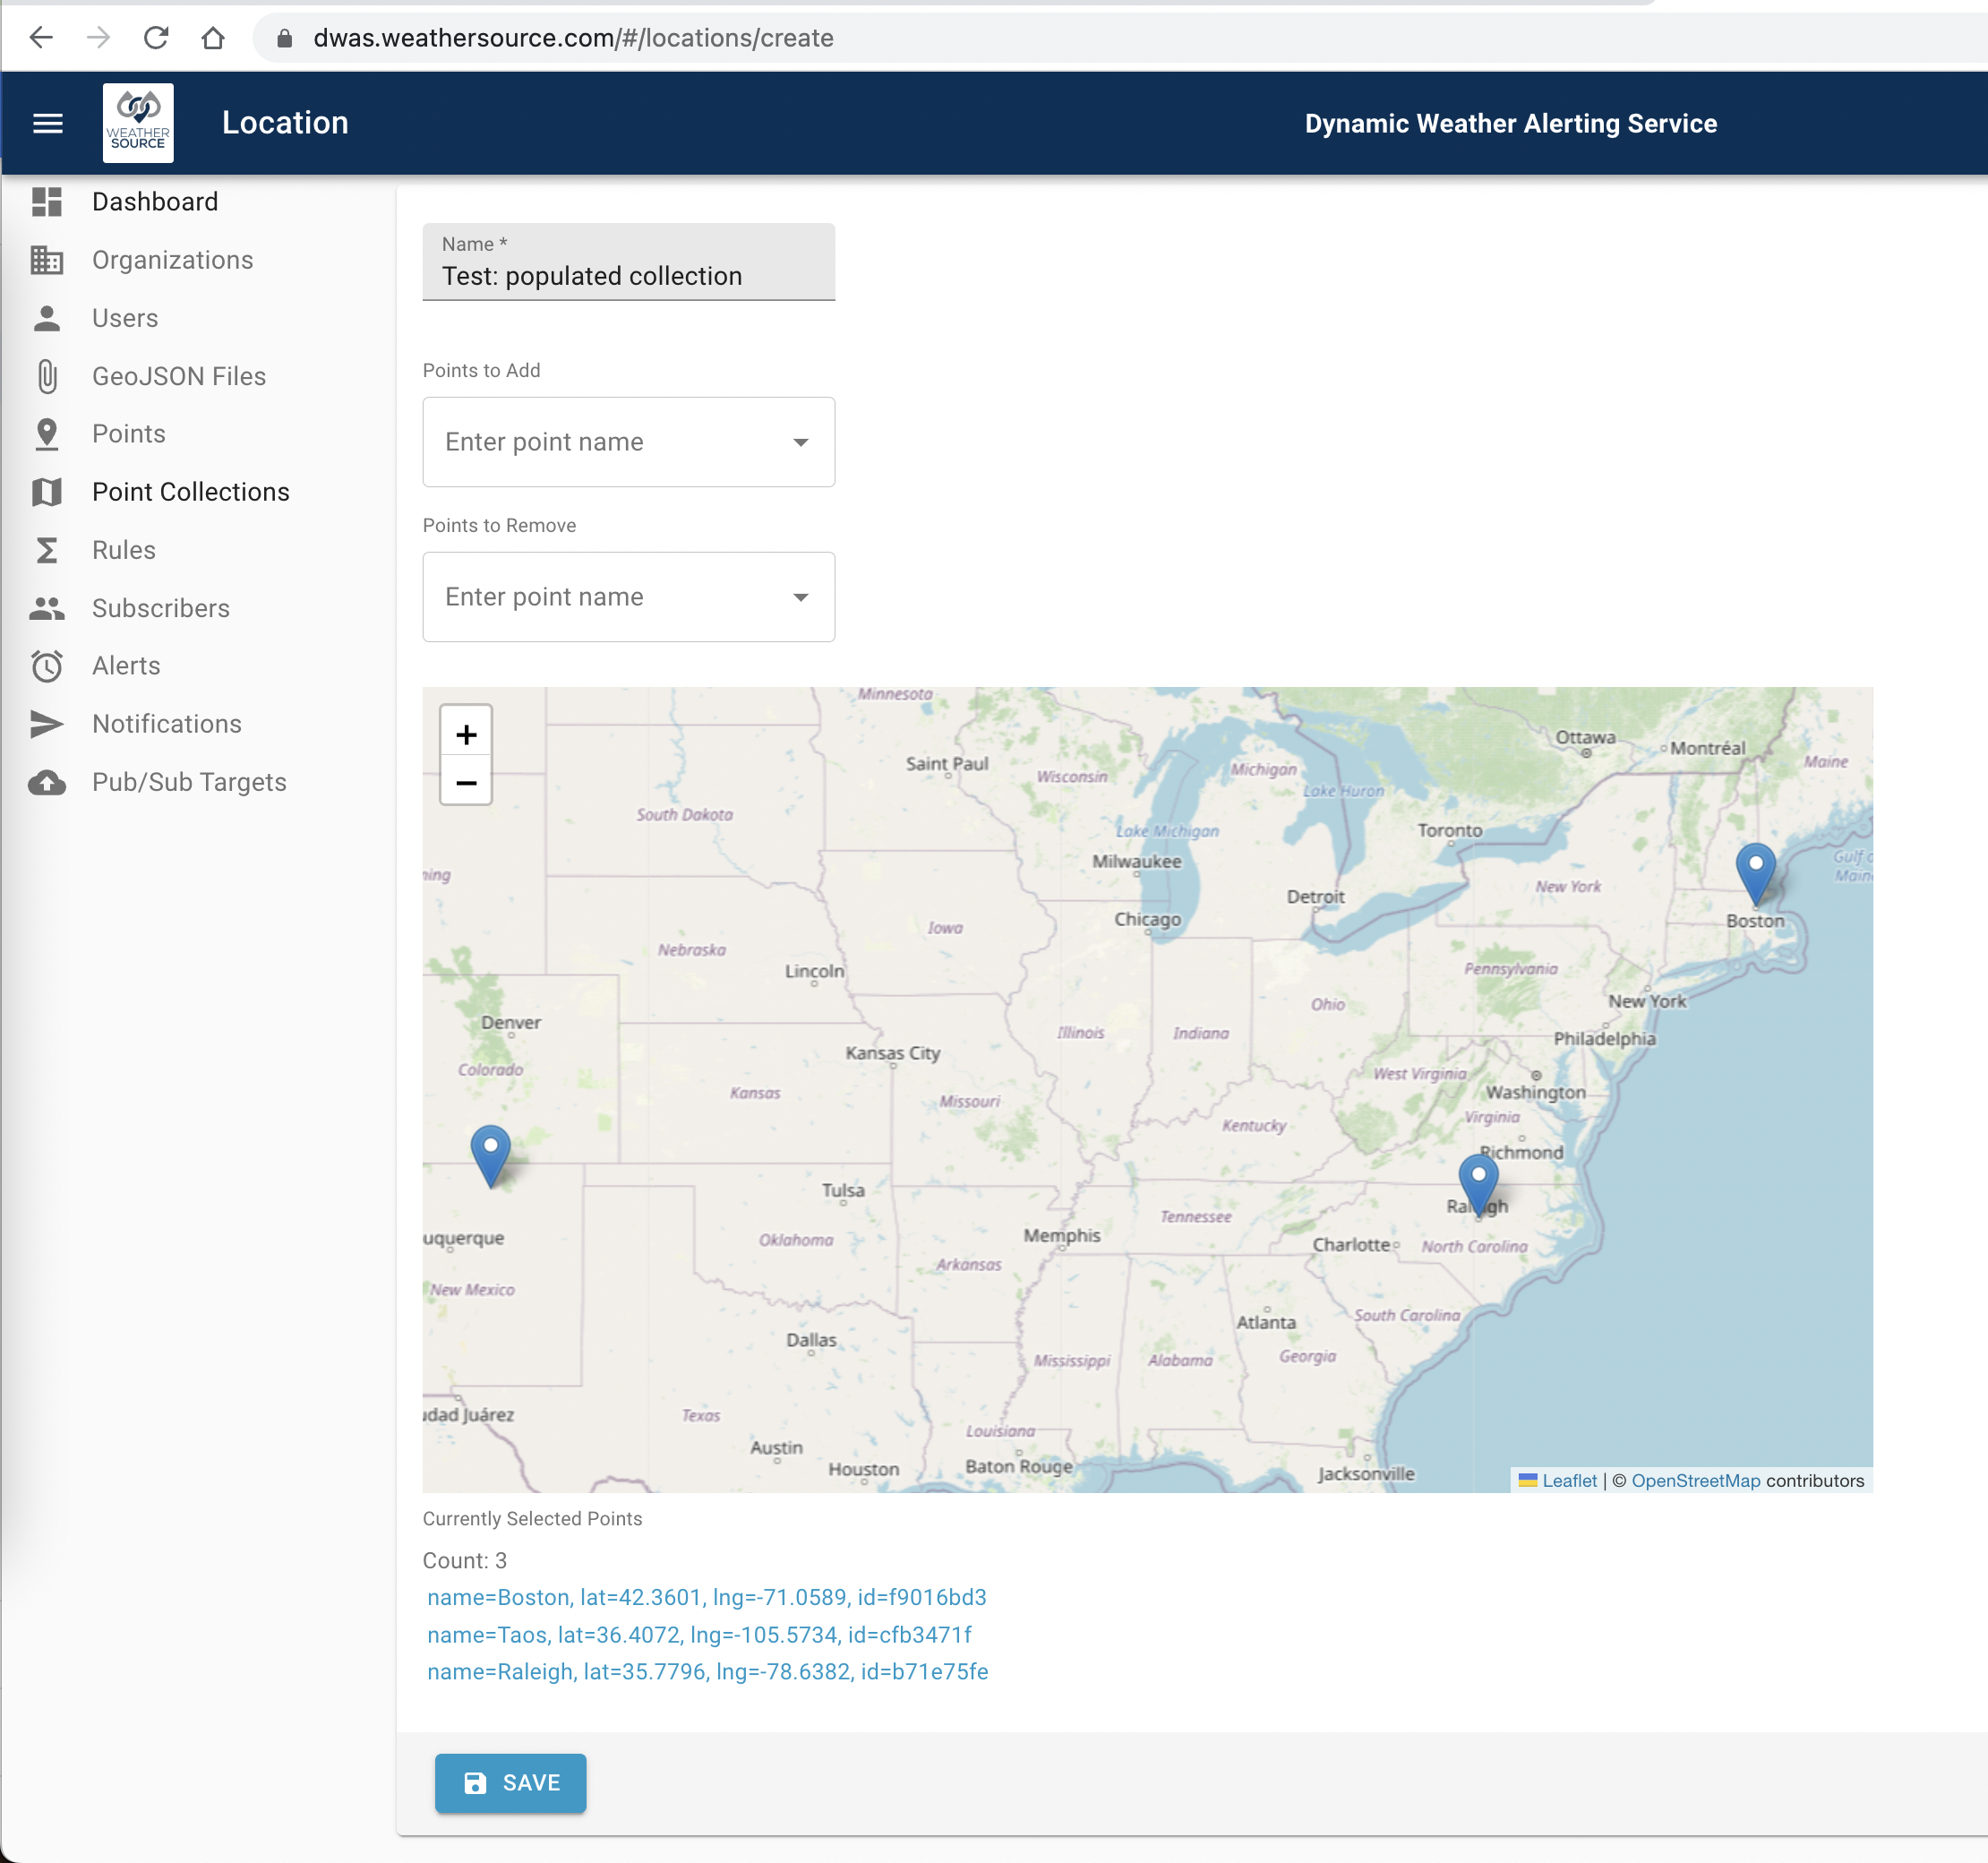
Point collections are very simple, they are simply a named collection of points. One can create an empty point collection and provide a name attribute. One can include or exclude the points from the collection as they wish.
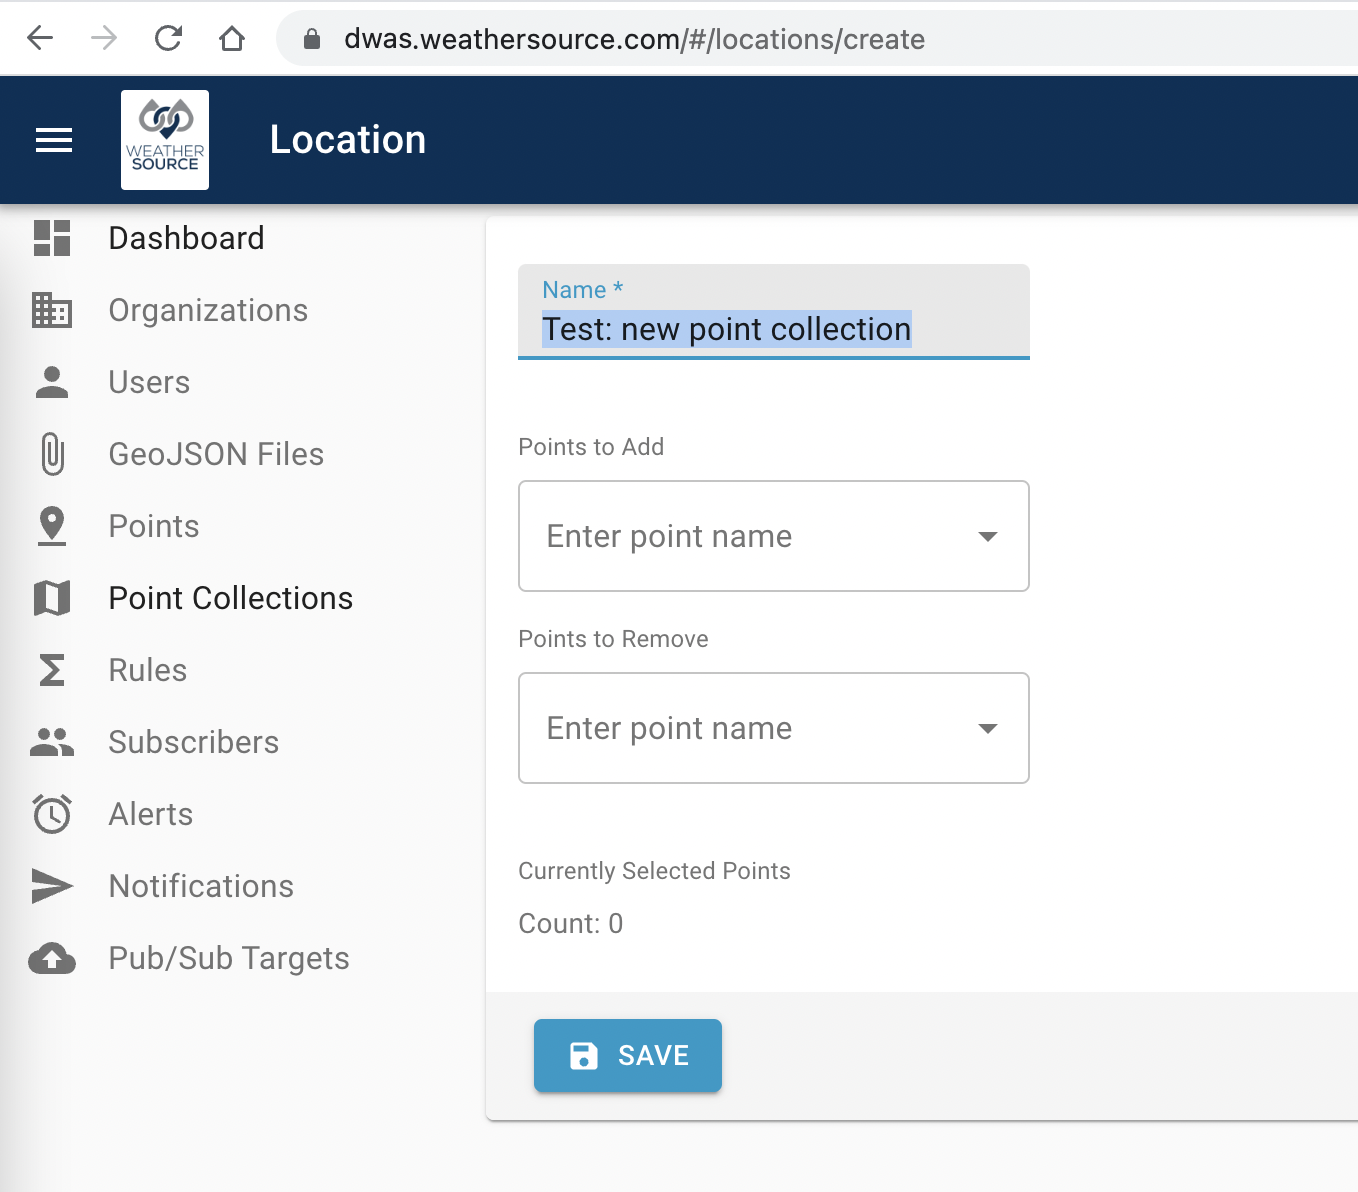
Then one can include or exclude previously included points in a dropdown array select box. A dynamic map provides feedback to help ensure the points are included as intended.
Configuring Rules
Rules can be specified/created in two different ways or as a combination of the two methods. When both methods are employed, they are joined using an "OR" relationship. This means that if either one occurs, that a subsequent notification will be emitted. This is contrast to an "AND" relationship where both conditions would need to be in order for a notification to be triggered.
Rules have a name field that can be specified. The name must be unique.
Government-Issued Watches and warnings
As mentioned above there are two different ways to describe a rule. The first is by choosing from predefined weather phenomena as defined by the National Weather Service. As mentioned in the text and link in the application, these rules are only applicable to points in the United States and Canada. This widget appears as:
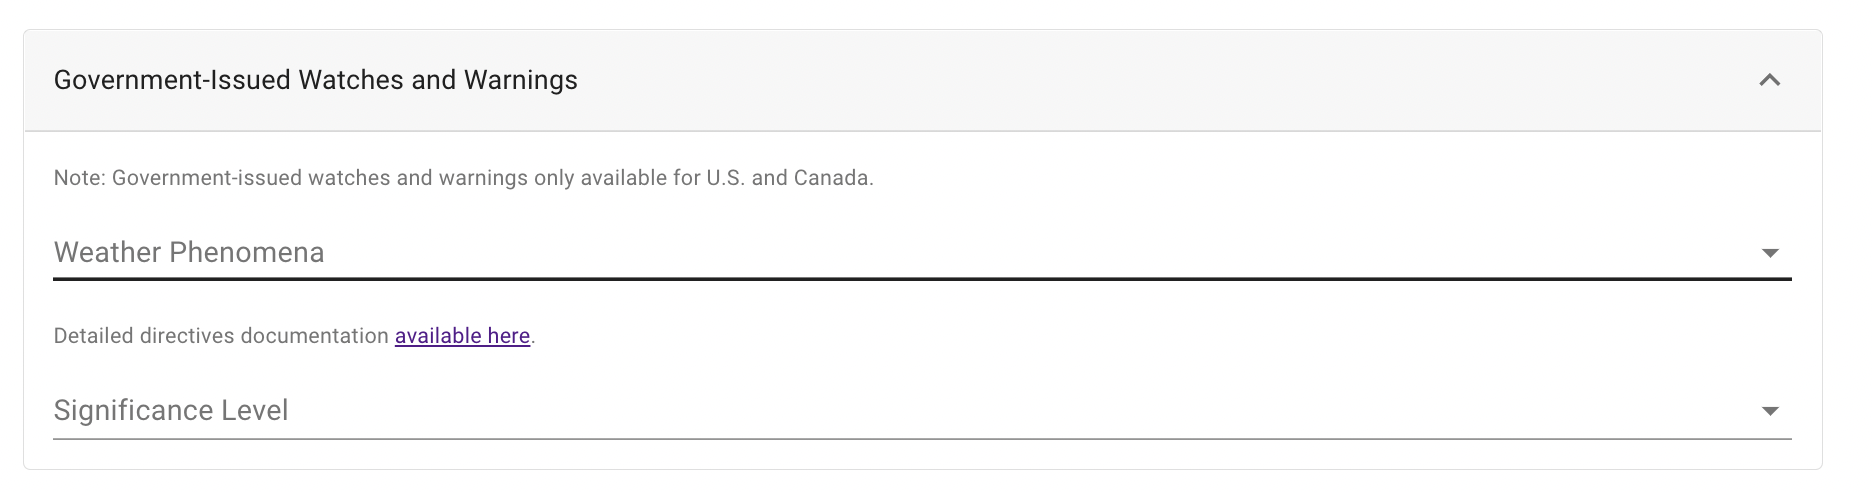
To describe what one is interested in, they must specify the weather phenomena and the significance level. One has the ability to select all and deselect all for both of these selections. Further, one can choose groups of weather phenomena. For instance, one can express their interest in weather phenomena that affect visibility and several different selections will be made. Of course, this works in reverse as well, one can remove selections by group as well. After selecting all visibility-related weather phenomena, the dropdown would appear as:
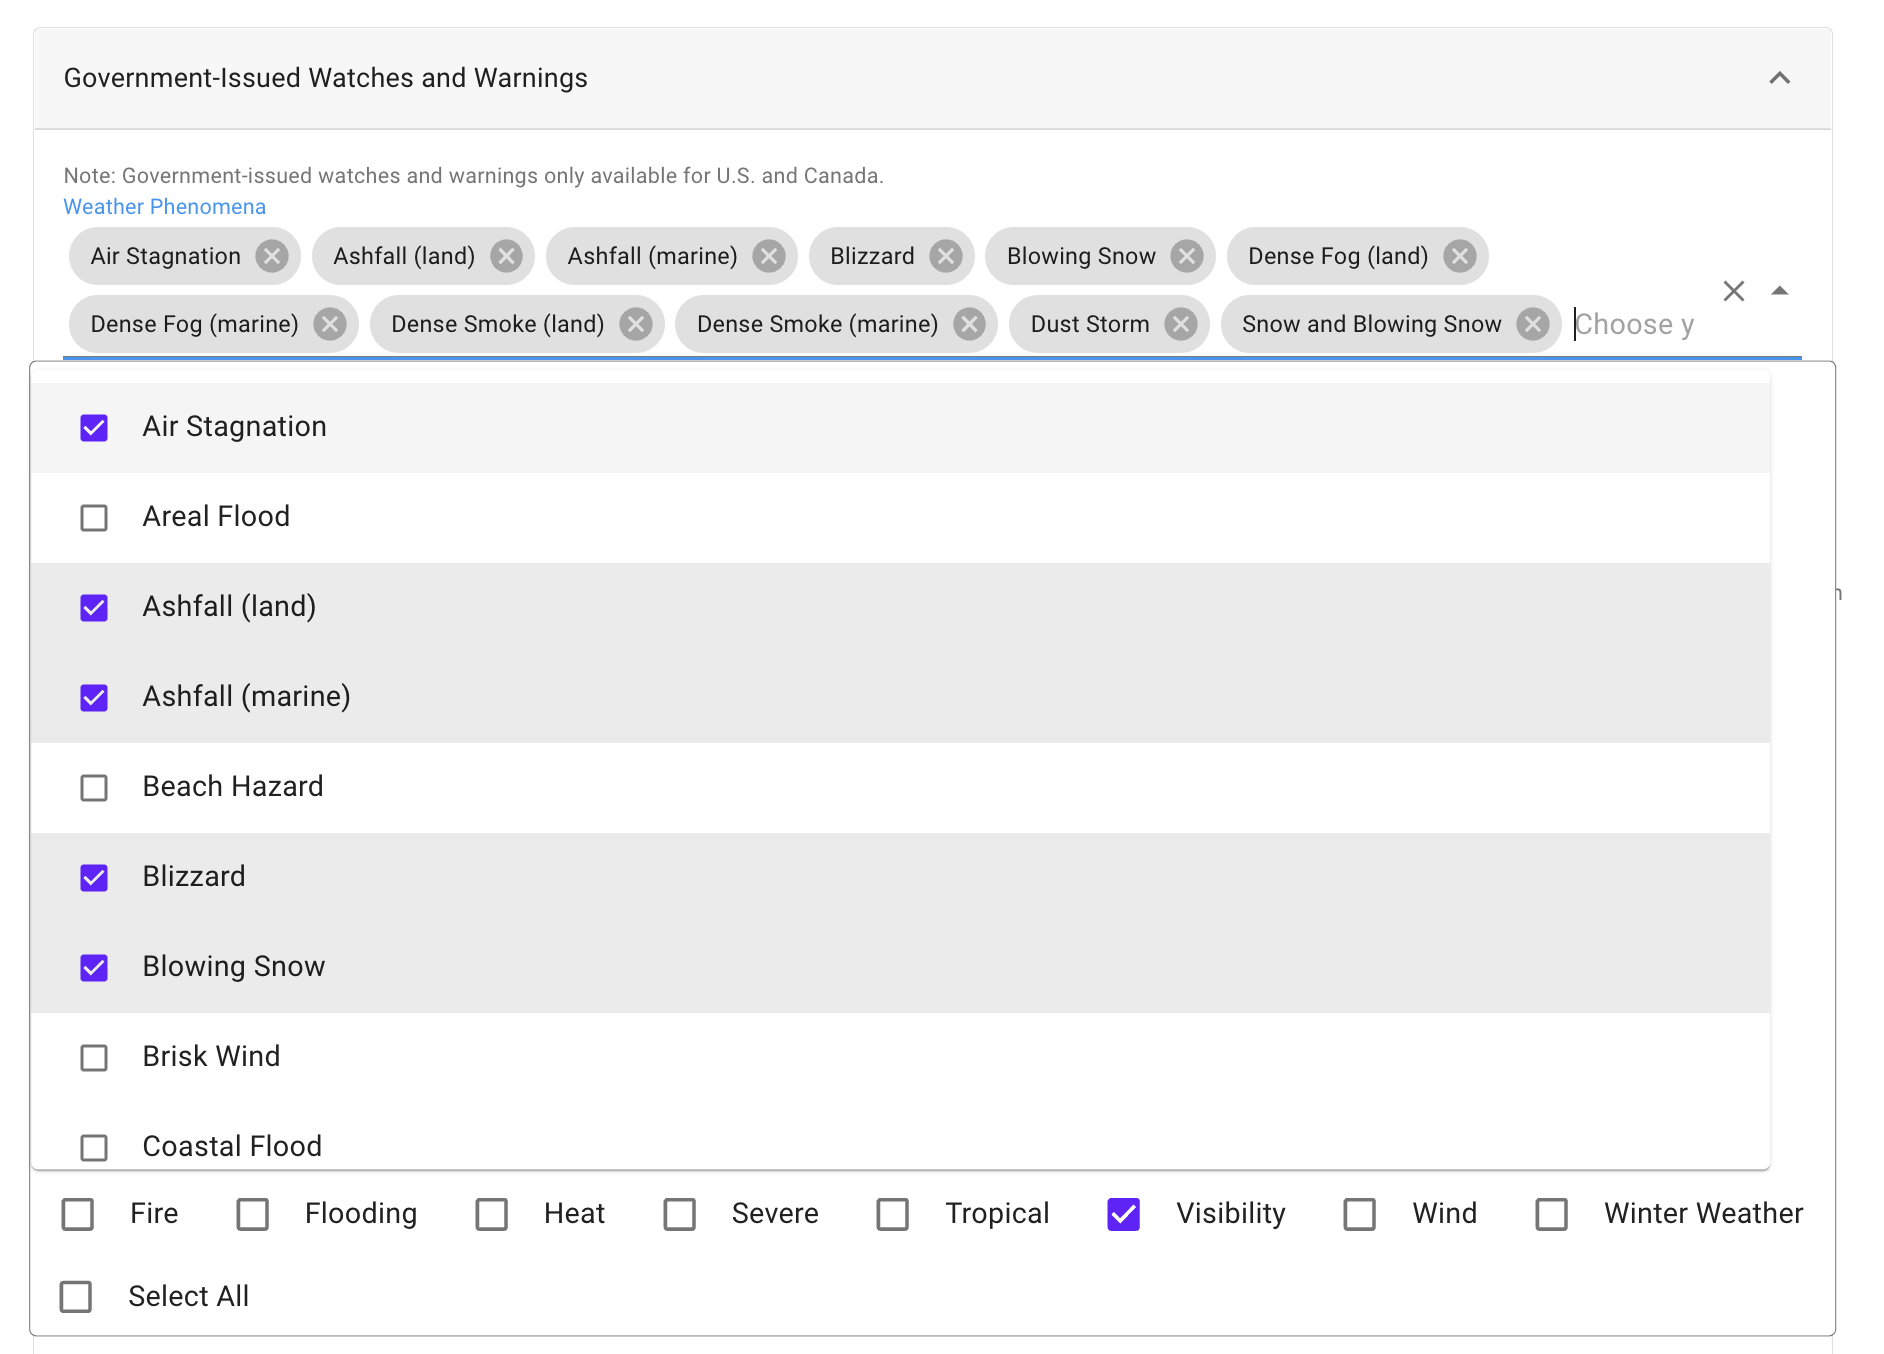
Choosing the significance level works similarly, but no groupings exist nor are any necessary. Selecting all the signifance levels at once would appear as:
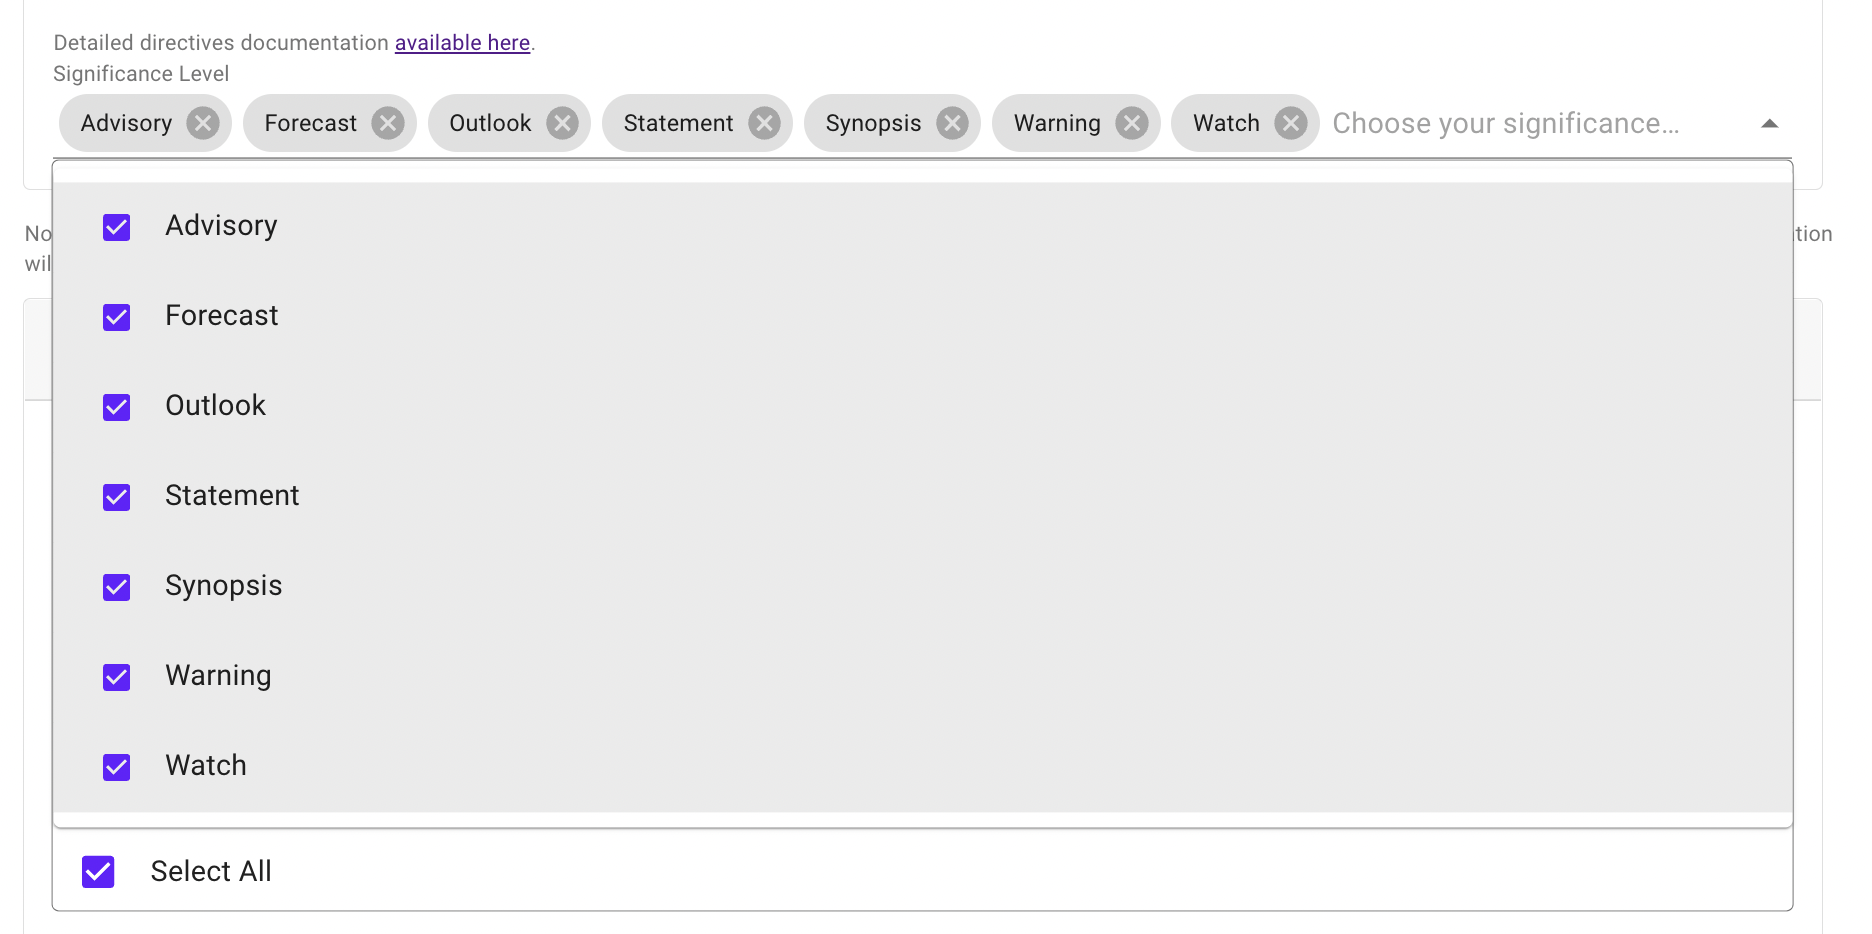
Lastly, one can search for specific weather phenomena by making use of the autocomplete feature as shown below:
One can do similarly for the significance levels, but this is of less utility given the small number of levels.
User-Defined Rules
The second way that one can specify a weather rule is by creating a user-defined rule.
One can indicate whether they would like to use metric or imperial units to define their rule.
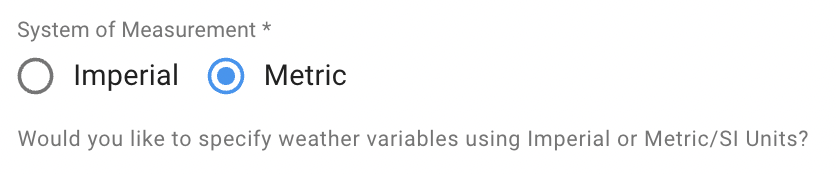
This selection defaults to whatever the user has specified in their settings, but this is available for modification when creating a new rule.
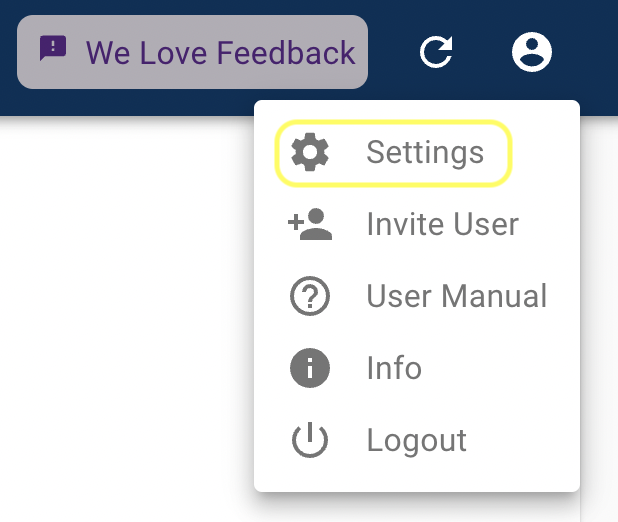
One can access their settings by clicking on "settings" in the top-right drop-down menu.
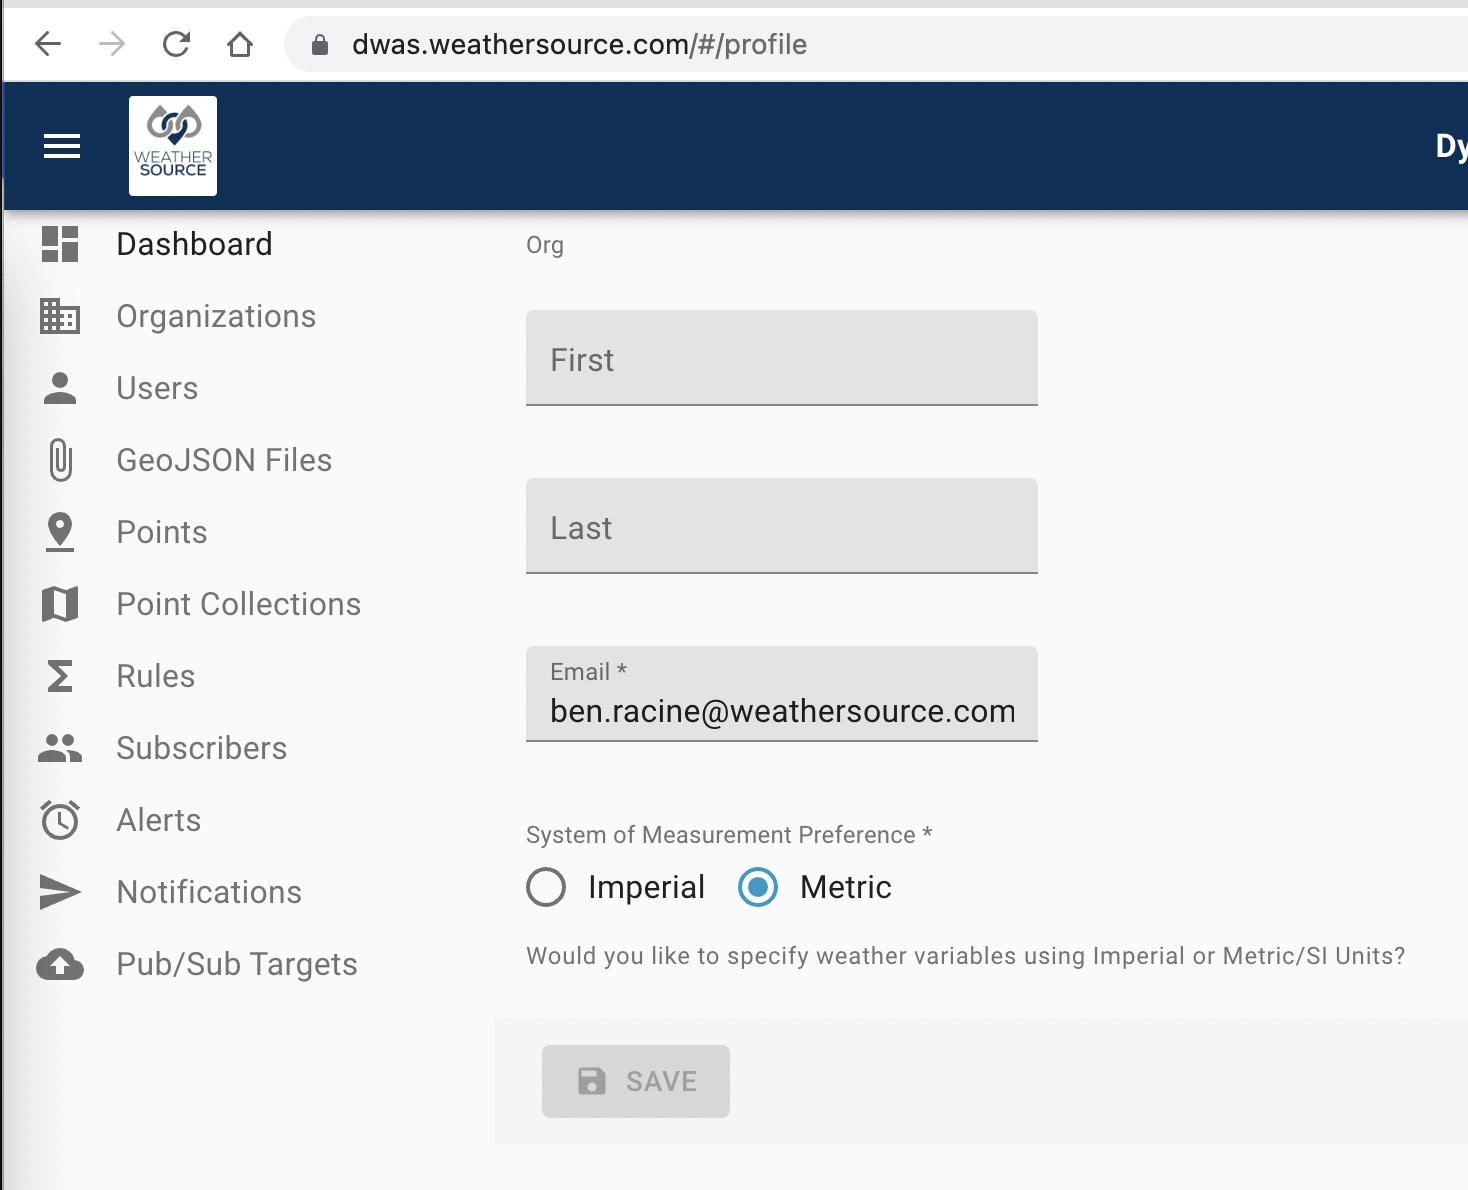
Upon arrival at the user-profile/settings page, one can set their system of measurement preference to either imperial or metric units.
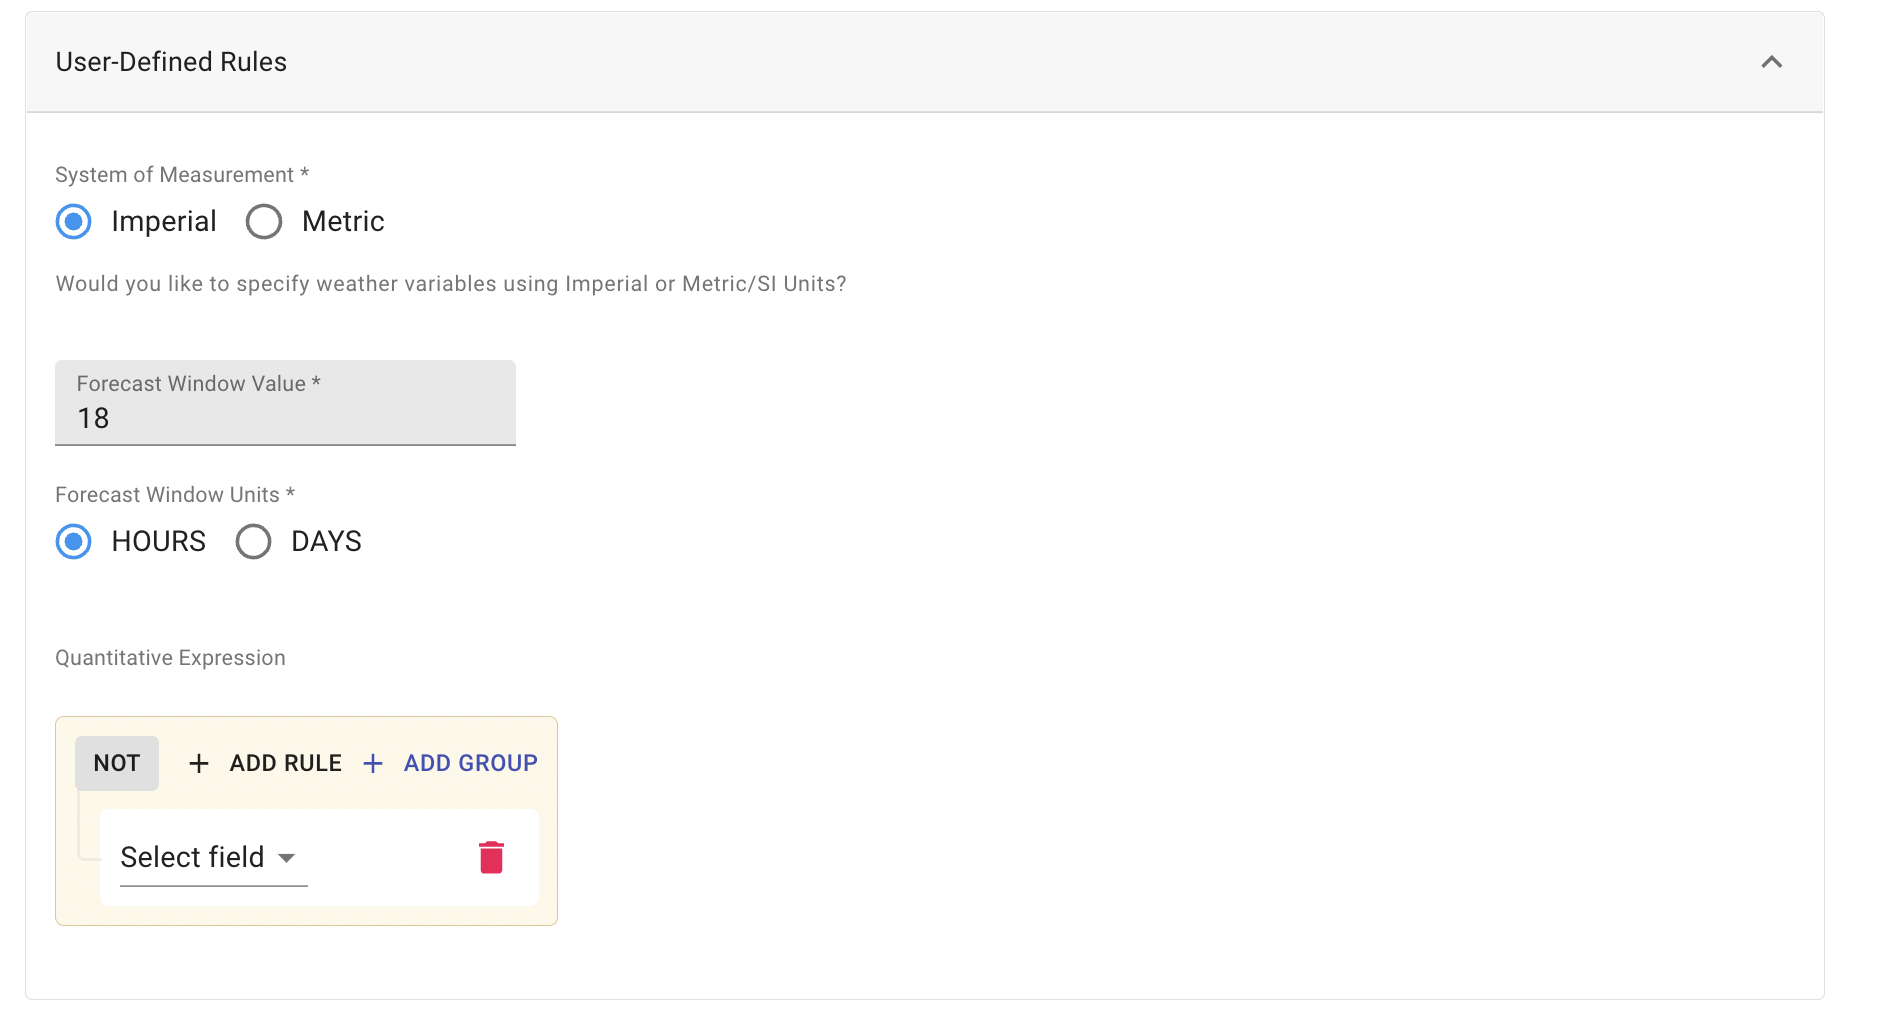
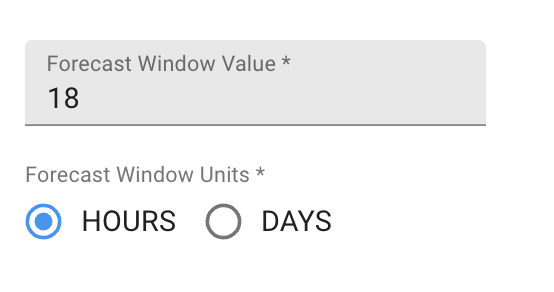
One can also specify how far out to look ahead for forecasts using the appropriate combination of Forecast Window Units and Forecast Window Values. The example shown below is looking ahead 18 hours.
When one switches the forecast window between hourly and daily units, the available weather parameters must change. Direct weather variables are available in the hourly case where minimums, maximums, and averages are only available when the weather windows is defined in daily units.
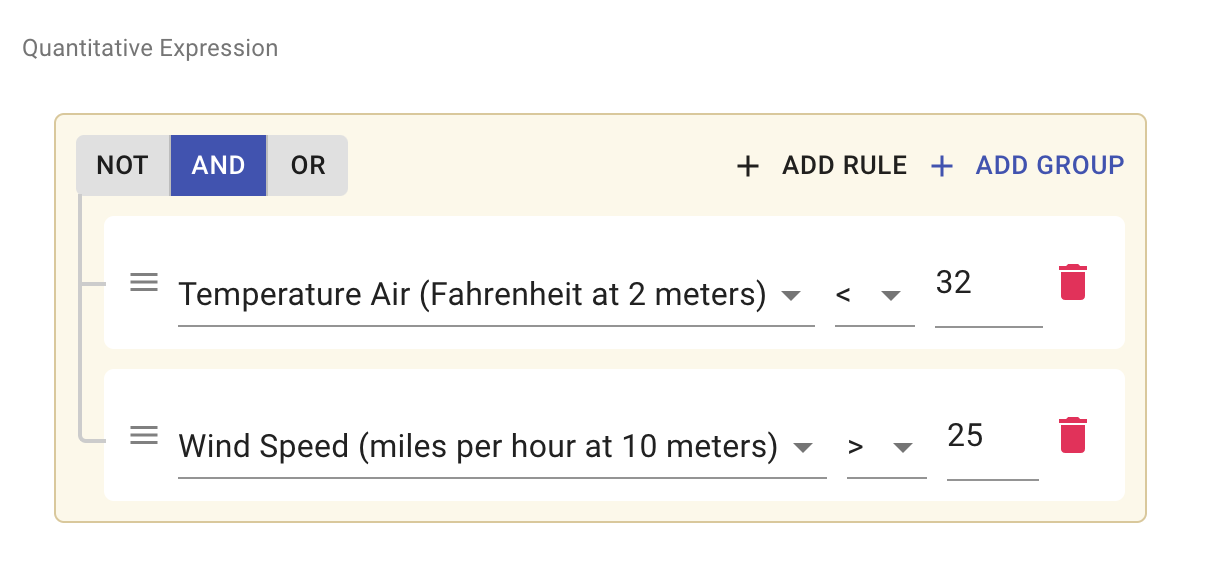
The DWAS service offers a sophisticated query builder widget for these ends. This widget provides the ability to create a tree-like weather rules expression. Sibling rules can be associated with each other using an "or" or an "and" relationship. "Or" relationships mean that either one will trigger the alert while an "and" relationship means that both criteria must be met. As a relatively simple example, the selections below describe a scenario of interest that is cold and windy.
Roadmap Ahead
The DWAS team is busy trying to turn the existing NWS rules into a set of predefined set of "user-defined" rules such that these same events of interest can be applied globally.
We have also identified several additional capabilities that we are interested in pursuing. We are interested in allowing users to specify:
- Duration of a specific criteria.
- Precipitation aggregation rates.
- Weather variable values by a specific number of standard deviations away from normal.
Lastly, we also have our eyes on additional weather phenomena such as NEXRAD hail and tornadoes, tropical cyclones, and storm surges.
Ok, let's move on to subscribers.
Configuring Subscribers
The following fields are available for specification on a subscriber:
- First name
- Last name
- Email(s)
- Phone number(s)
The first and last name are fairly self-explanatory.
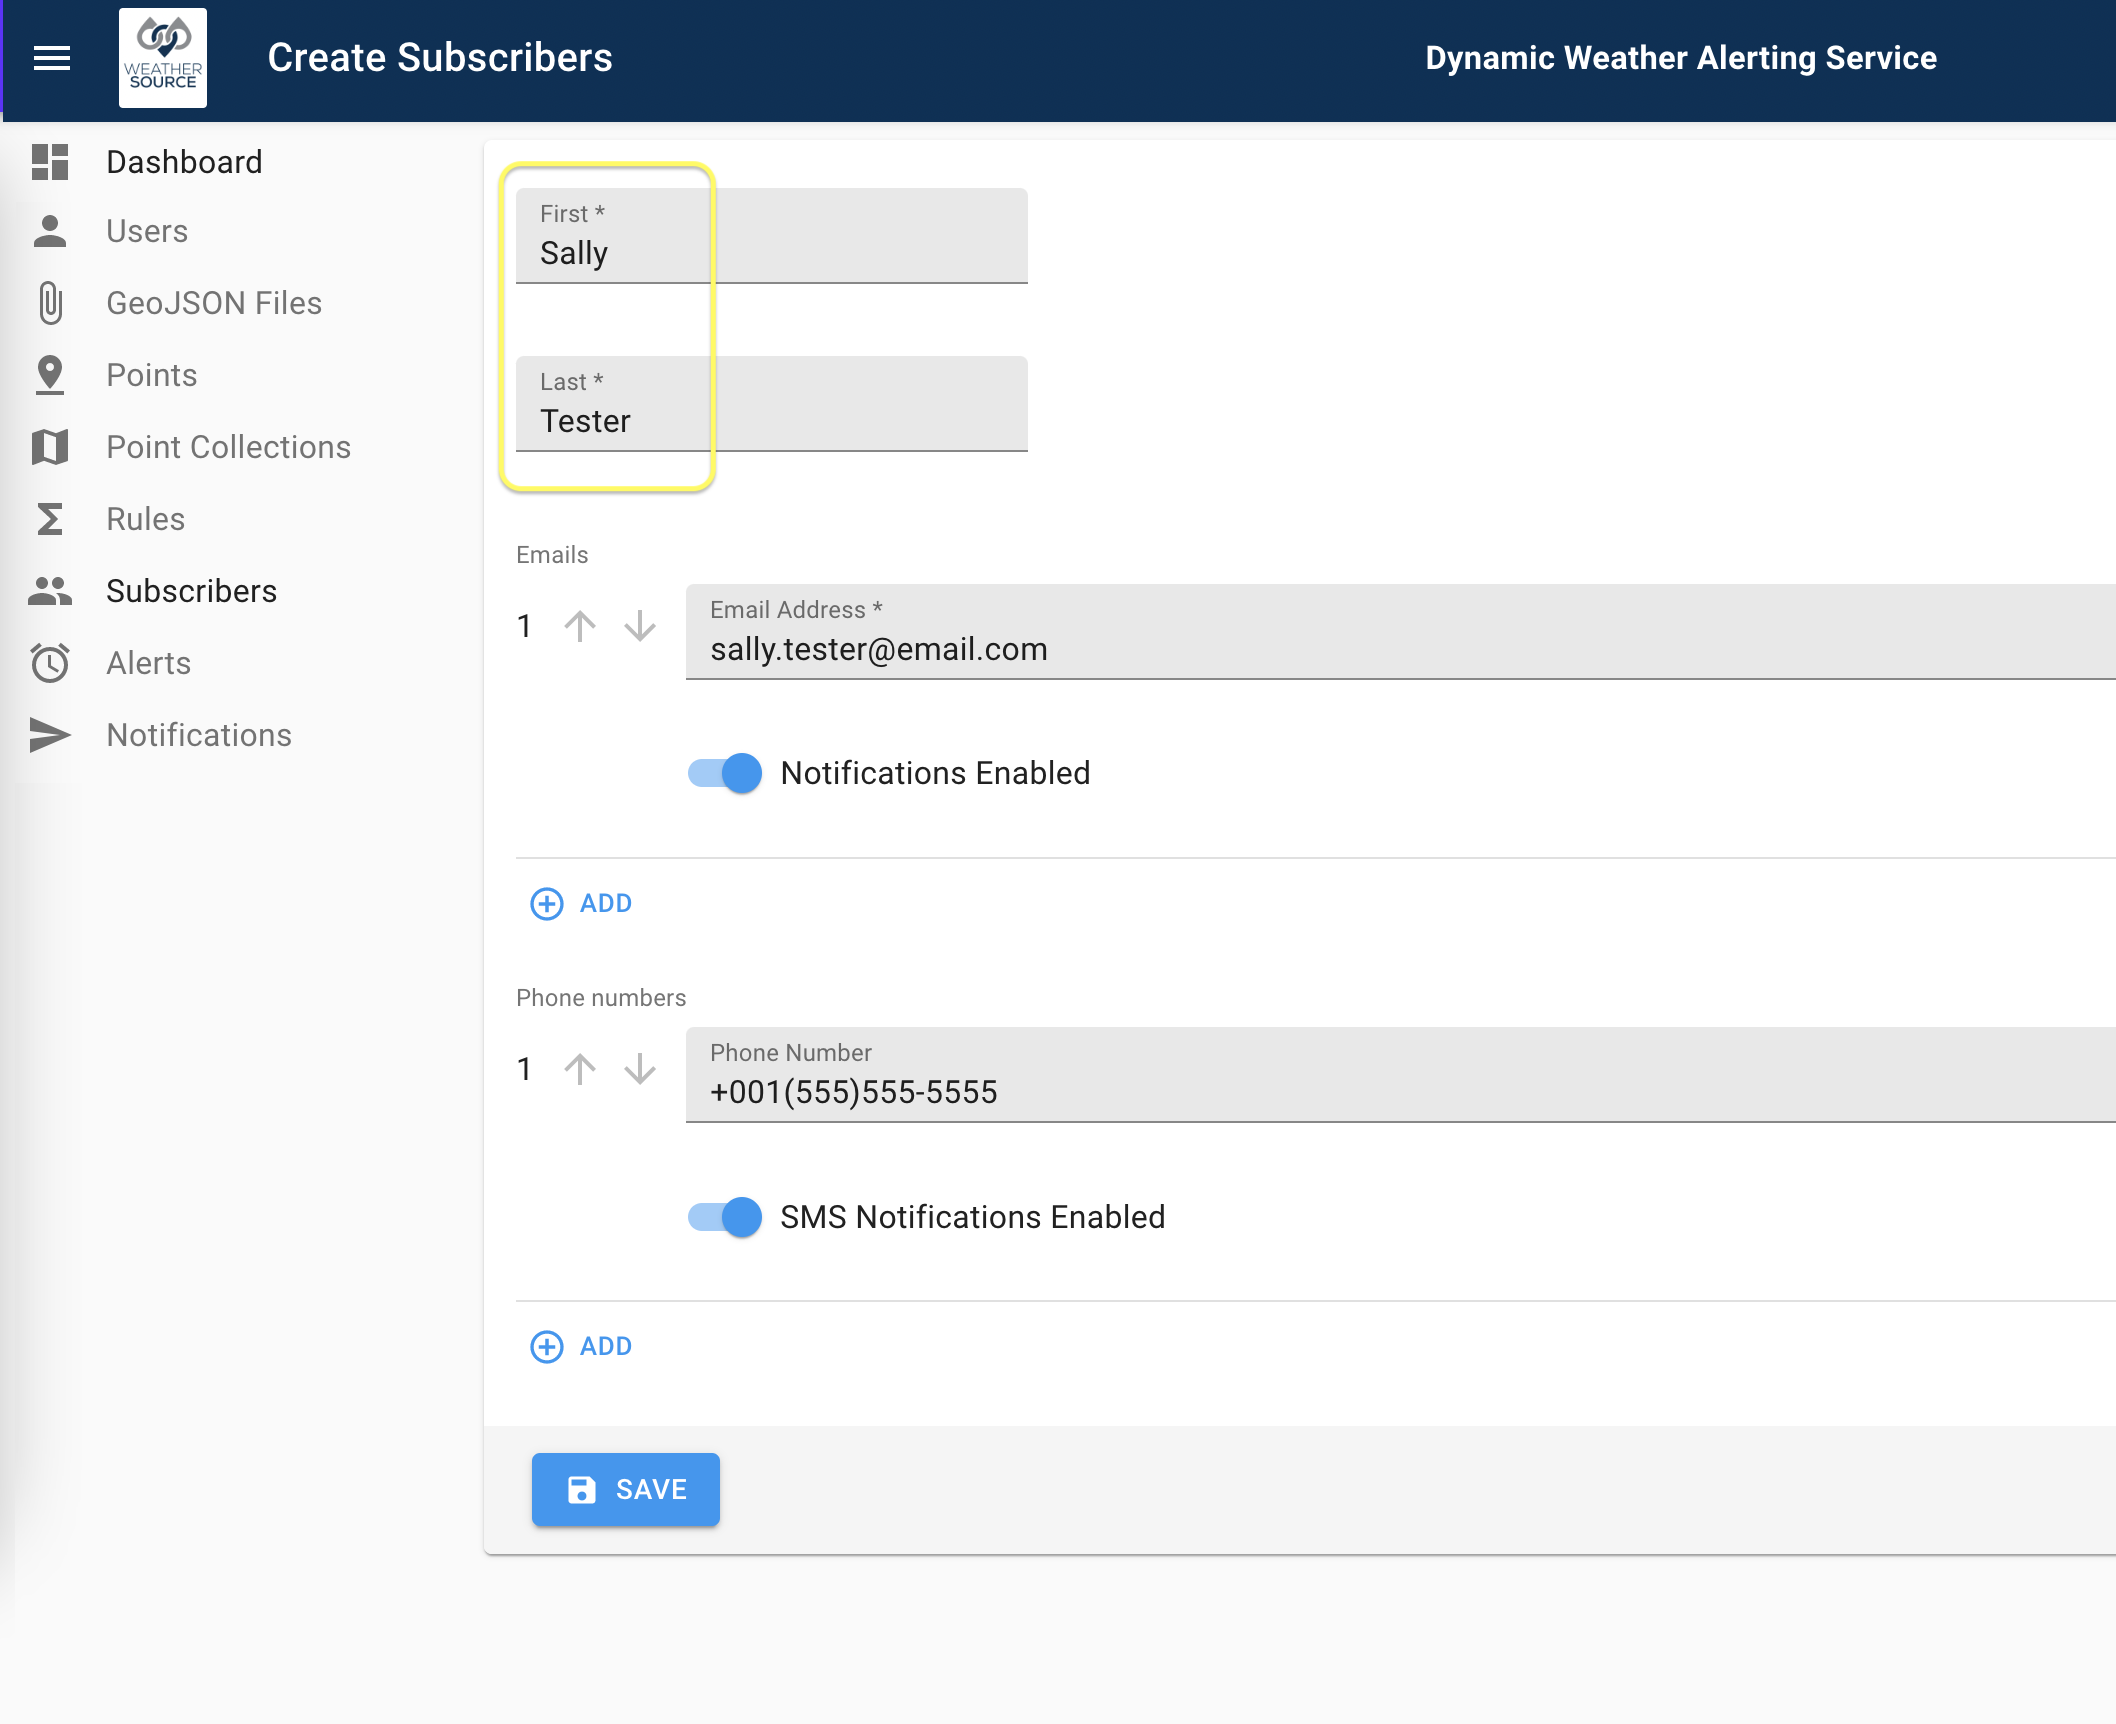
One can enter zero, one, or multiple emails. Each one can be individually enabled or disabled from receiving notifications. Emails are embedded as a notion within subscribers.

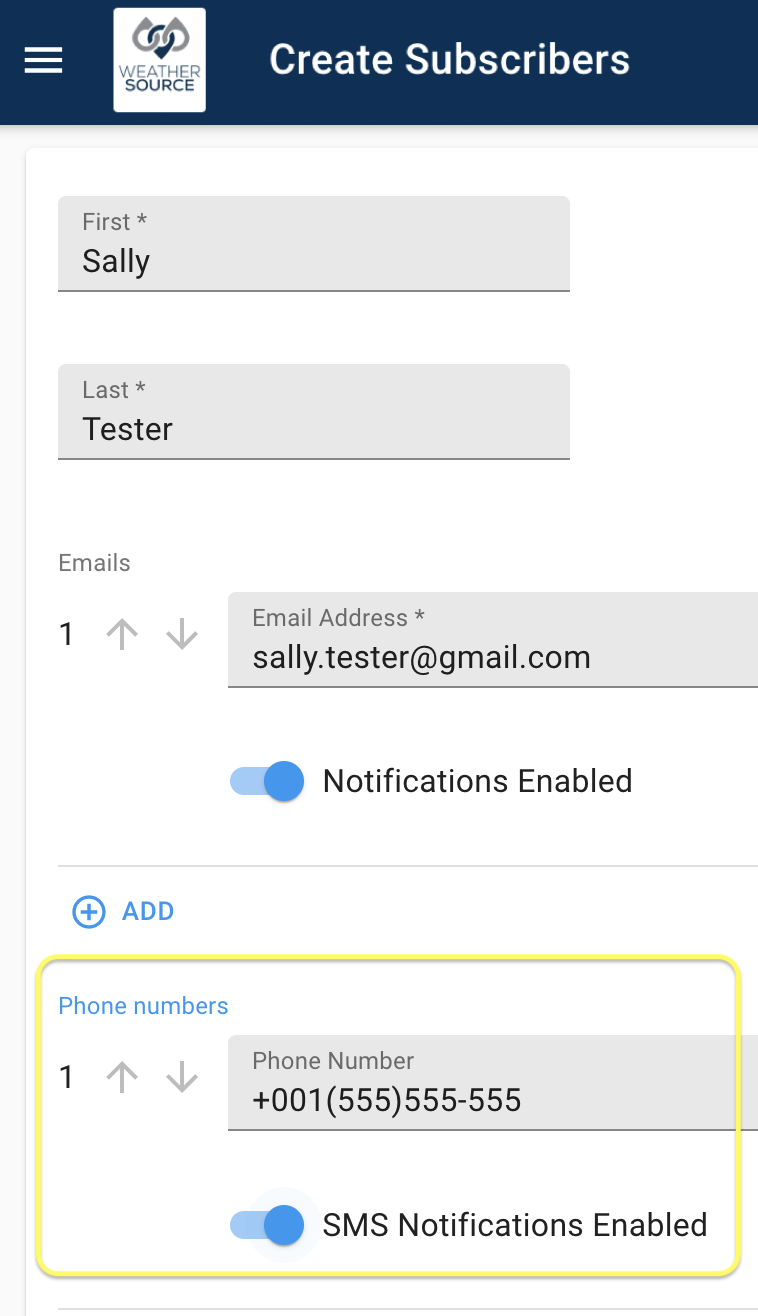
Phone numbers follow the same pattern as emails, e.g. one can provide zero, one, or multiple phone numbers, and each one can have SMS messaging enabled or disabled individually.
As mentioned before in the section on resource limits. The DWAS system will enforce limits on the number of subscribers in accordance with your pricing tier. You are free to adjust your pricing tier at any time. You can find more details about that in the accounting section.
Now that we a subscriber configured, let's move onto the final step of configuring an alert.
Configuring Subscriber Teams
Note: Subscriber teams are not yet released. They will be released as a minor update soon.
Subscribers may be grouped into teams. These may or may not correspond to real teams within your company. You are free to create and maintain however you deem appropriate.
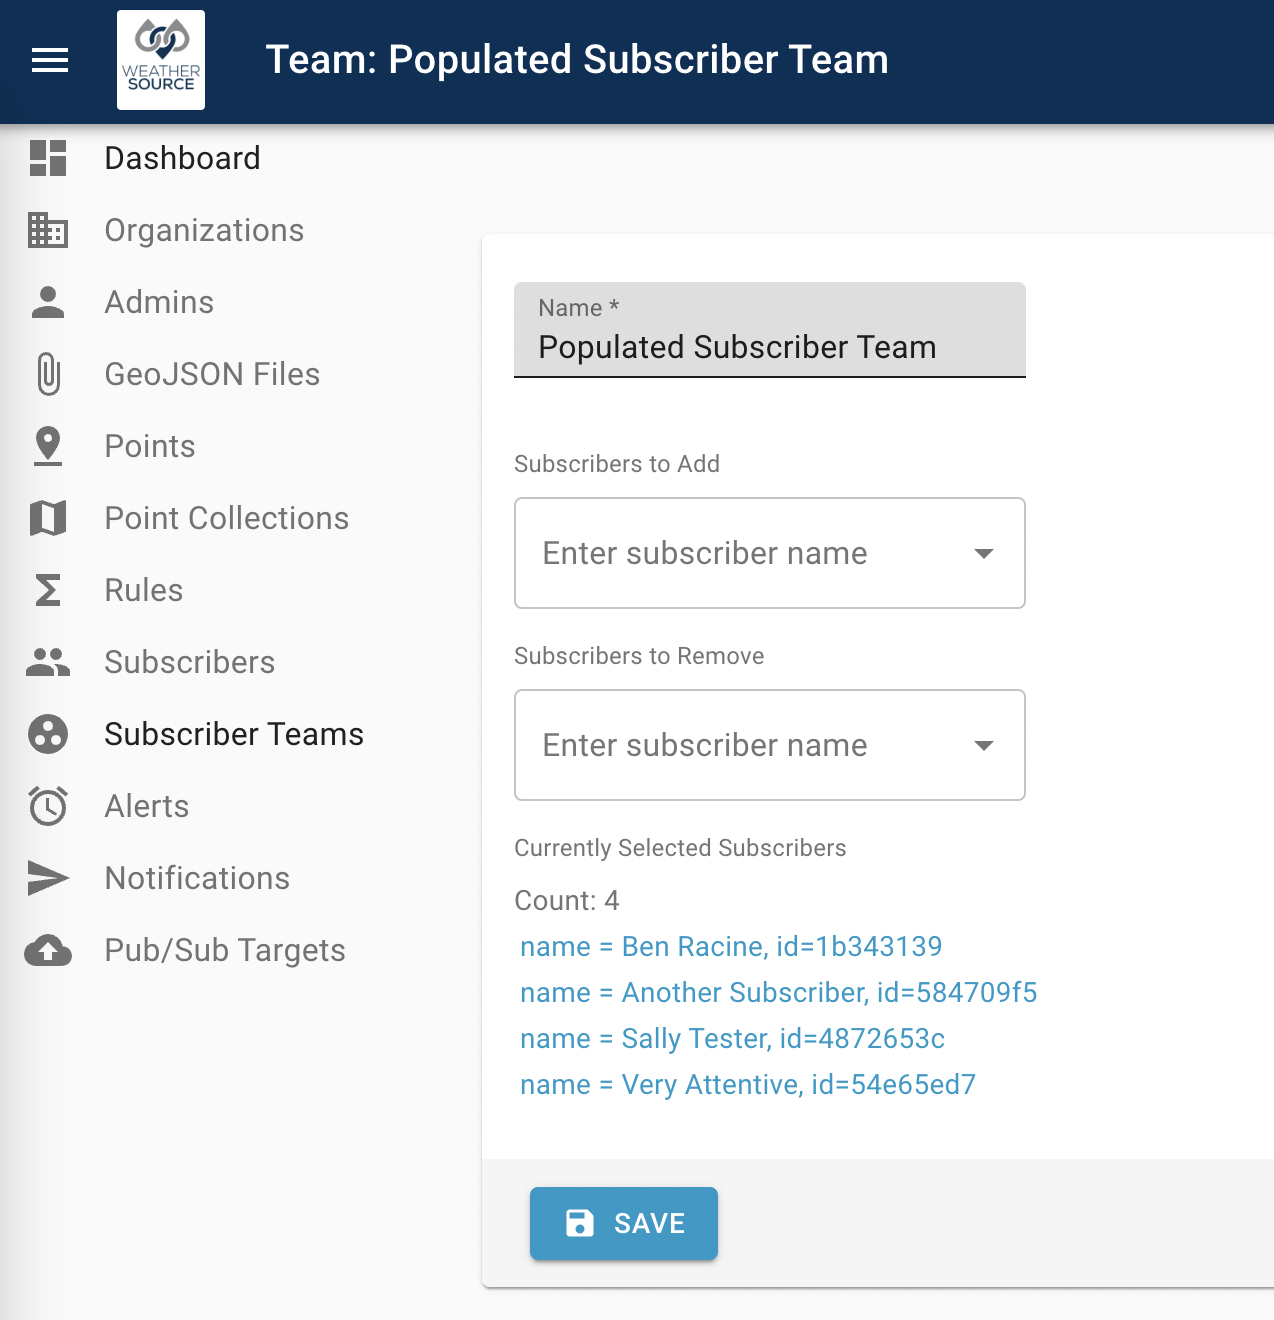
Subsriber teams are very simple, they are simply a named collection of subscribers. One can create an empty team and provide a name attribute. One can include or exclude the subscribers from the collection as they wish.
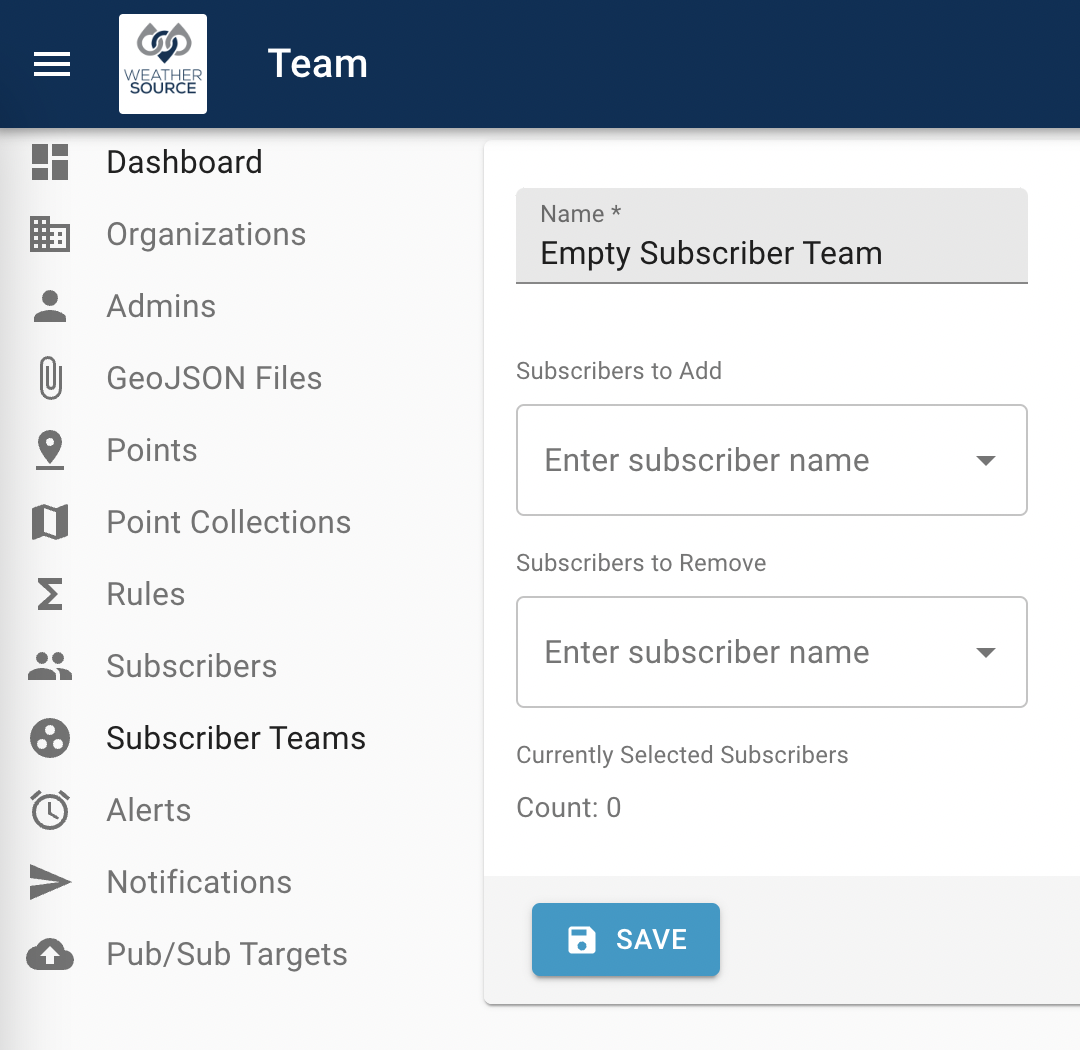
Then one can include or exclude previously included subscribers in a dropdown array select box. A dynamic list below provides feedback to help ensure the subscribers are included as intended.
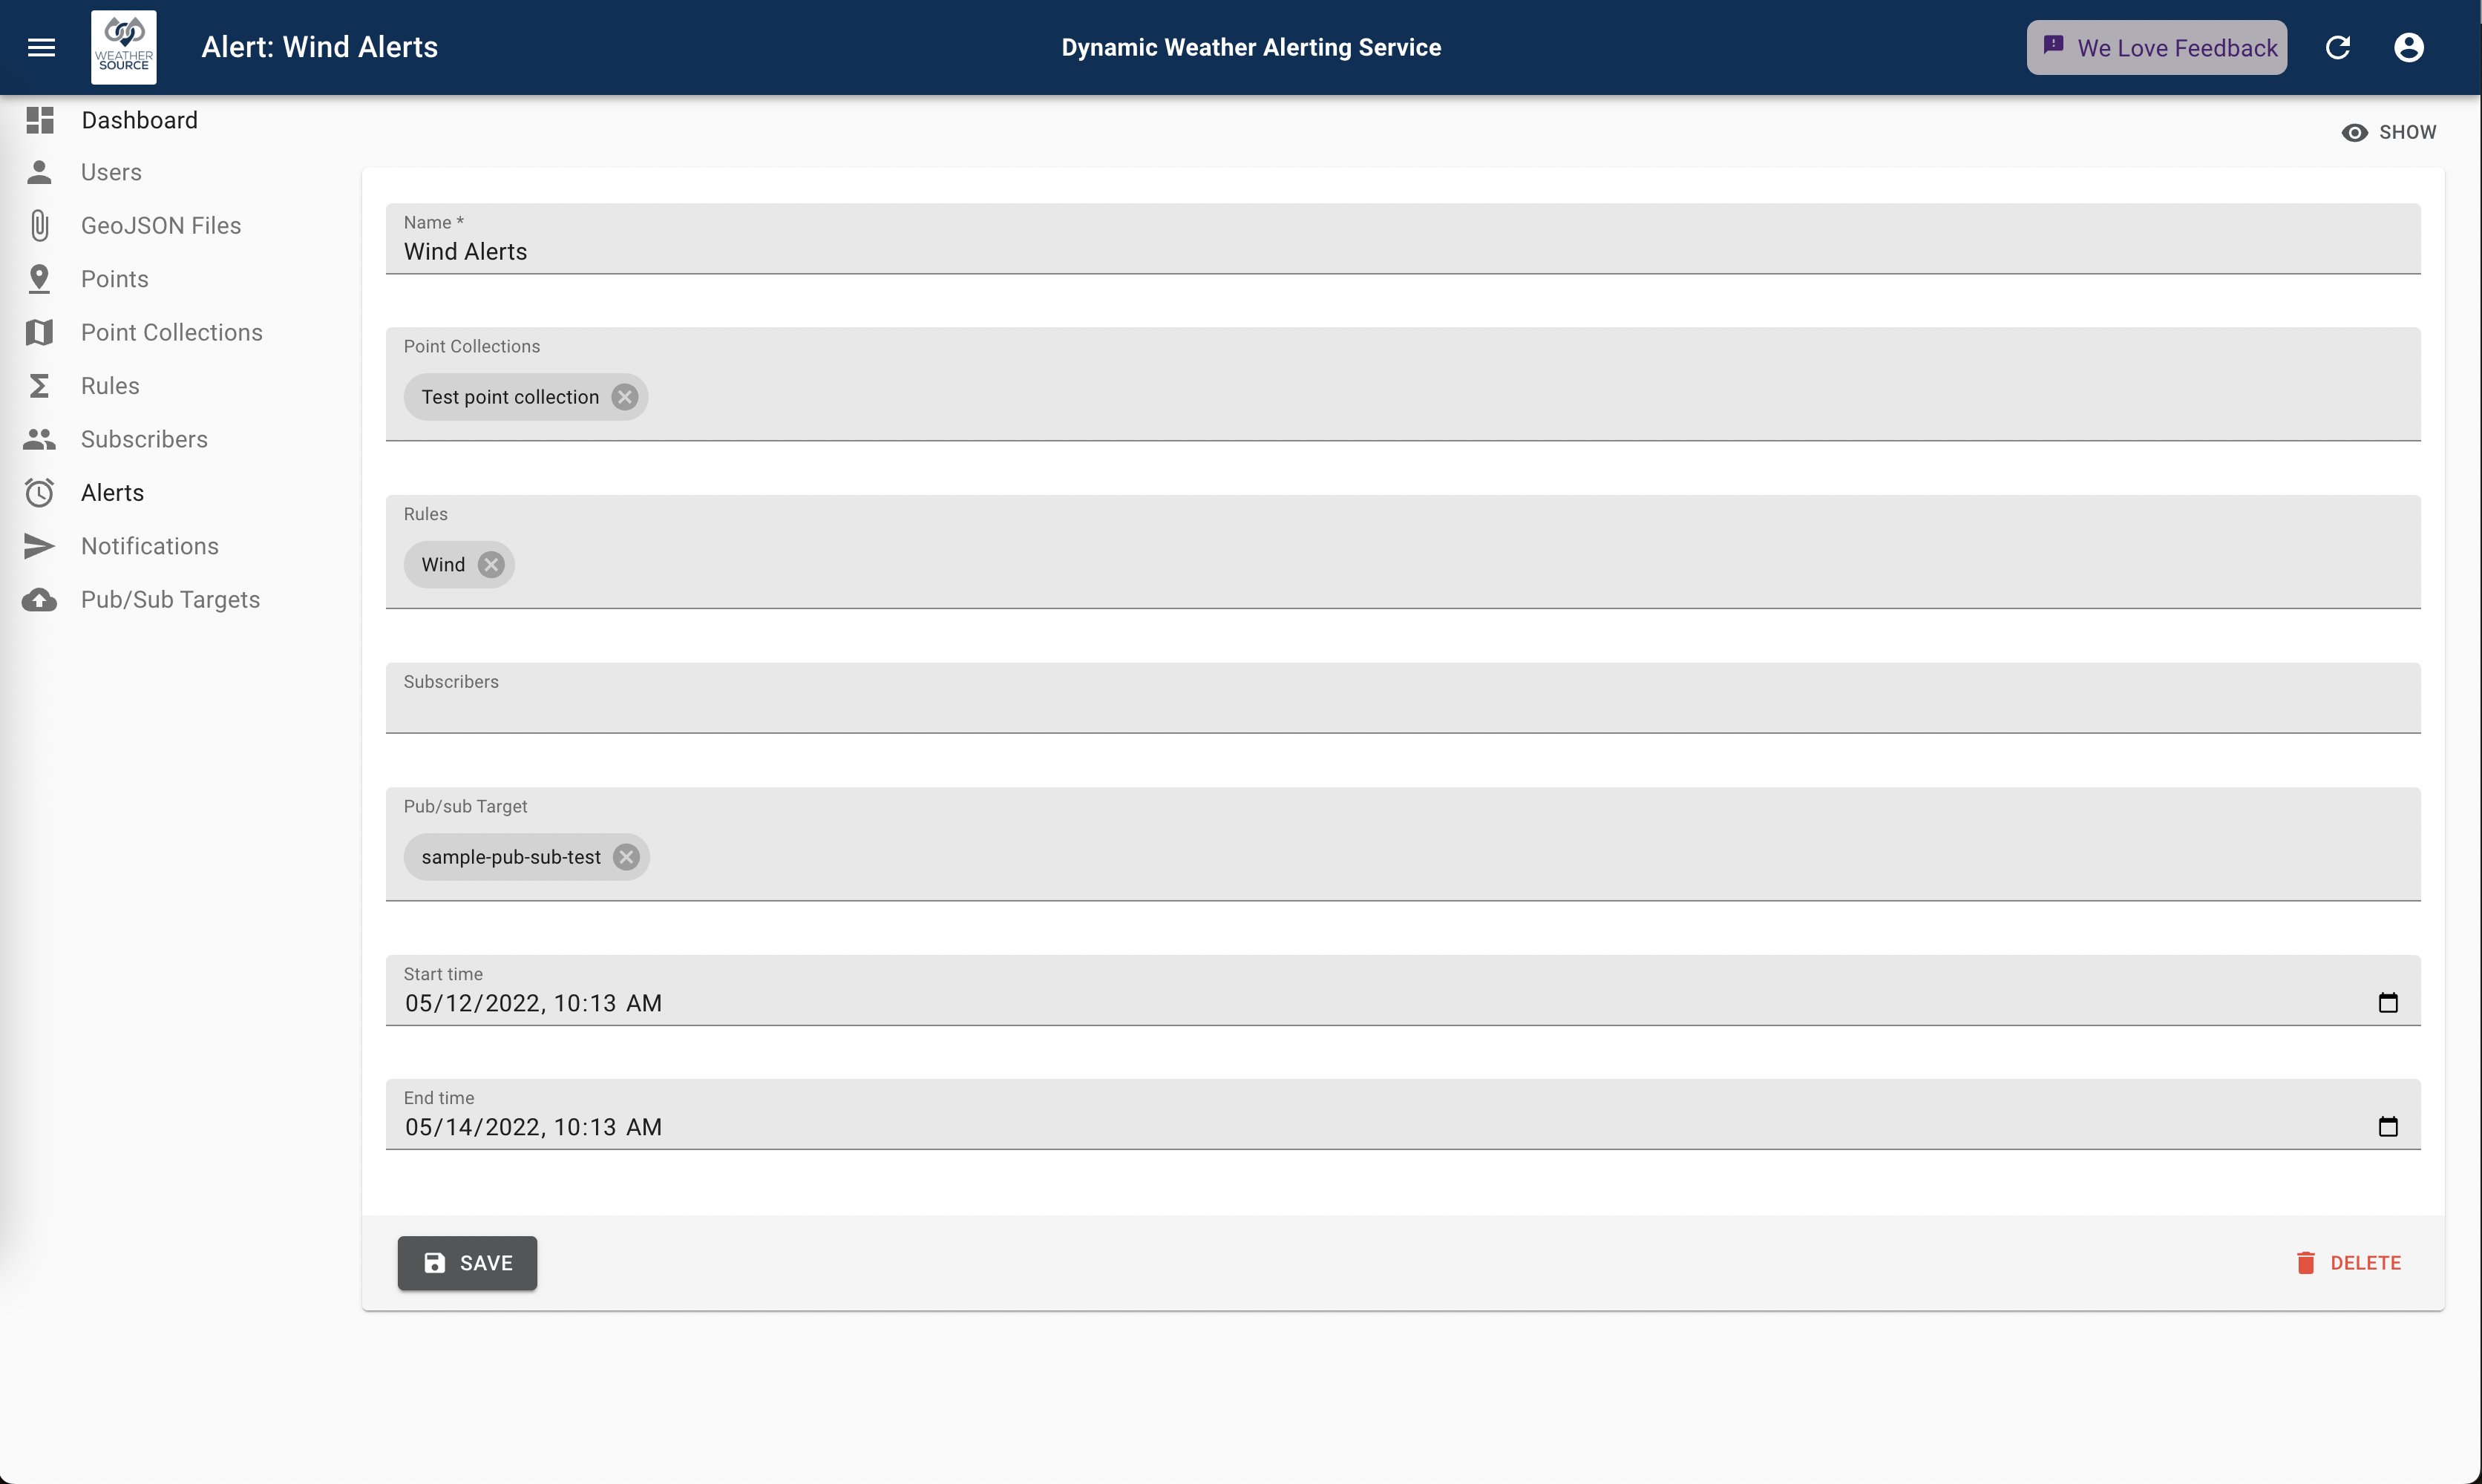
Configuring Alerts
The following fields are available for specification on an alert
- Name
- Start time
- End time
- Point Collection(s)
- Rule(s)
- Subscriber(s)
As previously discussed, alerts are best understood by the entities that are connected together by them.
They require a unique name and an optional start and end time. One should note that the start and end time pertain to the time that the alert is evaluated and whether to withold a notification or not. It does pertain to the lookahead window of the weather rule. They can be saved with just a name, but do not become actively recognized by the backend processing engine until they are bound to at least one of each of the entities that define them - such as point collections, rules, and subscribers. A properly configured alert with appropriate bindings is shown below.
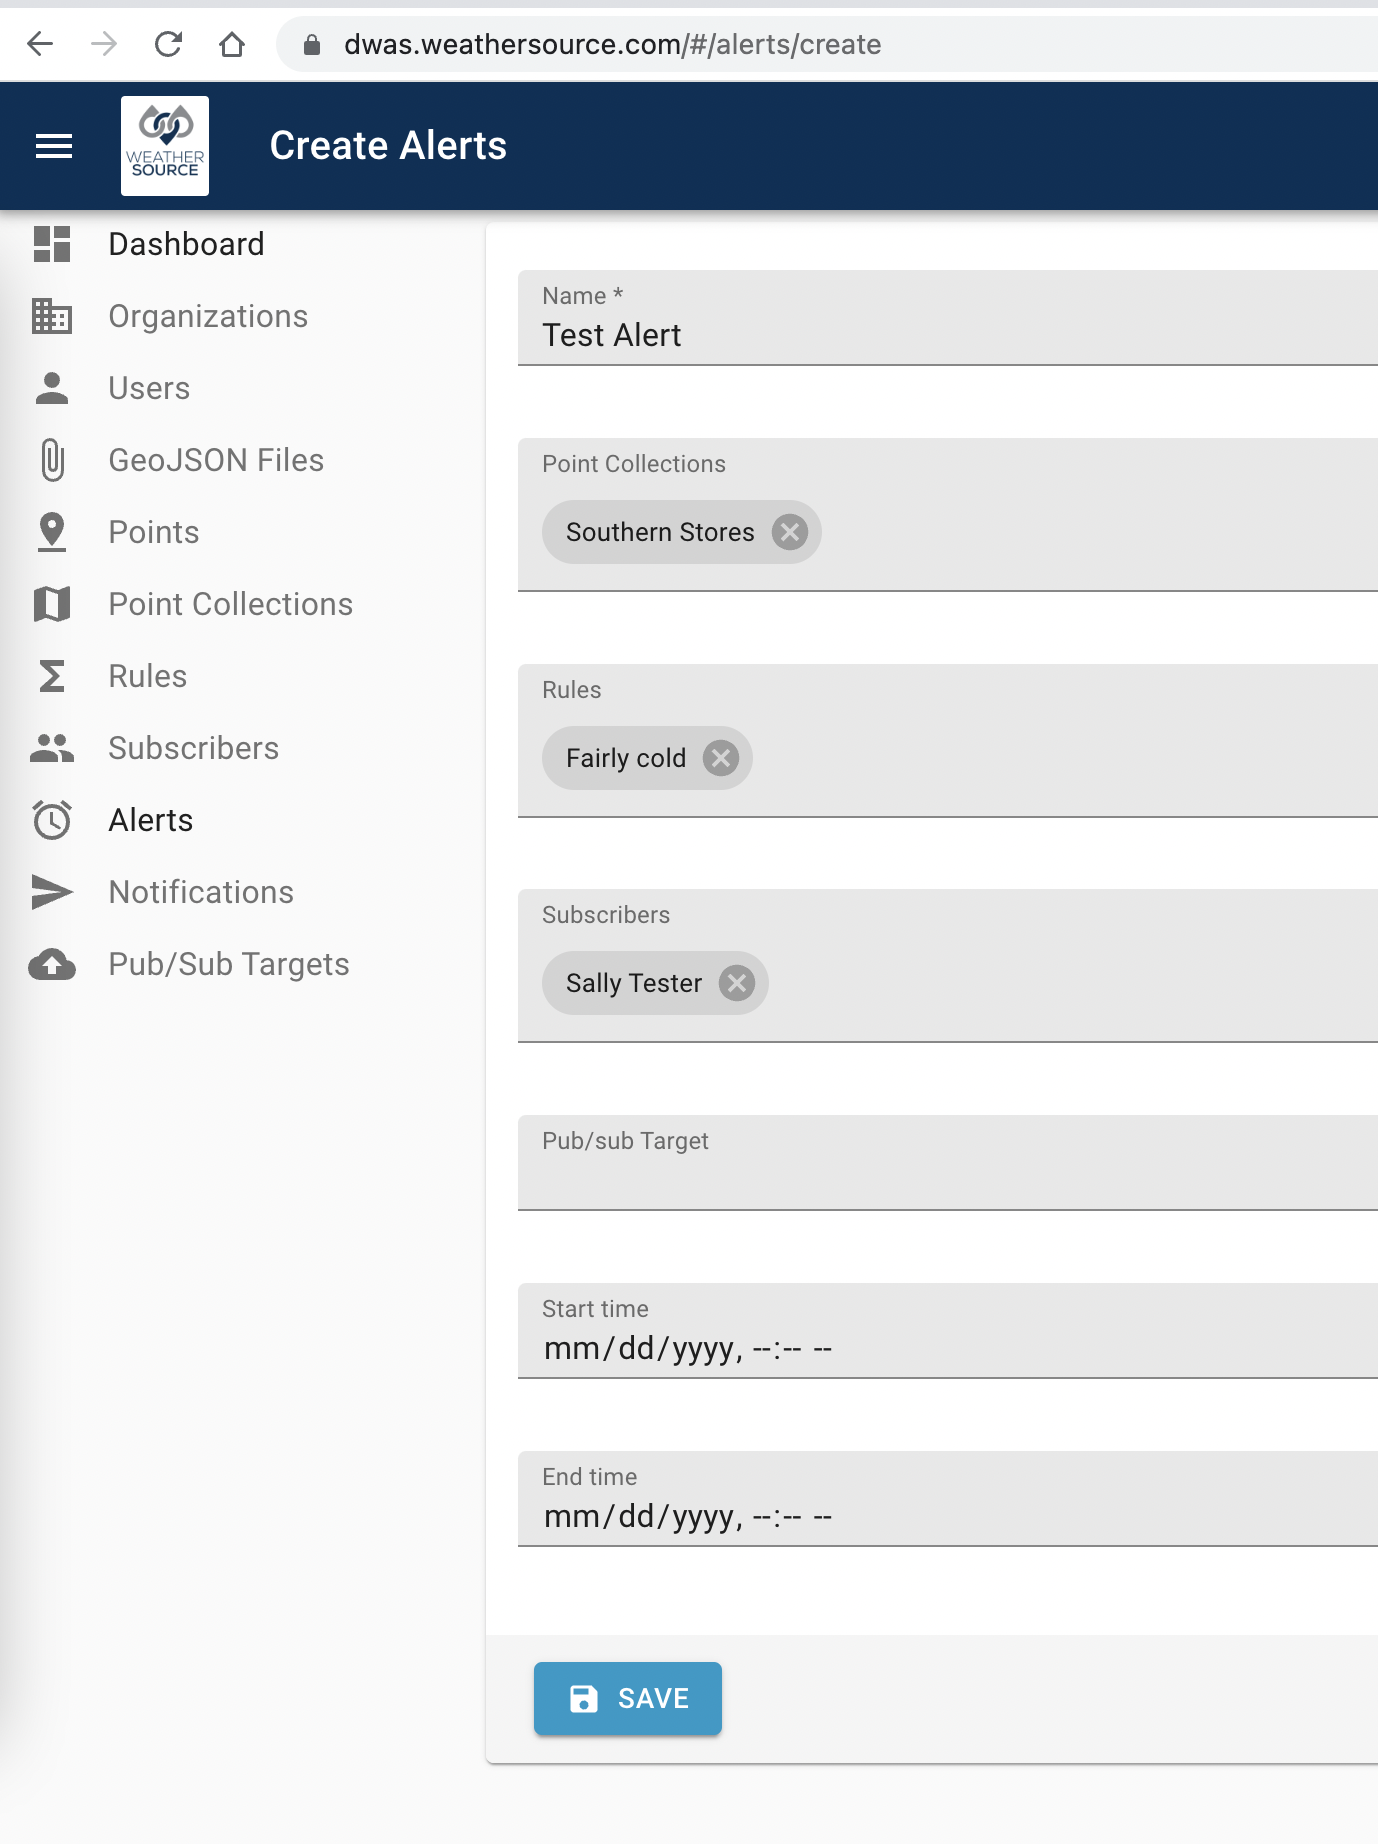
We now have a properly configured alert and our subscribers will start to receive notifications! Sally Tester will now be notified when one of the southern stores of interest sees atypically cold weather. Yay, we're starting to sense the power and flexibility of DWAS!
Let's explore a very powerful feature that makes it possible to connect DWAS to your own systems.
Pub/Sub Targets
One can think of a pub/sub target a lot like they do a human subscriber. It is simply yet another destination to send notifications when an alert is triggered. But, instead of providing an email or phone number to reach this entity, we need special information that allows DWAS to send information along to a pub/sub topic within the Google Cloud Platform.
Prerequisite to set up Pub/Sub
- Create a service account in GCP (Google Cloud Platform)
- Create a Project.
- Create a Topic inside the project.
- Create a JSON key of the service account.
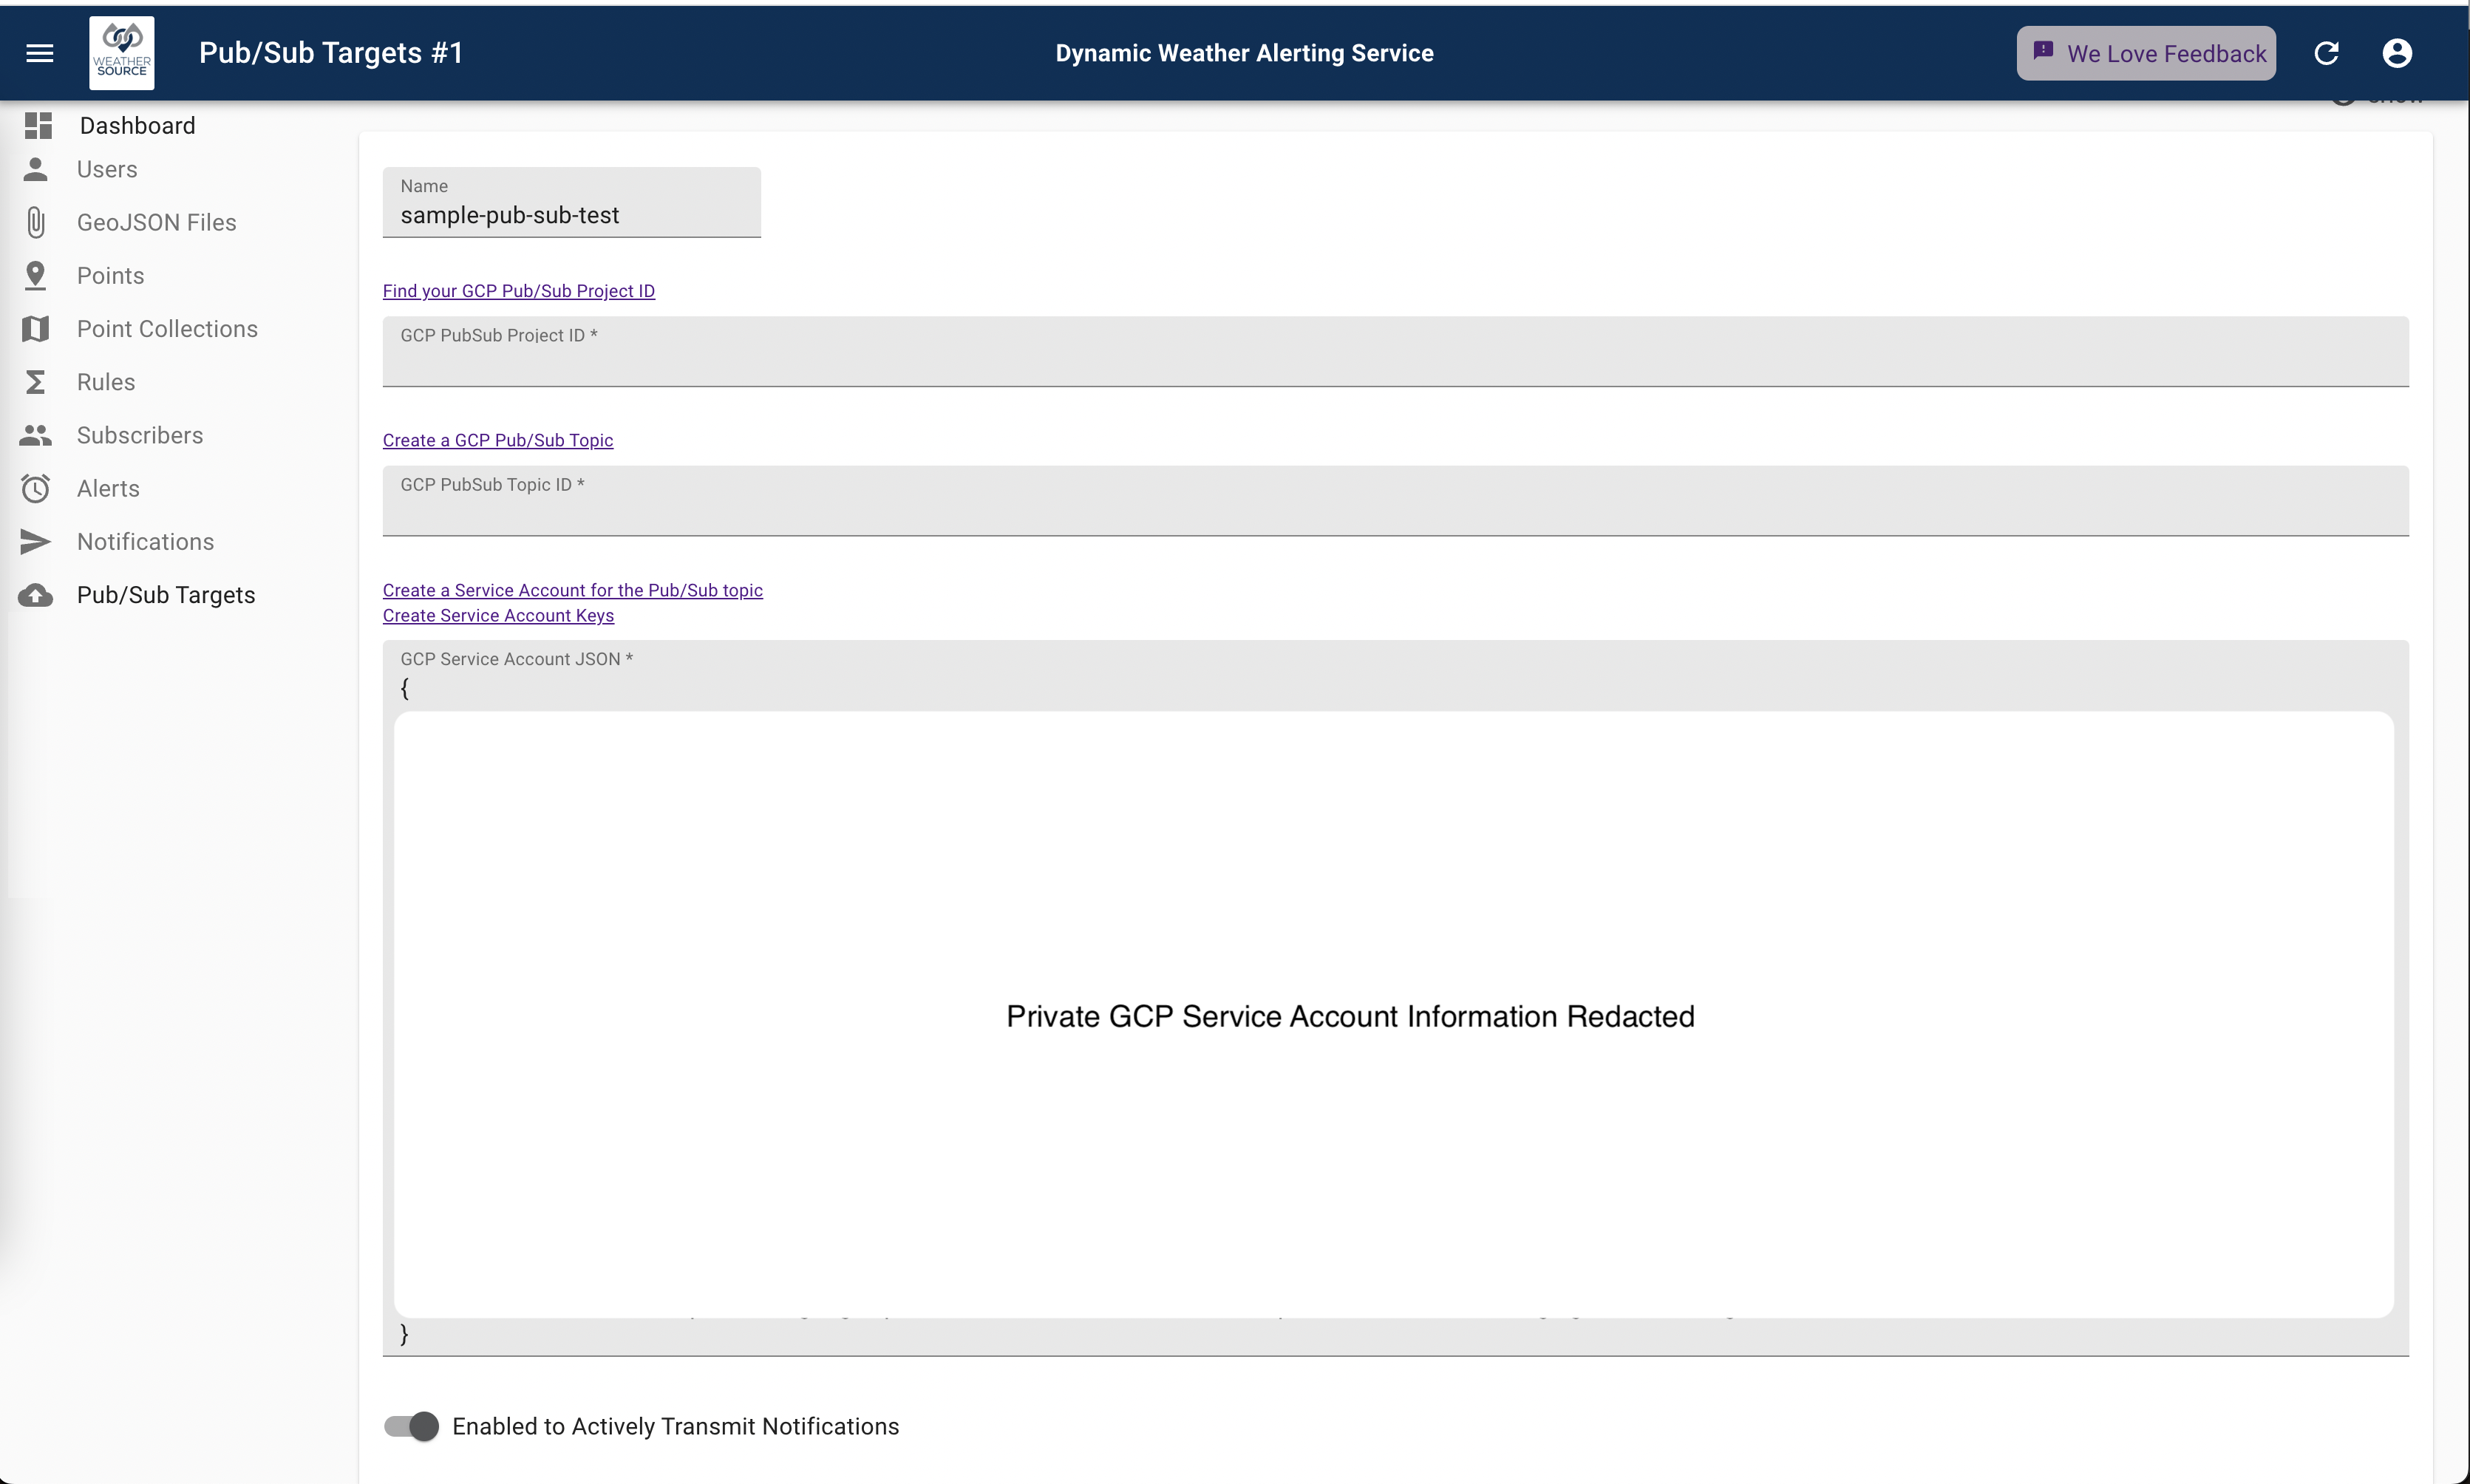
One can configure a pub/sub target within the DWAS service by using the appropriate create and edit interfaces and by providing the key fields:
- Project ID
- Topic ID
- GCP Service Account JSON
- Enabled (to actively transmit notifications)
A sample image of this configuration is as shown:
There can be a many-to-many relationship between alerts and pub/sub targets. Therefore the configuration is very flexible and the user is free to set up whatever flow they deem most appropriate. A sample image of binding a single pub/sub target with a single alert is as shown:
The user is then free to subscribe to this pub/sub topic using either a poll-based or push-based architecture. This configuration is the responsibility of the user and will not be discussed further here.
Before we explore notifications, we have one loose end to tend to. Let's explore a convenience feature for the bulk upload of points using GeoJSON file uploads.
Bulk Uploads
GeoJSON Files
One may have a large number of points they want to enter into the DWAS service from an outside data source. If one uses the GeoJSON standard format to describe these points, they can upload them en masse to DWAS. In the process, they can bind them to a particular point collection if desired. The interface for doing this shown below.
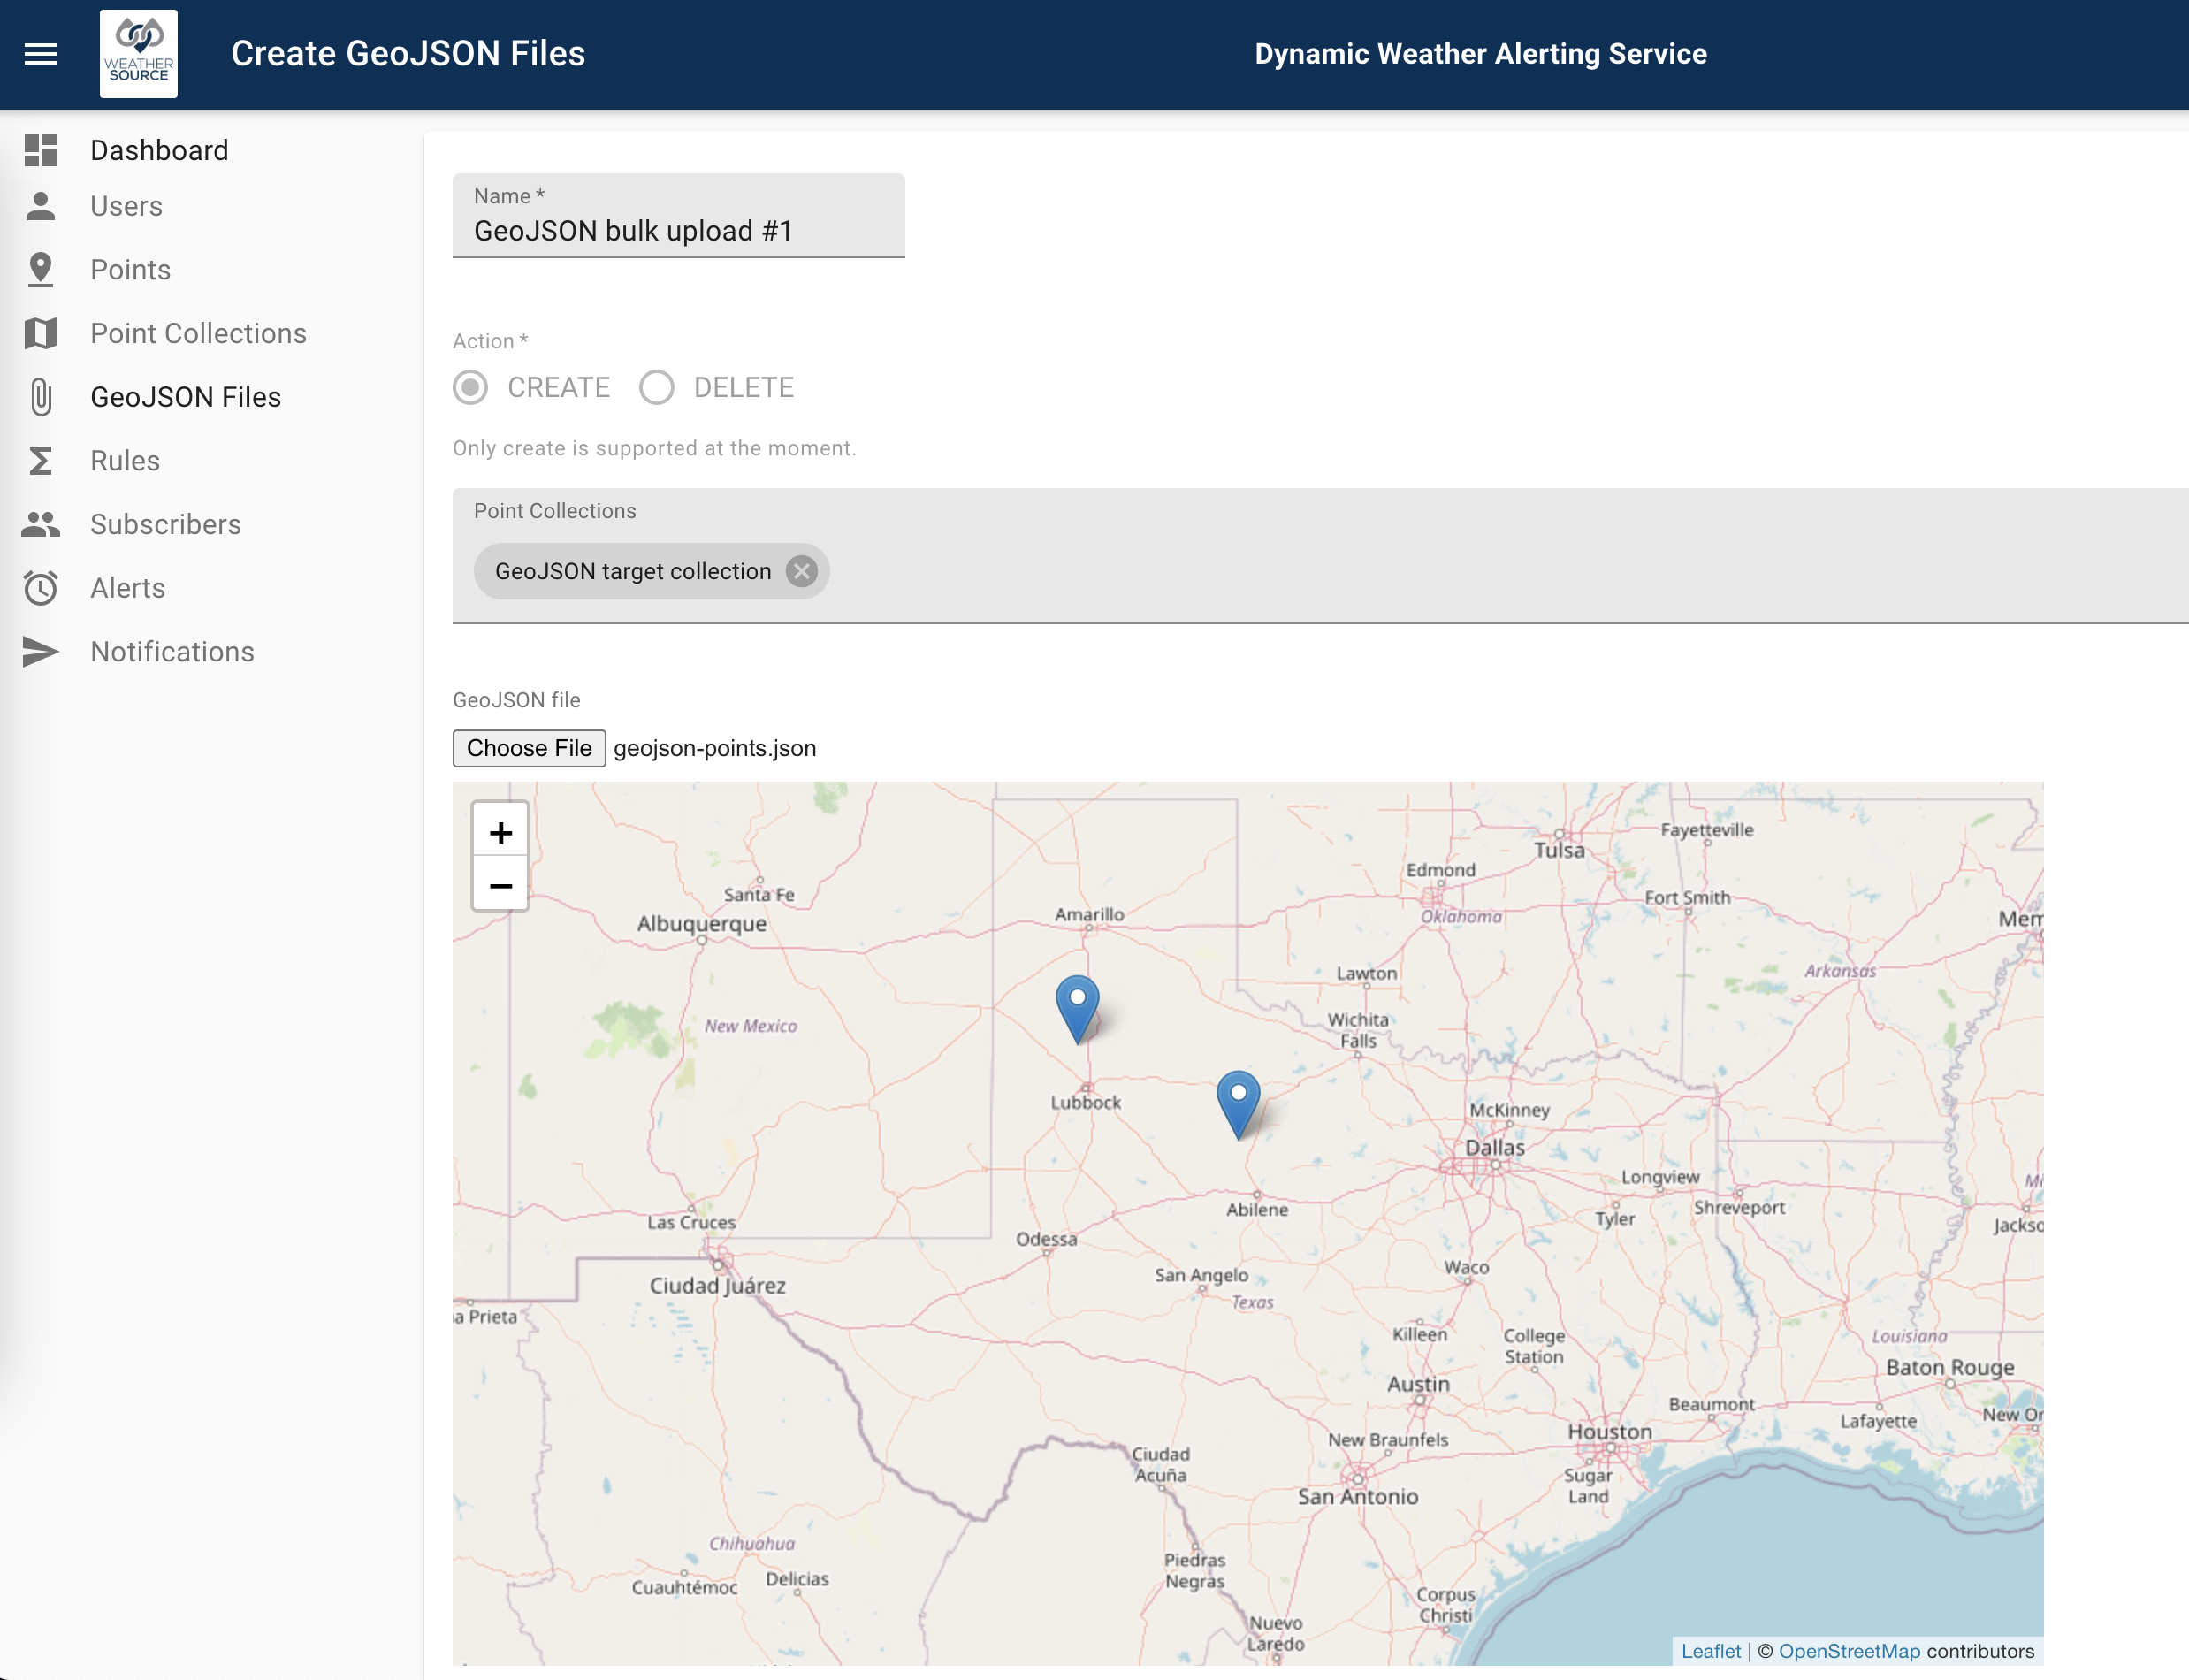
A list of previous uploaded GeoJSON files is kept in the database, but it should be noted that only the points (and the binding between points and point collections) that are created are a "first class citizen" in the DWAS entity hierarchy. For this reason, GeoJSON files are not included in the relationship diagram on the dashboard.
To put it another way, there is an immutable one-way flow of information from GeoJSON files to points. One cannot edit an uploaded GeoJSON file once it is uploaded. However, one can edit the points that were brought into the service from a GeoJSON upload.
Ok, great, with that extra feature out of the way we can finally discuss the details of the notifications.
Chapter 2: Notifications
There are two different ways to be notified that your alerts have been triggered: text messages and emails.
Further, notifications are stored and available for navigation from the Web User Interface.
Soon, notifications will also be available for machine to machine communication by configuring a Pub/Sub queue from within DWAS that clients can utilize for either pushed-based or pull-based consumption.
Texts
Notifications
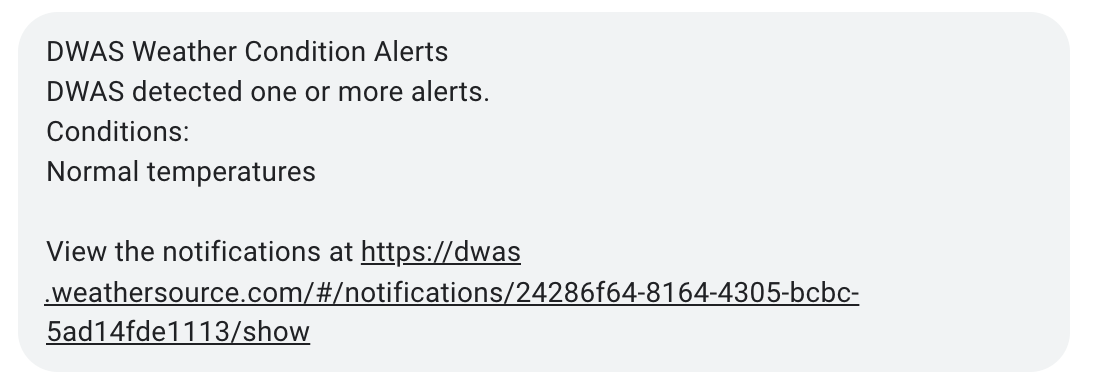
When an alert is triggered, each SMS-enabled phone number for each subscriber will be contacted. The texts provide a signed URL that is valid for 60 minutes after the notification occurs providing detailed notification information in JSON format.
The information will look something like as shown below:
SMS Limit Reporting
As mentioned before in the section on resource limits. The DWAS system will enforce limits on the number of notifications in accordance with your pricing tier. You are free to adjust your pricing tier at any time. You can find more details about that in the accounting section.
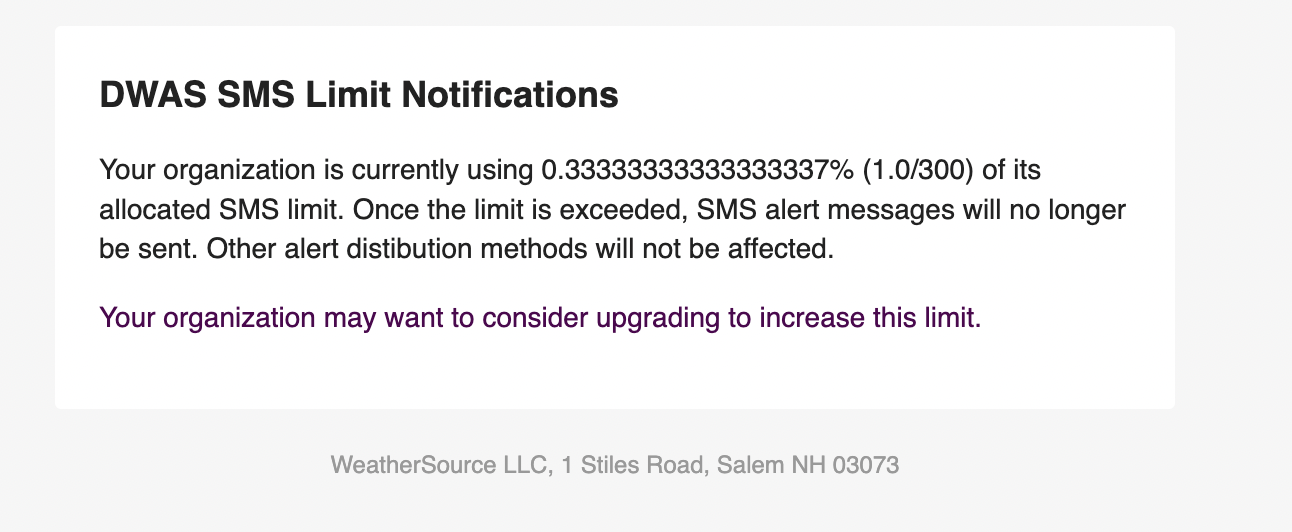
SMS messages are much more expensive than emails. Thus, as you approach your SMS limit we will provide emails when you approach your SMS limit so that your team can plan accordingly. This email will appear as shown below.
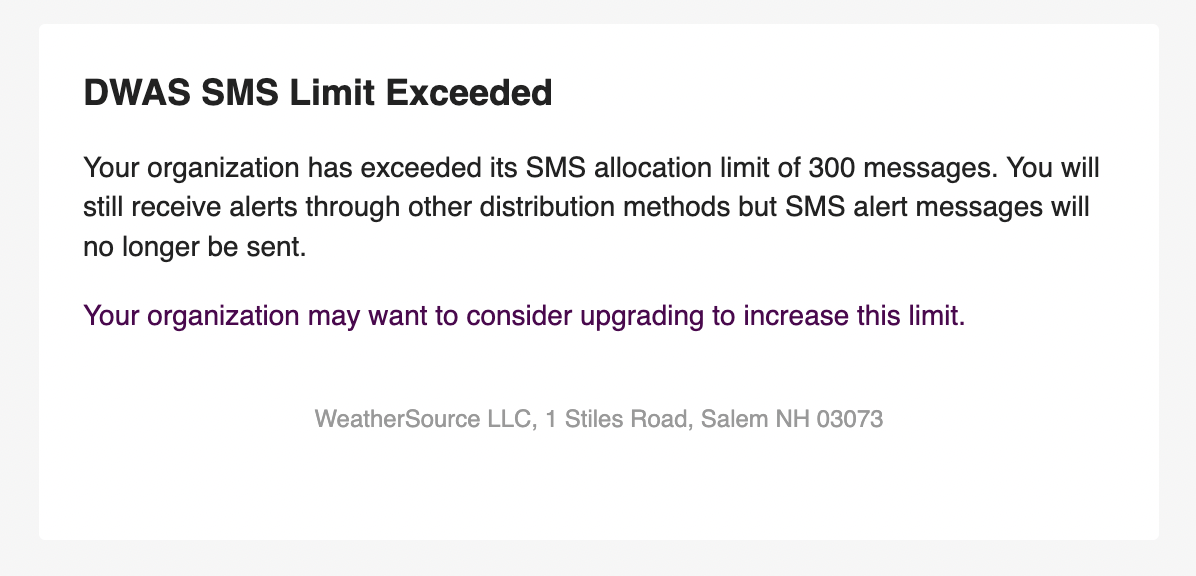
Further, if you actually hit your limit, we will notify you again. This message is shown below.
Emails
Notifications
An example of an email notification is provided below:
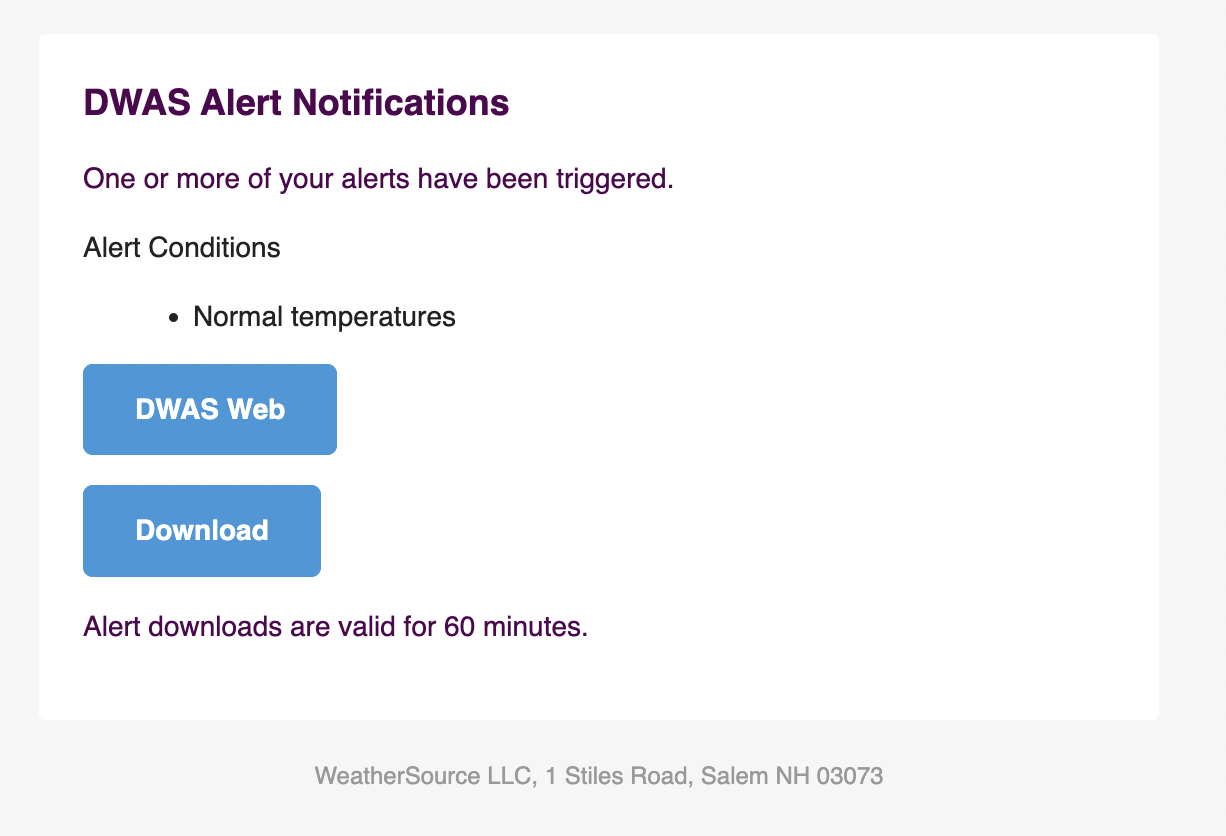
The blue "DWAS Web" button brings a user to the Web User Interface and to the notification of interest, specifically.
The blue "Download" button provides a signed URL that is valid for 60 minutes after the notification occurs. This provides the ability to download the detailed notification information in JSON format.
SMS Limit Reporting
As mentioned before in the section on resource limits. The DWAS system will enforce limits on the number of notifications in accordance with your pricing tier. You are free to adjust your pricing tier at any time. You can find more details about that in the accounting section.
SMS messages are much more expensive than emails. Thus, as you approach your SMS limit we will provide emails when you approach your SMS limit so that your team can plan accordingly. This email will appear as shown below.
Further, if you actually hit your limit, we will notify you again. This message is shown below.
Notification Pane
Notifications
The Web User Interface stores notifications and provides powerful filtering, sorting, and mapping capabilities to aid in navigating a multitude of notifications.
They appear in a notification list similar to the way the entities in the alert setup are:
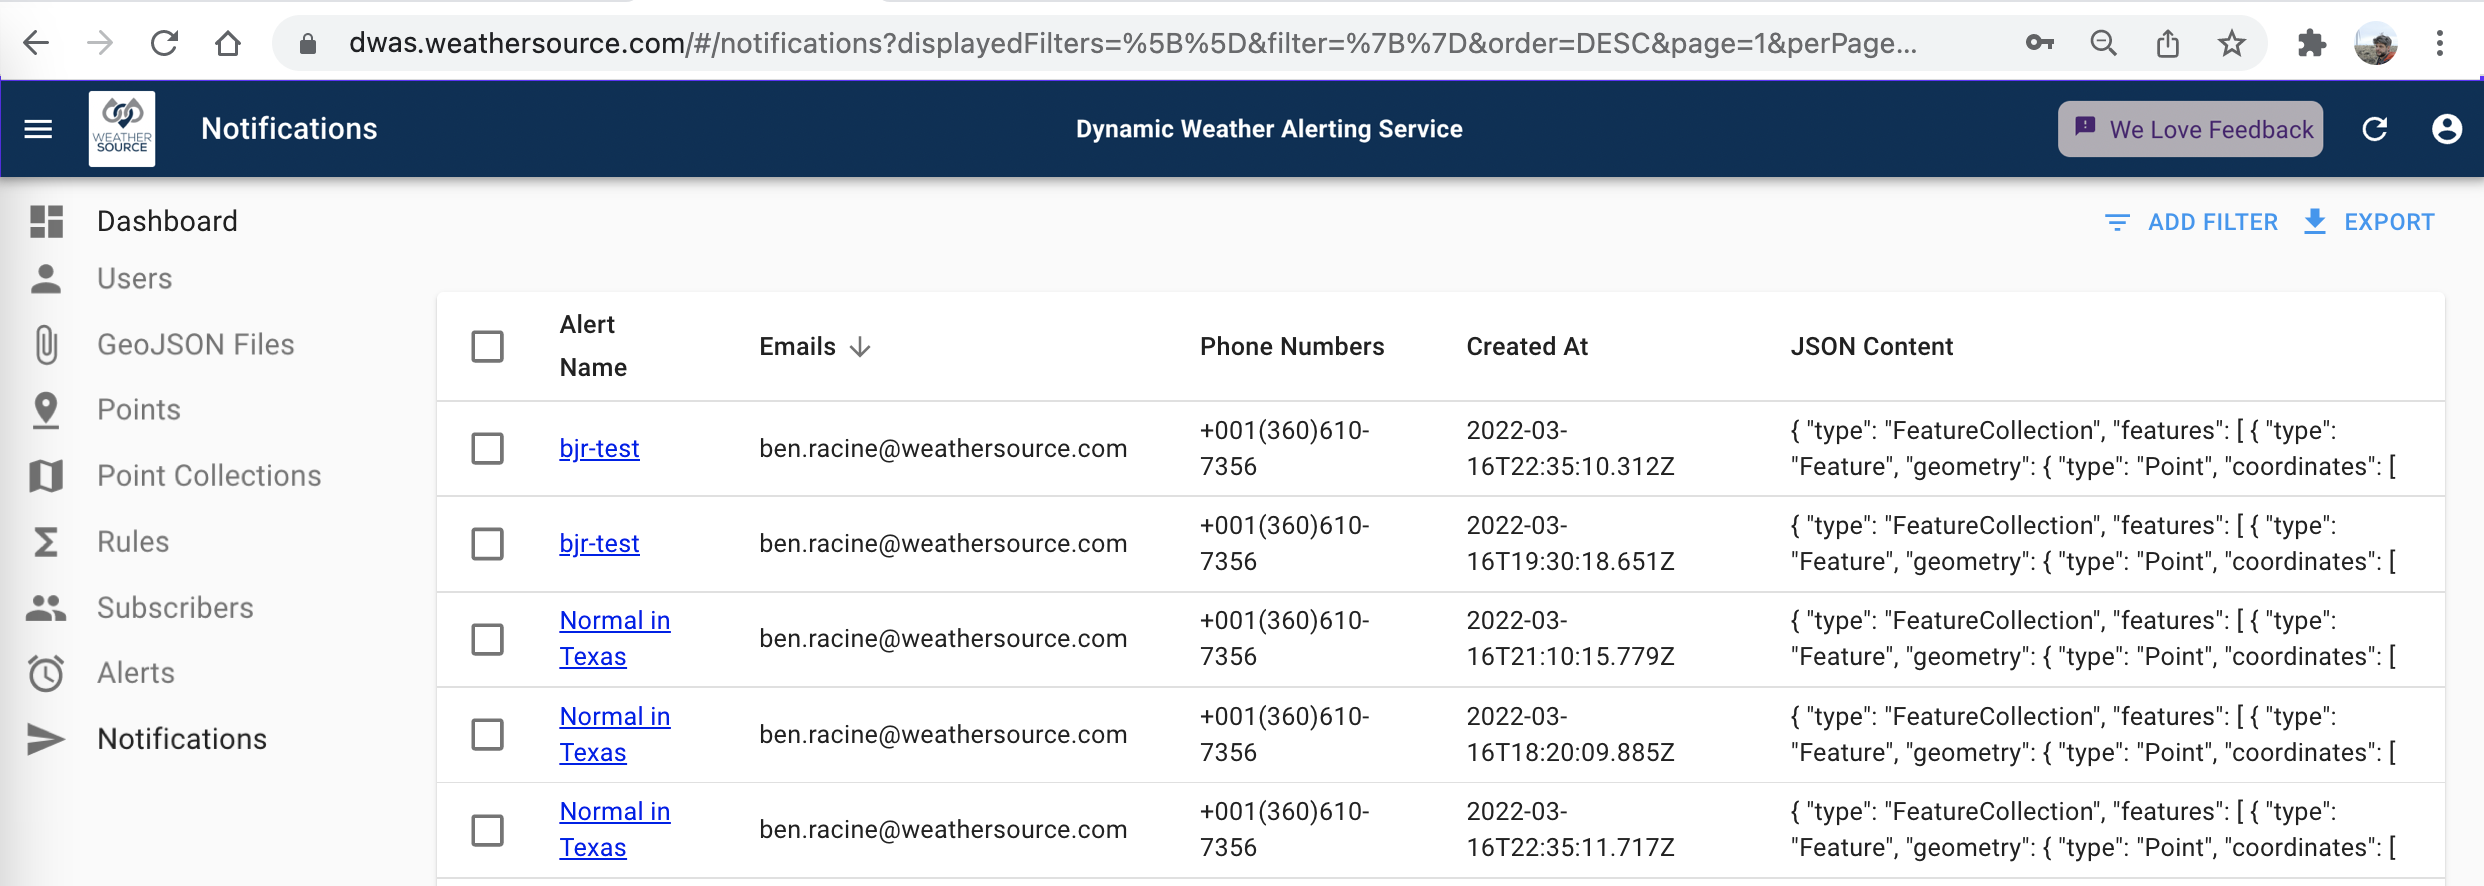
The export and filter functionality operate in a similar manner as was discussed earlier.
One can filter notifications by the alert that generated them.
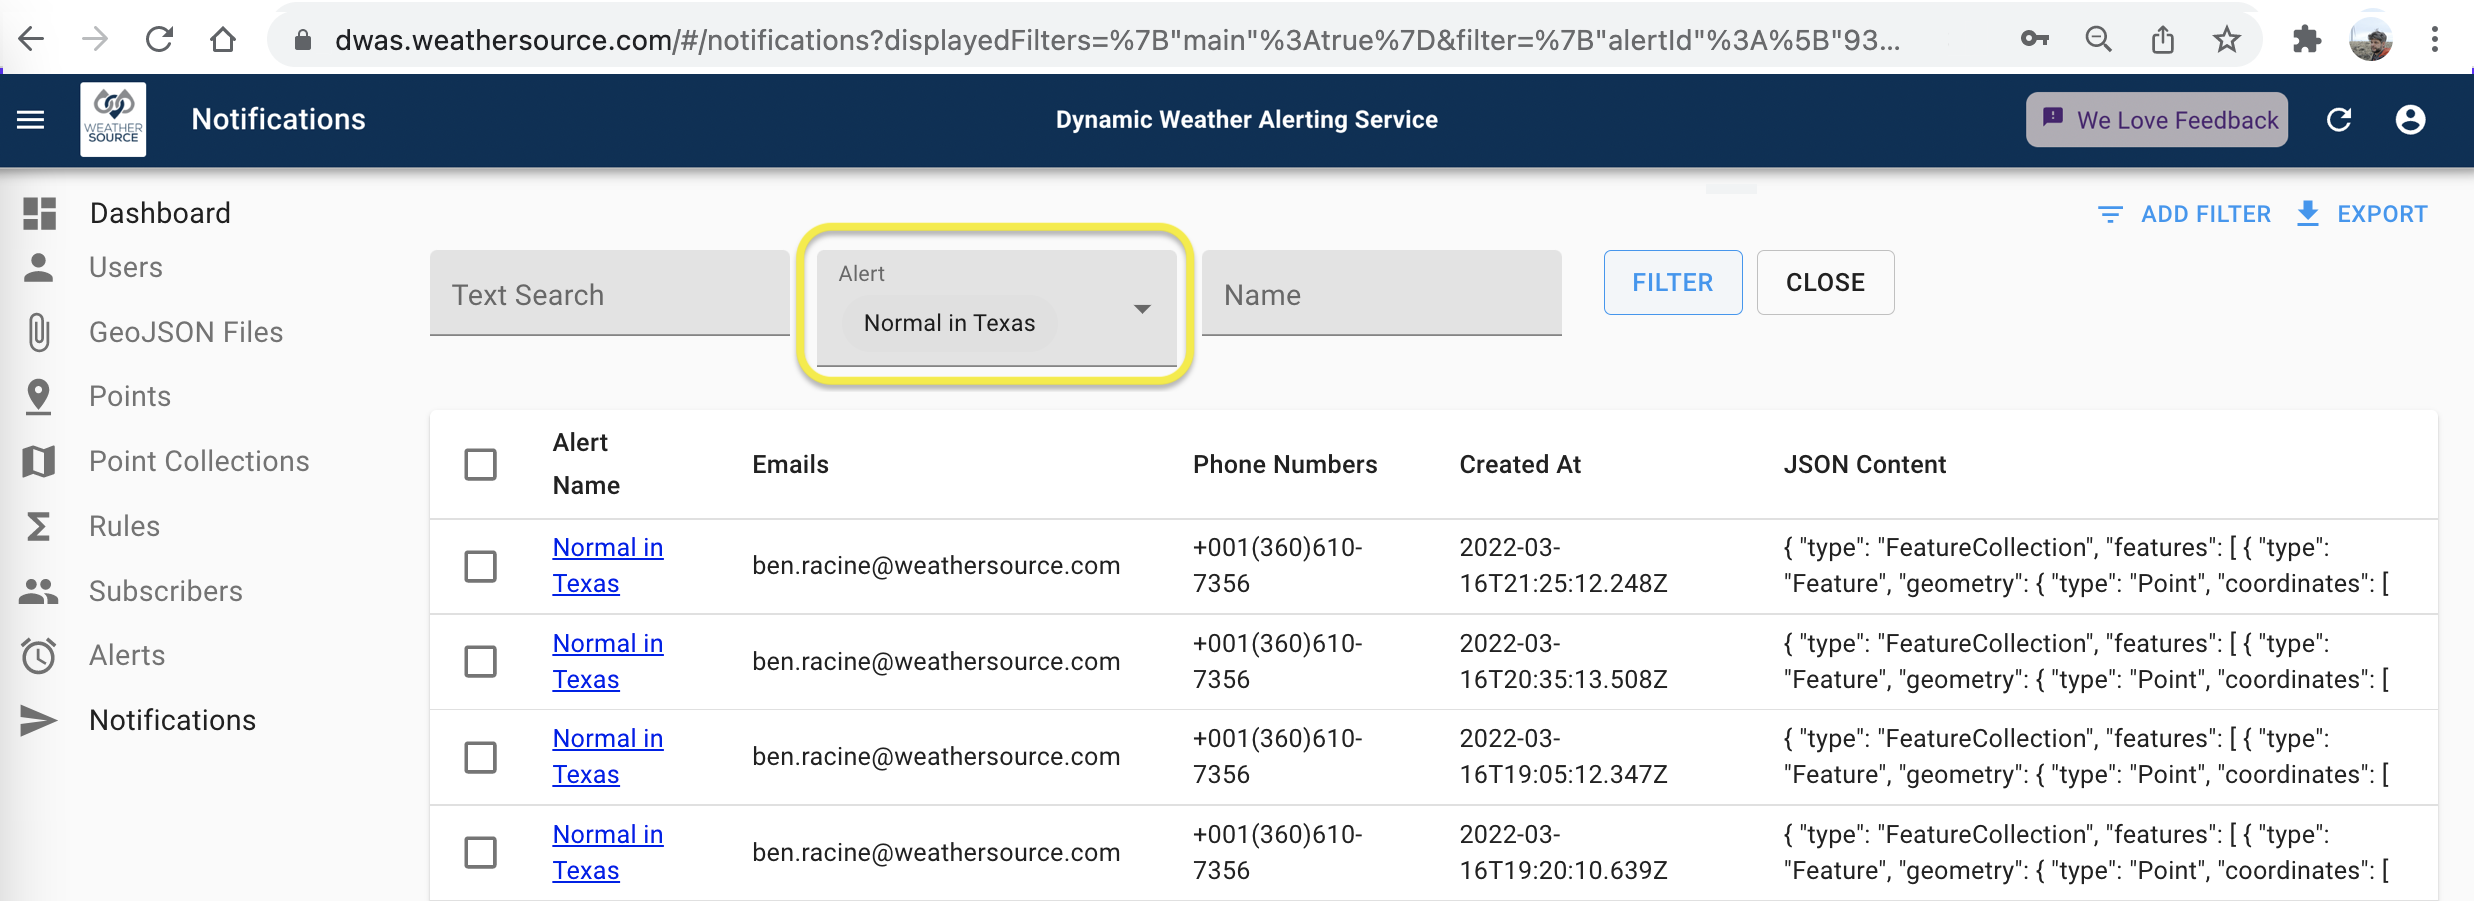 .
.
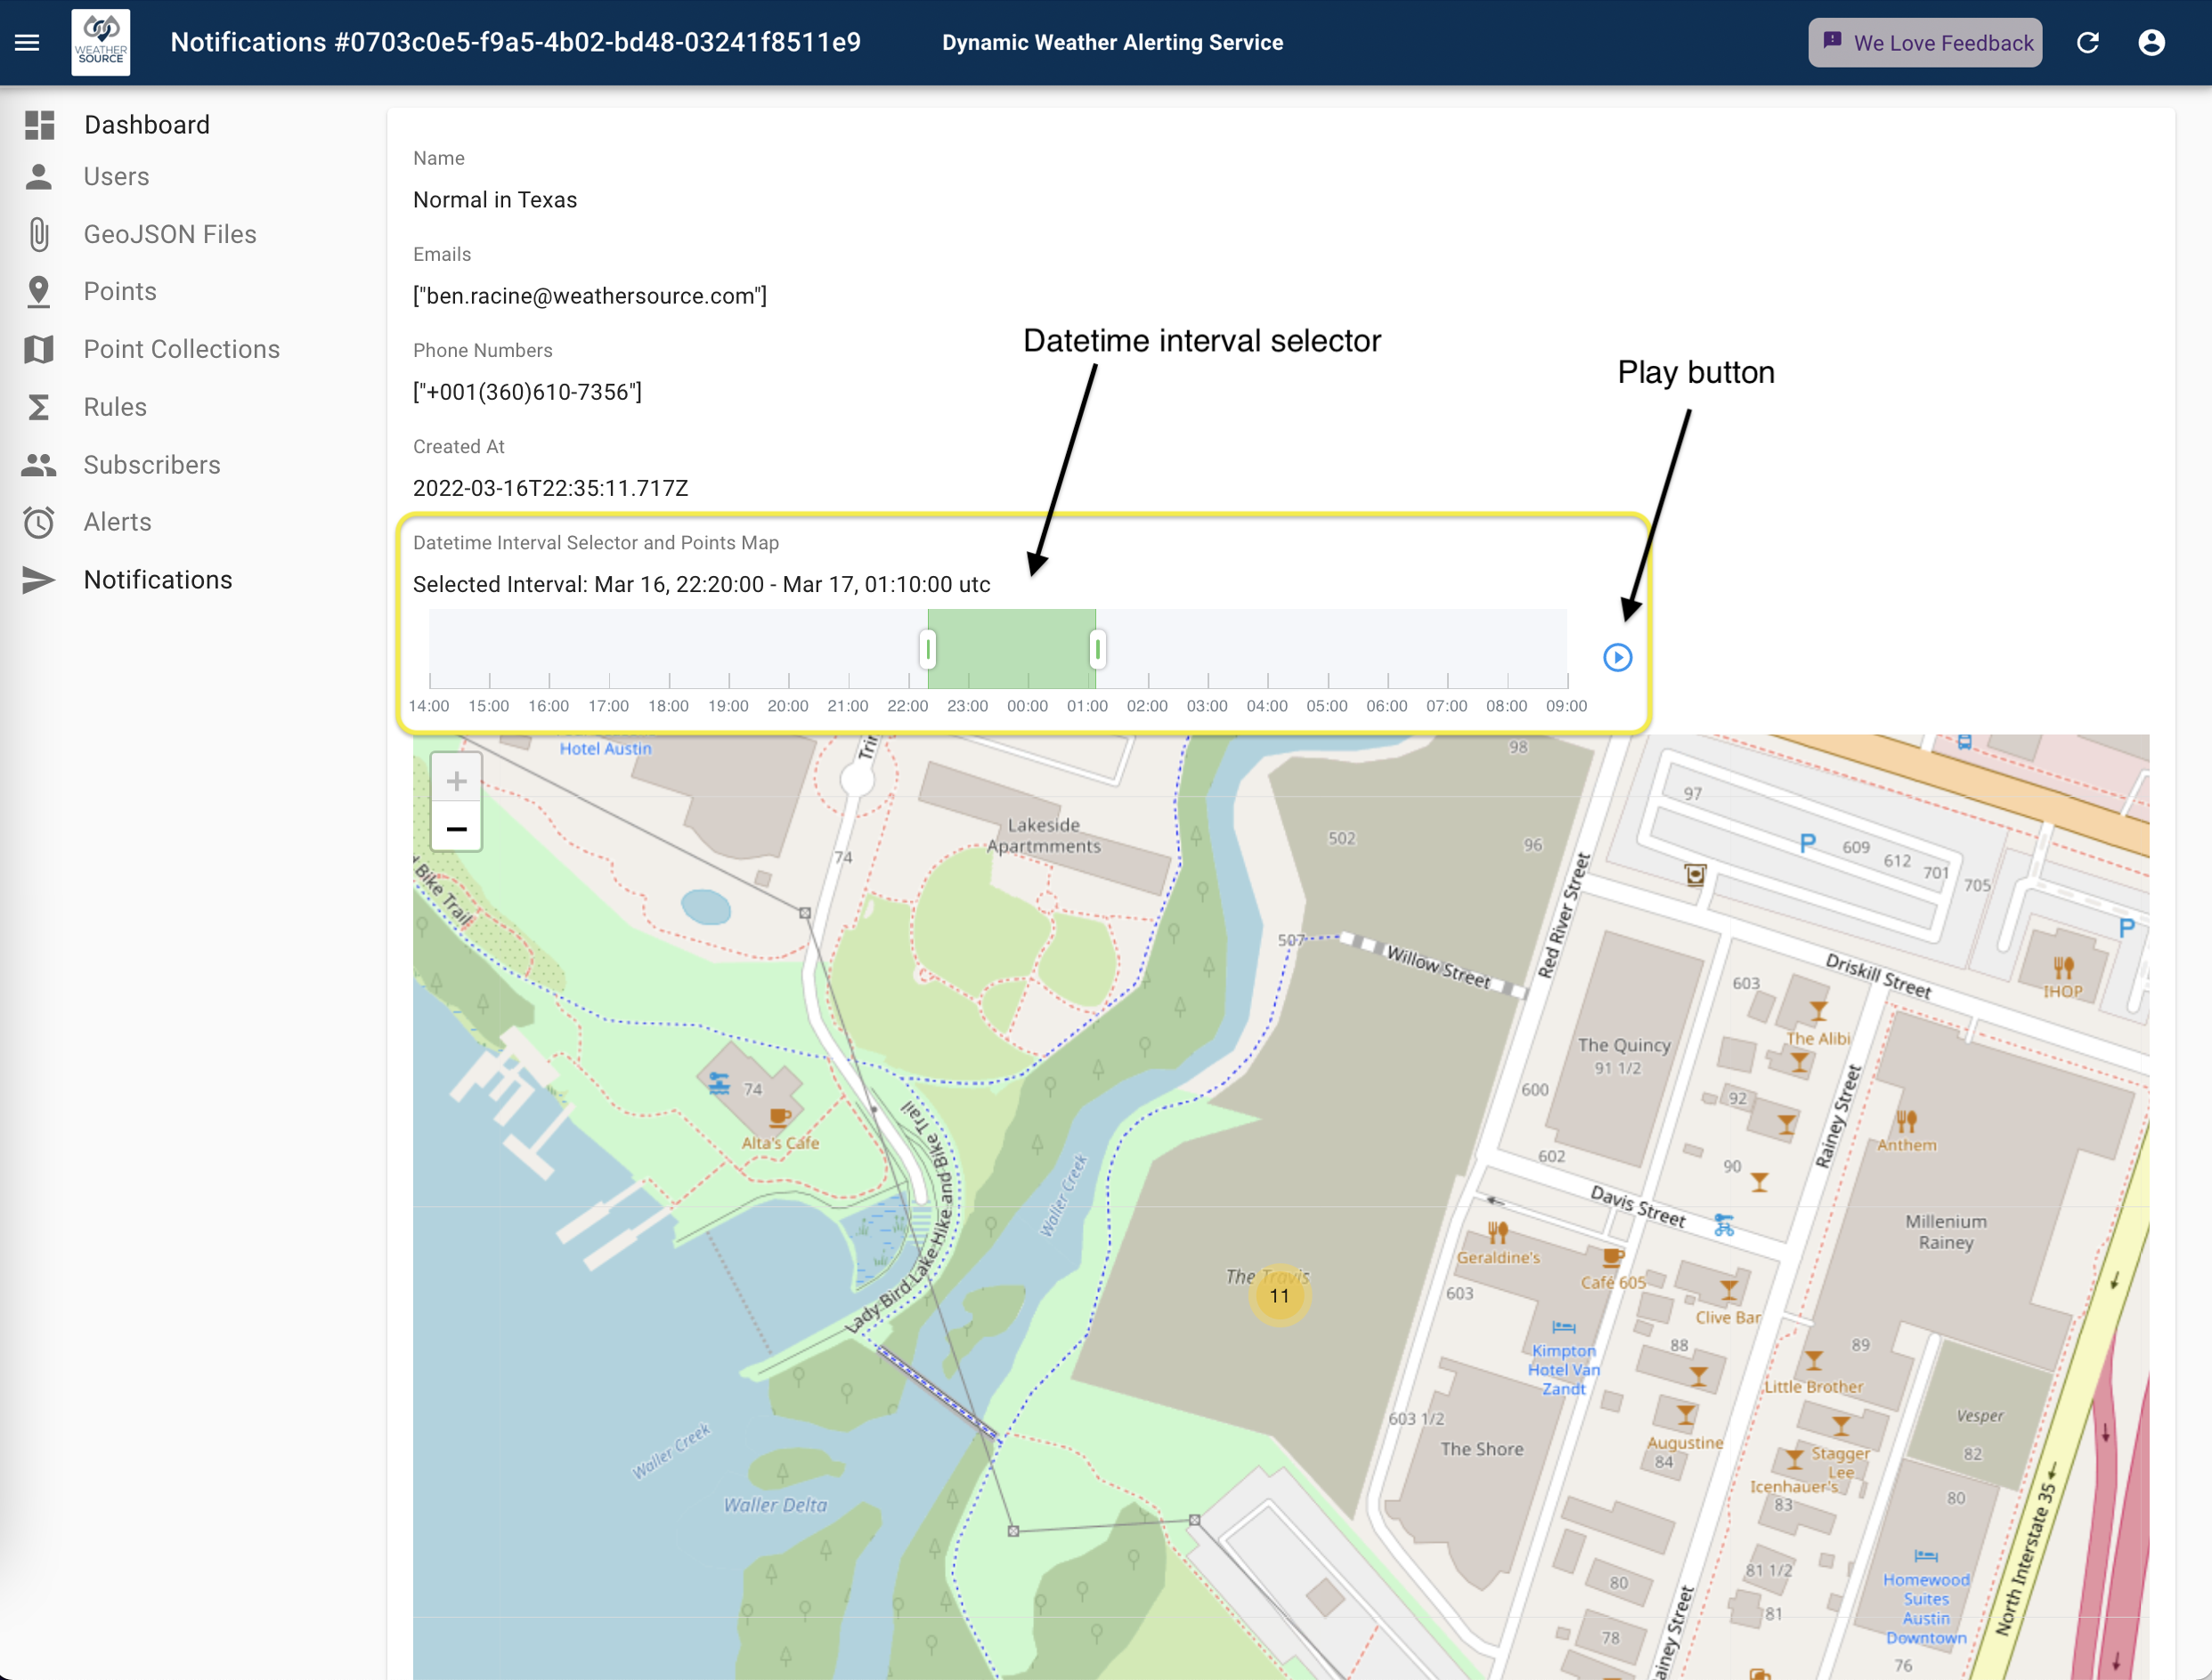
An individual notification is shown below. This user interface pulls the same JSON file content that is shared in the email link. A single notification can include multiple alert triggers within it. For this reason, a datetime slider is provided in order to facilitate navigation through that time window. One can control the start time and/or end time. Further, it is possible to march through the time series using the play button on the right.
Alert Limit Reporting
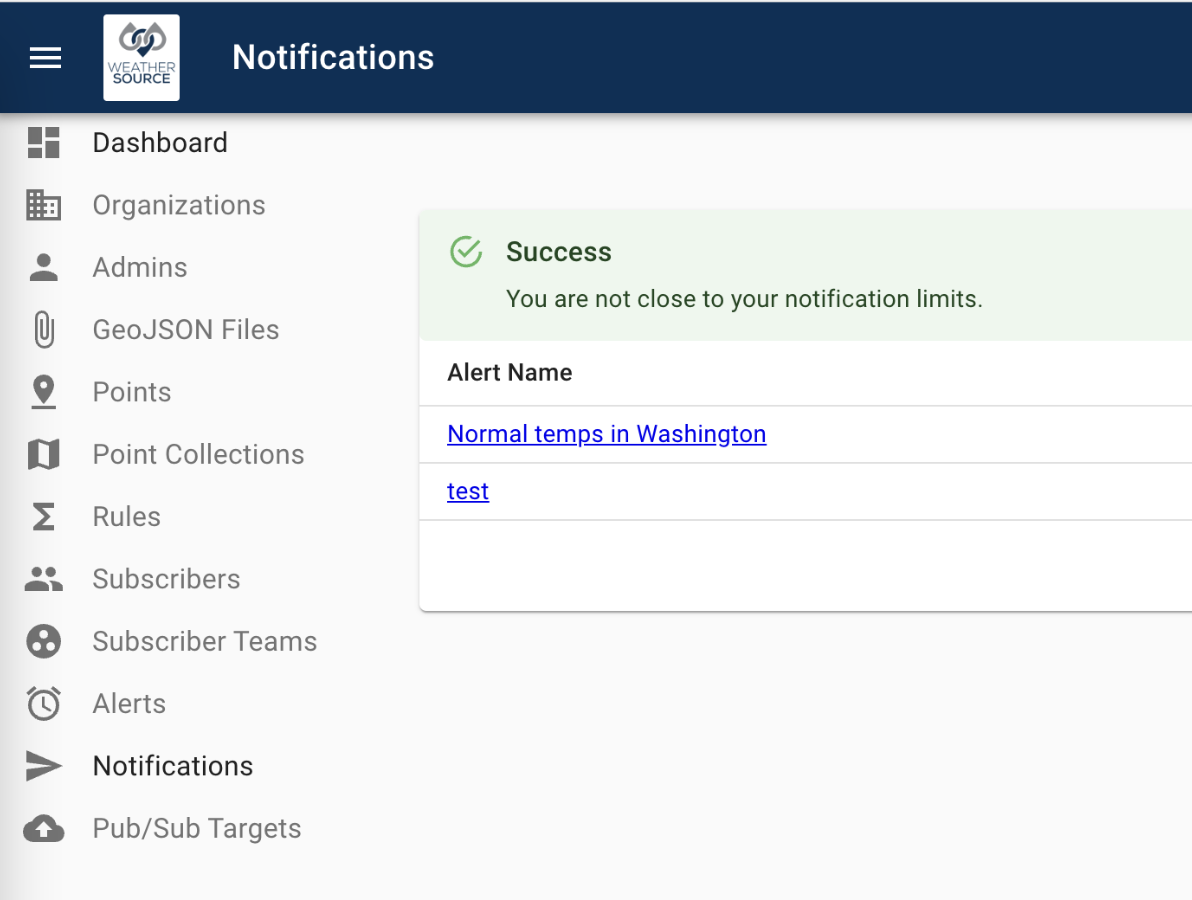
Each calendar month we assess if you have consumed your SMS allotment. If you are within your allotment, we will inform you of such as shown below.
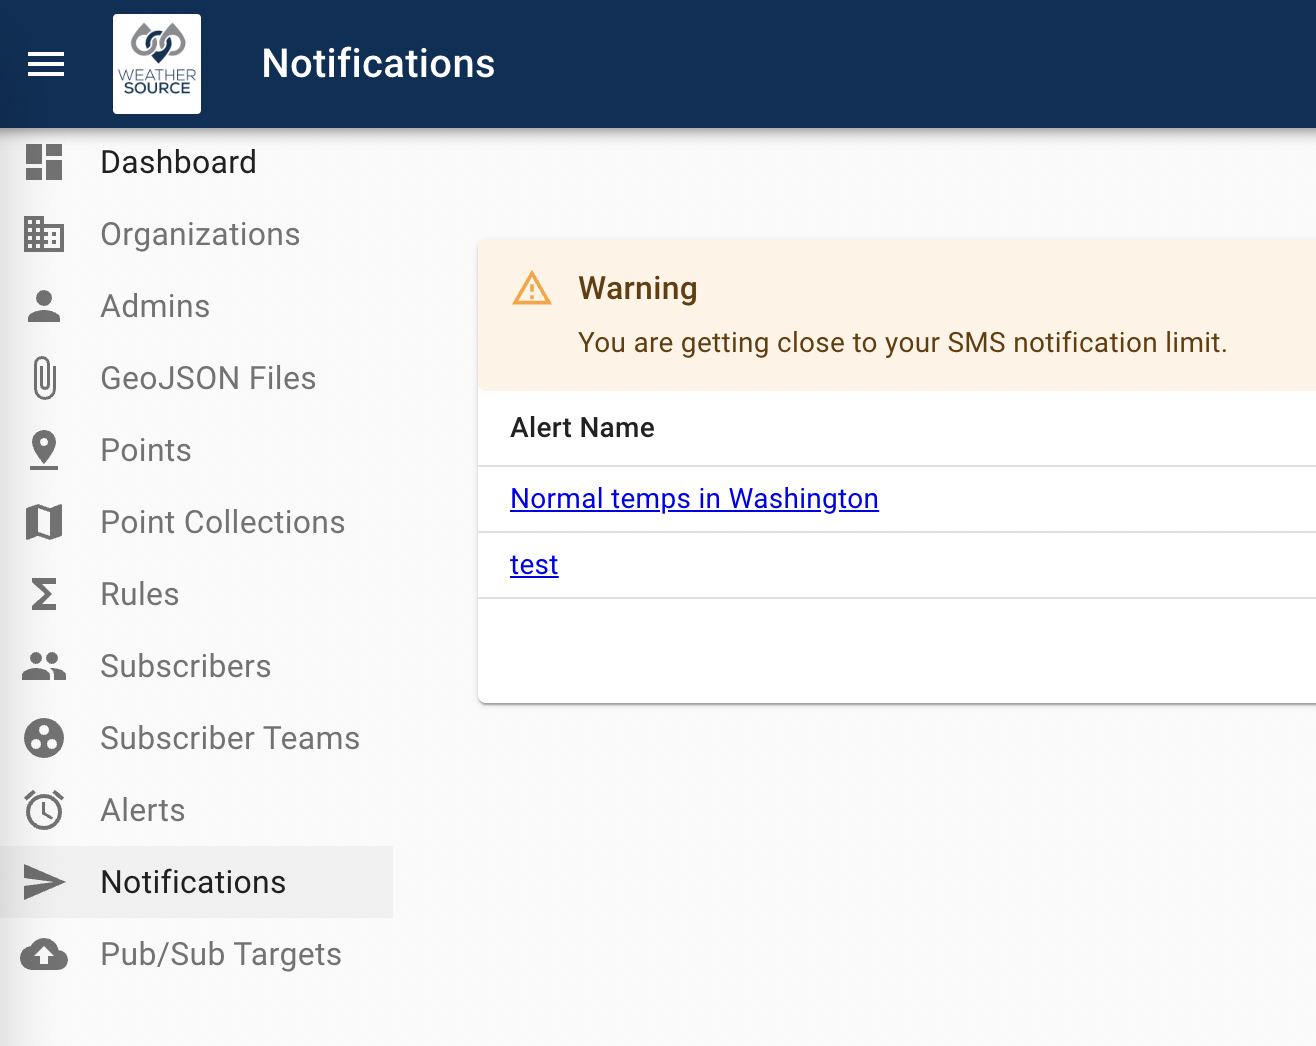
When you approach your limit, we will also warn you.
And of course, when you exceed your limit, we will let you know.
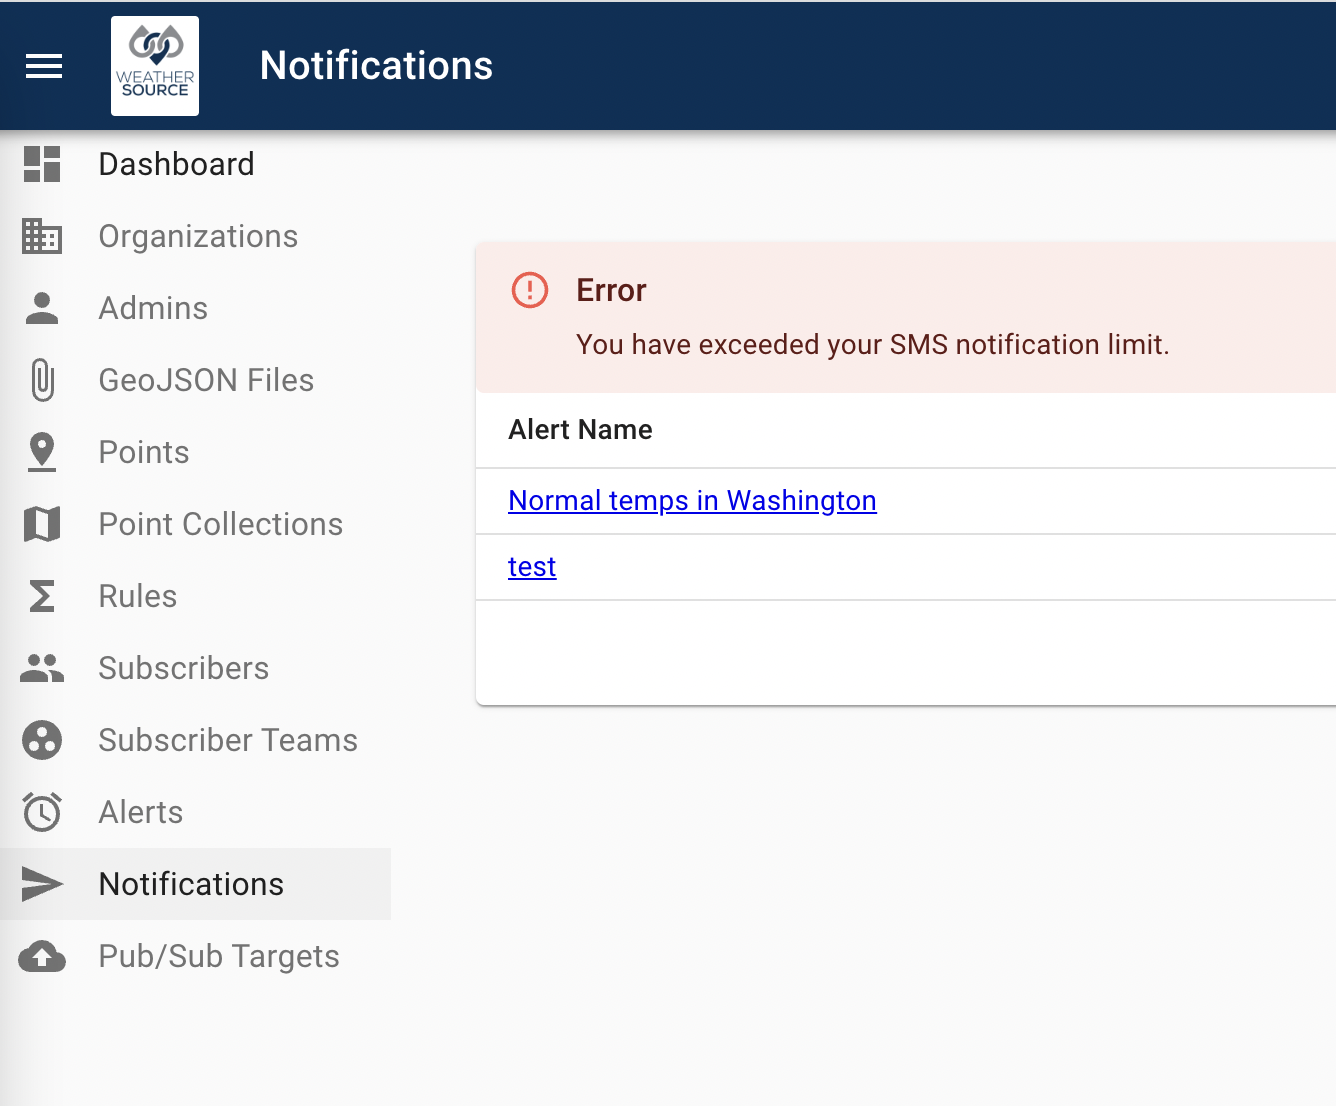
One should note that this limit only pertains to SMS messaging and that emails and in-app notifications will continue to function appropriately.
Chapter 3: Connecting to Snowflake
DWAS is capable of consuming geographic information from client-curated Snowflake tables. This can be achieved by setting up DWAS as a "Connected Application" as described in this Medium article.
The steps necessary to connect DWAS to Snowflake are as follow:
- Create a fresh DWAS account as discussed in the DWAS User Manual. Note that, at this time, it is only possible to have all geographic information come from Snowflake (behind the scenes, it still propagates into the DWAS system) or all be exlusively native to DWAS. Mixed use is not yet available. Either way you have the same ability to create, read, update, and edit that information from within the DWAS UI.
- Contact Weather Source to request that we enable Snowflake access for this account. Note that we will need both the DWAS account name and the Snowflake account name in order to act on this step.
- Create a public and private key pair as described in the Snowflake documentation.
- Weather Source will provide your team with a script similar to the one in the Medium article above that you run within your Snowflake account. The user attempting to execute this script must have appropriate privileges to do so. These commands will need to be issued by a Snowflake
ACCOUNTADMIN, or at least someone who has access to bothUSERADMIN(orSECURITYADMIN) andSYSADMINroles. This script will create the appropriate roles, users, and tables. Note that you will need to choose your own password and set the appropriatersa_public_keyas generated in step 3 before executing this script. The last line of the script requires you to copy and paste the public key you created in step 3 for the newly created Snowflake user as discussed here. - Provide the necessary information to Weather Source such that the DWAS system can authenticate and access the tables created in step 4 above. These parameters include: account name, private pem key (as discussed above), and the passphrase necessary to decode the private pem key. Private keys and passphrases are always encrypted and never visible to users.
** Note that the DWAS Public API also does not yet support Snowflake as a target.
Contact DWAS Support
DWAS Support can be contacted by emailing dwas-support@weathersource.com. Please provide as much background text and/or screenshots as possible to help clarify your concern.